


Cold Frame Gardening Could Be Your Secret to Growing Veggies Year-Round
Imagine stepping outside on a crisp winter morning and picking fresh greens or root vegetables right from your garden. With cold frame gardening, this dream can become a reality. This simple yet effective gardening technique extends your growing season, allowing you to cultivate fresh produce even in the chilliest months. Here’s how you can unlock the potential of cold frame gardening and enjoy homegrown veggies all year long.

A cold frame is a low-tech, unheated outdoor structure designed to protect plants from frost, snow, and cold temperatures. Typically, it consists of a wooden or metal frame topped with a clear covering made of glass or plastic. This covering traps heat from the sun, creating a microclimate that’s several degrees warmer than the surrounding environment.
Cold frames are versatile and can be used to:
Extend the growing season in spring and fall.
Protect tender seedlings or overwinter hardy plants.
Start seeds earlier than you could directly in the ground.
Here are some compelling reasons to incorporate a cold frame into your gardening routine:
Year-Round Harvests: Cold frames make it possible to grow hardy crops like kale, spinach, carrots, and lettuce throughout the winter.
Eco-Friendly: By growing your own food year-round, you reduce the need for store-bought produce, which often comes with a hefty carbon footprint.
Cost-Effective: Cold frames are inexpensive to build and maintain. Many gardeners use repurposed materials like old windows to construct their frames.
Low Maintenance: Unlike greenhouses, cold frames don’t require electricity or complex systems to function. Their simplicity is part of their charm.

Building a cold frame doesn’t require advanced carpentry skills. Here’s a basic guide to get started:
Choose the Right Location: Pick a sunny spot with good drainage. Southern-facing areas are ideal for maximizing sunlight exposure.
Select Materials: Use wood, bricks, or cinder blocks for the frame. For the lid, repurpose old windows or clear plastic panels.
Angle the Lid: Position the lid at a slight angle to catch maximum sunlight and allow rain or snow to slide off.
Insulate for Winter: Add straw or leaves around the outside of the frame for extra insulation during freezing temperatures.
Certain crops thrive in the protected environment of a cold frame. Consider planting:
Leafy Greens: Spinach, arugula, chard, and kale.
Root Vegetables: Carrots, radishes, and turnips.
Herbs: Parsley, cilantro, and chives.
Cold-Hardy Veggies: Cabbage, broccoli, and Brussels sprouts.

To keep your cold frame garden productive, follow these tips:
Ventilation: On sunny days, prop the lid open slightly to prevent overheating.
Watering: Monitor soil moisture, but don’t overwater—the enclosed space retains humidity.
Pest Management: Regularly check for pests and remove any debris that could attract them.

Cold frame gardening is a game-changer for anyone passionate about growing their own food. It’s a sustainable, cost-effective, and rewarding way to enjoy fresh vegetables regardless of the season. Whether you’re a seasoned gardener or just starting out, cold frames offer a manageable project with delicious results.
So, why wait? Embrace cold frame gardening and enjoy the satisfaction of harvesting your own veggies year-round.
Tips for Taking Care of Your Houseplants in Winter
Winter can be a challenging time for houseplants, as the colder weather and shorter days bring changes to their environment. To keep your indoor greenery healthy and thriving, follow these practical tips tailored for the season.
Overwatering is a common mistake in winter. Since most houseplants enter a period of slower growth, they require less water. Always check the soil before watering; if the top 1–2 inches (2.5–5 cm) feel dry, it’s time to water. Let excess water drain completely to prevent root rot.

Winter’s dry air, especially from indoor heating, can stress plants that thrive in humid conditions. Increase humidity by:
With shorter days and weaker sunlight, ensure your plants get enough light:

Fluctuations in temperature can harm houseplants. Keep them away from cold drafts near doors or windows, and don’t place them too close to heat sources like radiators or fireplaces. Aim for a steady indoor temperature of 65–75°F (18–24°C).
Dust can accumulate on leaves, blocking sunlight and hindering photosynthesis. Gently wipe leaves with a damp cloth every few weeks to keep them clean and able to absorb light effectively.

During winter, most plants are in a semi-dormant state and don’t require as many nutrients. Pause fertilizing until spring when active growth resumes.
Remove any yellowing leaves or spent blooms to keep plants tidy and healthy. Check for signs of pests, which can sometimes thrive indoors during winter.
By following these winter care tips, you’ll create an environment where your houseplants can stay healthy and strong until spring returns. With just a little extra attention, your indoor garden can continue to bring life and beauty to your home year-round.
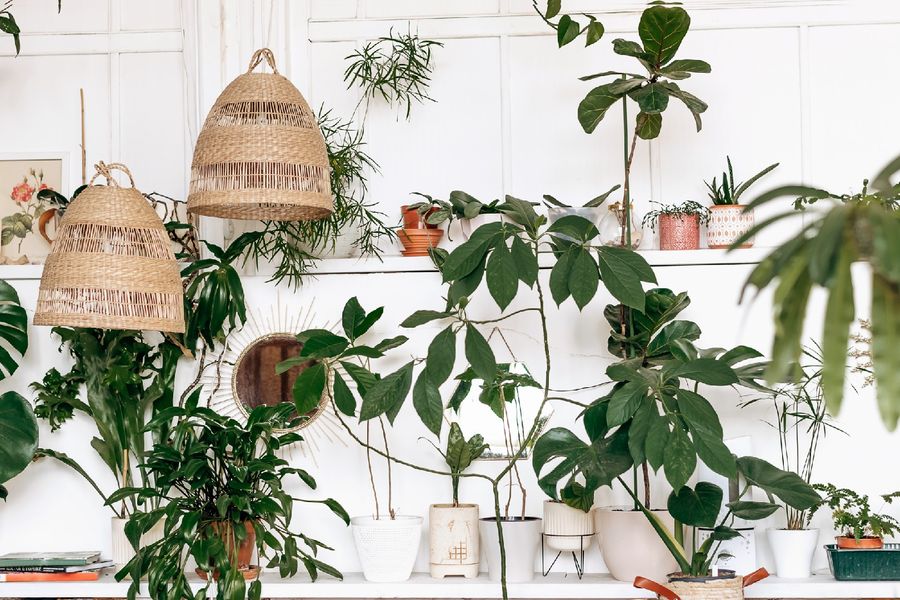
Benefits of Indoor Plants
Indoor plants are more than just decorative pieces; they offer a range of benefits that can transform your home into a healthier and more enjoyable space. Here are the top reasons why you should bring greenery indoors:
Indoor plants help purify the air by removing toxins such as formaldehyde, benzene, and carbon monoxide. Plants like peace lilies, spider plants, and snake plants act as natural air filters, contributing to fresher and cleaner indoor air.
Studies show that having plants in your living space can reduce stress, anxiety, and feelings of depression. The simple act of caring for plants fosters mindfulness and a sense of accomplishment, which positively impacts mental well-being.
Whether in a home office or study area, indoor plants have been shown to boost concentration and productivity. Adding plants like pothos or succulents to your workspace can enhance focus and creativity.

Plants release moisture through a process called transpiration, helping maintain optimal humidity levels indoors. This can be especially helpful during winter months when indoor heating can cause dryness
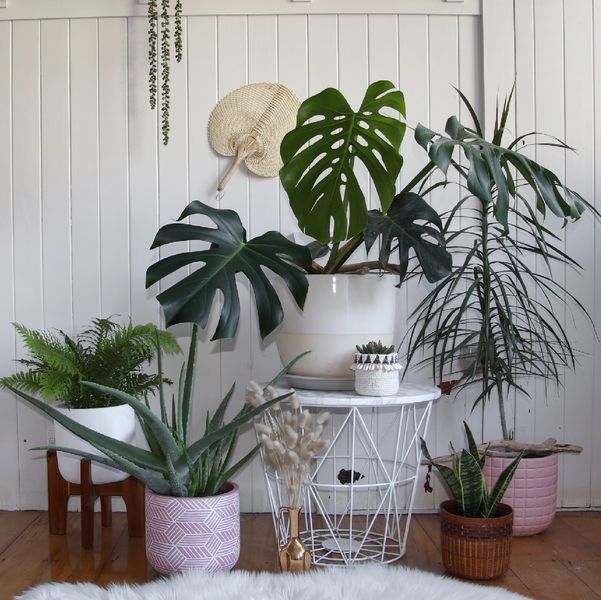
Certain plants can absorb sound, making your home quieter and more serene. Larger foliage plants, such as rubber trees or monstera, can help dampen noise, especially in urban settings.
From trailing vines to vibrant flowering plants, indoor greenery enhances your home’s aesthetic. They add life and texture to any room, complementing various interior design styles.

Plants can lower dust levels, reduce allergens, and improve overall air circulation. This leads to a healthier home environment, especially beneficial for people with respiratory issues.
Bringing plants indoors helps foster a connection to nature, which can be particularly calming for those living in urban or high-stress environments. It creates a sanctuary where you can unwind and recharge.

By incorporating indoor plants into your space, you’re not just adding beauty but also reaping numerous health and lifestyle benefits. Whether you’re a seasoned plant enthusiast or just starting, indoor plants are a valuable addition to any home.


The Snake Plant, also known as the “Mother-in-Law’s Tongue,” is a favorite for its striking appearance and low-maintenance nature. This plant thrives in a wide range of light conditions, from low to bright indirect sunlight. It also has low water requirements, needing water only when the soil is completely dry. Bonus: Snake plants are natural air purifiers, removing toxins from the air and producing oxygen even at night!
Care Tips:
– Light: Low to bright indirect light
– Water: Every 2-4 weeks, depending on the season
– Soil: Well-draining potting mix
Spider plants are popular for their fast-growing, arching leaves and baby “spiderettes” that dangle from the main plant. These are great for hanging baskets or tabletops and can tolerate low light and inconsistent watering. They also purify the air, making them a healthy choice for any indoor space.
Care Tips:
– Light: Low to moderate indirect light
– Water: Once a week or when the top inch of soil feels dry
– Soil: Well-draining potting soil


Halloween Garden Ideas: Transform Your Outdoor Space into a Spooky Haven
Get ready to embrace the spooky spirit of Halloween by transforming your garden into a haunted, magical space! Whether you’re hosting a Halloween party or just want to create a festive atmosphere, these garden ideas will help you bring the holiday to life.
1. Glowing Jack-O’-Lantern Pathways
Light the way for trick-or-treaters or party guests with a path lined with glowing jack-o’-lanterns. Choose traditional carved pumpkins or opt for creative designs to add a personalized touch to your garden.
2. Creepy Crawly Plants and Decorations
Incorporate plants that evoke a sense of mystery, like dark-colored flowers, or use fake spiders, bats, and skeletons to add a spooky vibe. Black petunias or blood-red dahlias can give your garden a gothic feel.
3. DIY Haunted Plant Pots
Turn ordinary plant pots into eerie Halloween decorations by painting them with ghostly faces, witches’ hats, or pumpkin designs. Add fairy lights inside the pots for a haunting glow at night.
4. Spooky Garden Lanterns and Lighting
Enhance the eerie ambiance with strategically placed lanterns, string lights, or LED candles. Use flickering lights or soft purple and orange hues to give your garden a spooky glow without overpowering your plants.
5. Witch’s Herb Garden
Create a “witch’s herb garden” with spooky plant markers. Label common herbs like sage, rosemary, and thyme with witch-themed names like “Potion Plant” or “Bewitching Basil” to give your garden a magical Halloween twist.
6. Skeletons and Tombstones among the Greenery
Scatter skeleton figures or faux tombstones among your garden beds. The contrast between lush greenery and eerie decorations will add a mysterious, playful vibe to your space.
7. Spider Webs in the Trees and Shrubs
Drape fake spider webs over trees, bushes, and shrubs to give your garden an abandoned, haunted look. You can add plastic spiders to complete the creepy-crawly effect.
8. Harvest-Inspired Halloween Décor
For a more natural Halloween look, mix pumpkins, hay bales, and corn stalks with seasonal plants. This blend of autumn and Halloween decor will create a welcoming yet festive garden setting.
From glowing pumpkins to ghostly plant pots, your Halloween garden can become the ultimate spooky retreat. These ideas will help you set the perfect eerie mood for the season, whether you’re looking to impress visitors or simply enjoy a festive fall atmosphere.


