Why Did My Succulent Change Colors? Signs to Notice
Succulents change color because they’re under stress. However, this is not a bad thing and not something you should be worried about. In fact, we explain exactly why your succulent has changed color and what you can do to promote this.
Succulents are such striking plants that they’ve become a favorite with many people. They’re relatively easy to grow making them ideal for beginners and seasoned gardeners alike.
But, if you’re new to succulent growing, you might be concerned that your succulent has changed colors. More often than not, this is not something to worry about as it’s the plant’s natural reaction to certain stresses or changes in environment.
There are primarily three reasons why succulents change color. These are related to the amount of available sunlight, the amount of water they receive and the temperature range that they’re growing in.
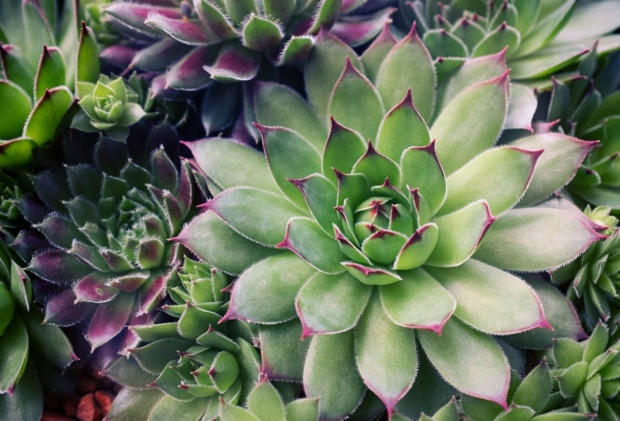
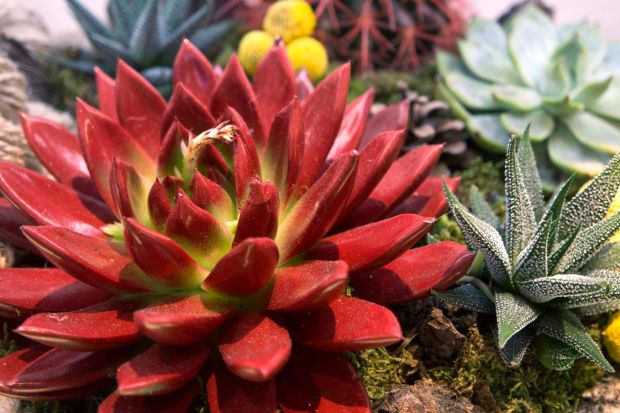
You see, when conditions change, the plant will react with a change in color. Many succulents that have signs of red or orange around the borders of their leaves are under stress. But, this is not a bad thing. It’s just the plant’s response and can even be initiated if you want that tinge of red on your succulent leaves.

The Amount of Light the Succulent Gets
Most succulents do prefer some bright sunlight in the morning. This will encourage that brightly colored foliage. However, if your succulents are mainly growing in the shade, they will revert to green.
You might have noticed this if you’ve ever ordered succulents online. When these plants arrive on your doorstep, and you open the box, they will be green in color. This is because they’ve been deprived of sunlight for a few days.
To encourage these plants to display their more vibrant colors, simply give them some sunlight. Morning sun is ideal as the hot afternoon sun may scorch the plants and turn them brown instead.
If your succulents are growing indoors you can either place them on a bright windowsill or even place them outside for a couple of hours each day.
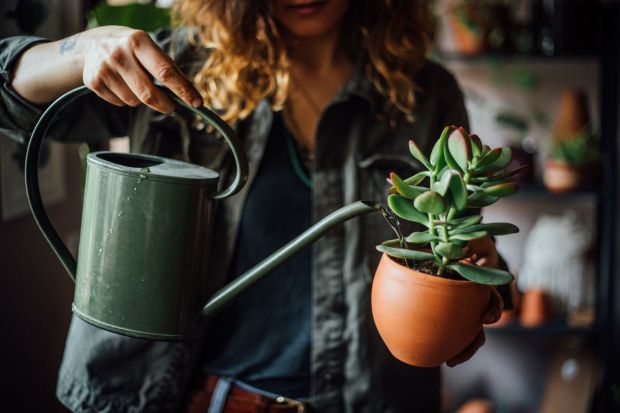
How Much Water the Succulent Gets
Succulents that get the ideal amount of water for their needs will generally turn green. This is because they are not under stress and are putting all their energy into growing.
Therefore, if you want to encourage some colorful growth, give your succulent a little less water. This might take a little bit of trial and error to get exactly the results you want.
For example, if you normally water your succulents once every week, try missing a week and see what happens. Don’t worry. This won’t do any long-term harm to your succulent but you might be rewarded with some vibrant color appearing on the tips of the foliage.
Whatever you do though, don’t ever overwater your succulents as this is the most common reason that succulents die. These plants don’t like having wet roots and sitting in water as this causes them to rot.
In the long run, it’s far better to underwater your succulents than to give them too much.
The Temperature Range the Succulent Is Exposed To
Once the temperature starts to drop, you will notice that your succulents start to change color. They’ll display more vibrant shades of red and pink. Especially when the temperature drops below 70 degrees Fahrenheit.
This is why succulents that are grown outdoors will be much more vibrant during winter and early spring. Then, once the temperature rises again, they lose some of their vibrancy.
To initiate a little color change in your indoor succulents, you can place them outside for a short period each day as long as the temperature is above 40 degrees Fahrenheit.

Final Thoughts
Succulents change color because they are under stress. However, this is not something to be concerned about because it’s perfectly normal. Stress-free succulents that grow out of direct sunlight will generally revert to green.
To encourage your succulents to display some of their brighter colors, you can induce a little environmental stress to your plants. This won’t harm them but you’ll be rewarded with vibrant colors.
There are three things you can do to induce more colorful foliage:
- Expose the plant to more sunlight especially in the morning.
- Let the soil dry out completely before giving your plant more water.
- Expose your plant to some cooler temperatures below 70 but above 40 degrees Fahrenheit.
Now that you understand why your succulents change colors, you can have a little fun with them to see what results you can produce. Remember though, that each succulent variety is different. So, try these different experiments in small doses to begin with.
Observe how your plant reacts and changes and then adjust your routine to get the best results.