
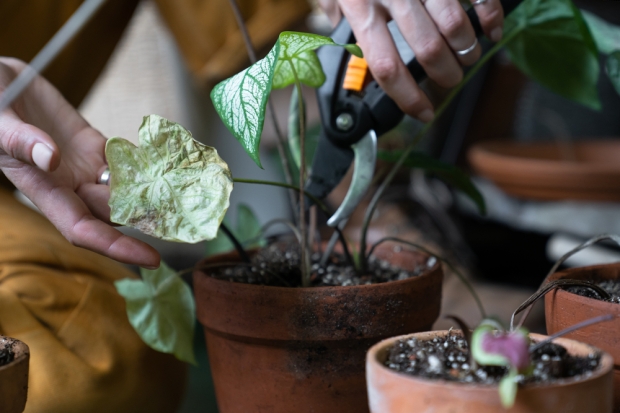

How to Prevent and Control Powdery Mildew
Adding color is a great way to improve the visual appeal of your garden. The issue is that many novices are unaware of how to use color effectively. This article will teach you the basics of color theory 40 words)——无概要
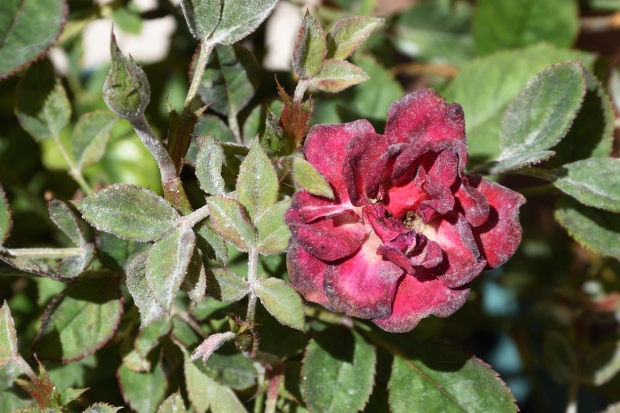
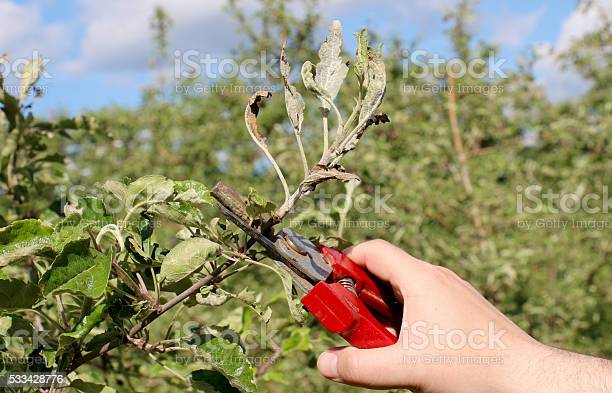
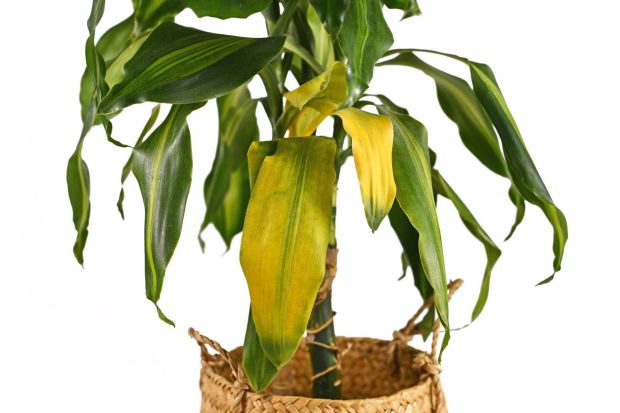
Powdery mildew is a common fungal disease that can affect almost all plants, including vegetables, roses, trees, herbs, and flowering ornamentals.
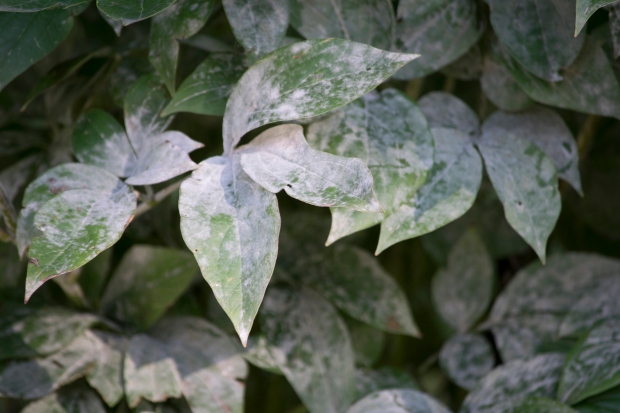
It is one of the easiest plant diseases to identify due to its distinctive appearance and symptoms. Powdery mildew shows up as a white powdery film on the leaves and stems of your plants. It looks very similar to a dusting of flour or baby powder and may darken to a gray color over time. Lower leaves are typically affected first, but the disease can spread throughout an entire plant.
Infection rates are highest in warm climates and are increased by bouts of high humidity. The fungal spores are transferred via moisture (irrigation, rainfall, etc.) and wind. Spores move quickly from one part of the plant to another, they may fall to the soil underneath the infected plant, and they may move to neighboring plants and infect them depending upon the fungal species causing the infection.
Powdery mildew is rarely fatal itself once it infects a plant. However, since it covers the leaf surface, it may impair photosynthesis if the fungal spores become too thick. In turn, plant growth is stunted, and a lack of photosynthesis can lead to plant death if the disease is left untreated.
When it comes to any fungal diseases, preventing them from occurring is much easier than treating them once an infection is noticed. Preventing powdery mildew centers around cultural practices that are easy to implement.
These prevention tips work for both inside houseplants and outdoor plants, regardless of the plant type.
If you notice powdery mildew symptoms on your plants, it’s essential to treat the disease quickly. This helps to minimize the effects on the affected plant and prevents spreading to neighboring plants.
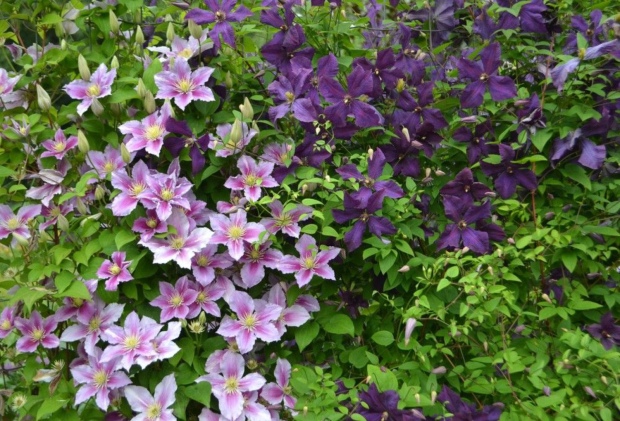
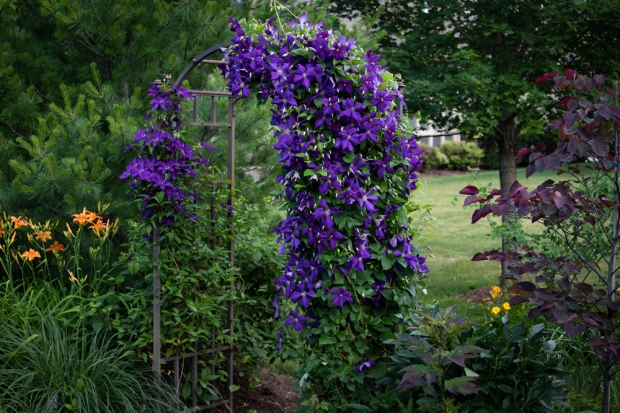
How to Prune Clematis
Did you know that if you find earthworms in your garden, that your soil is healthy? Earthworms help to aerate the soil and to add valuable nutrients in the form of worm castings. These castings provide your plants with some of the essential nutrients they need.
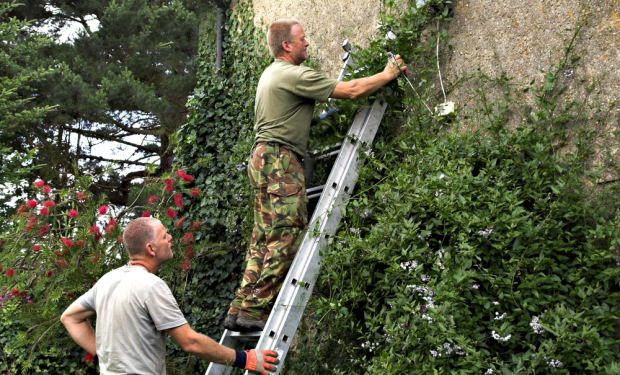
While clematis plants are known for their stunning flowers adorning a mass of vines, they need to be regularly pruned to keep the plants from becoming a mass of tangled stems. Regularly pruning a plant manages its size and shape and also helps encourage strong vine growth and prolific flowering all along with the plant.
It’s essential, though, to prune them correctly. If pruned improperly, you could end up with a plant that stops flowering completely.
Clematis plants are classified into three different groups, depending upon when they flower and if they bloom on new growth or old vines. These characteristics determine when and how to prune your plant.
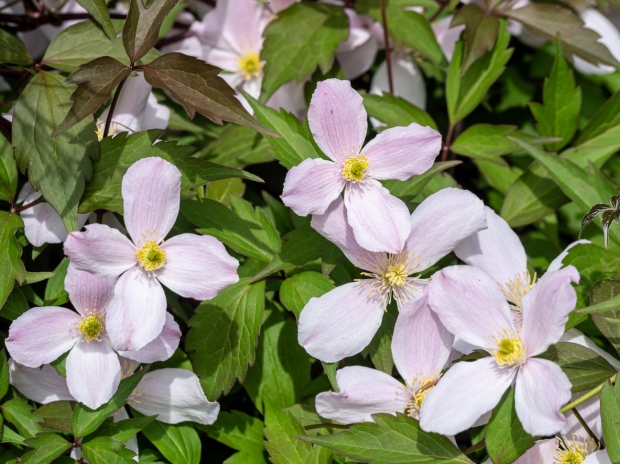
Sometimes called “Group A” or “Type A,” the clematis varieties in this group tend to be larger plants that bloom very early in the season. Their early flowering means the blooms were formed the previous year. Group 1 includes the alpina, armandii, cirrhosa, macropetala, and montana.
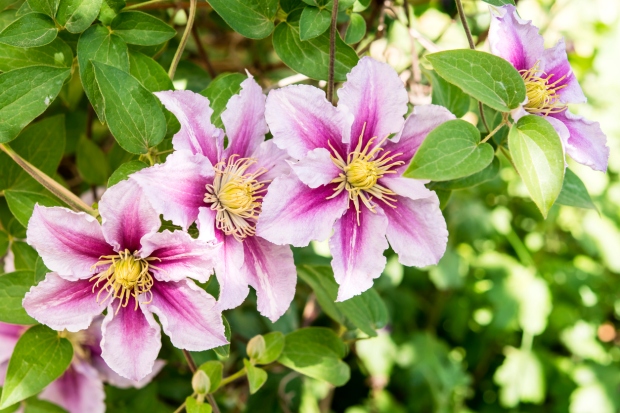
Also known as “Group B” or “Type B” clematis, Group 2 bloom later than Group 1 and earlier than Group 3. The first flush of flowers opens in late May or early June, with a second bloom erupting in late summer. Buds develop on a combination of old and new growth. Varieties include Nelly Moser, Lasurstern, Vyvyan Pennell, Mrs. Cholmondeley, and Duchess of Edinburgh.
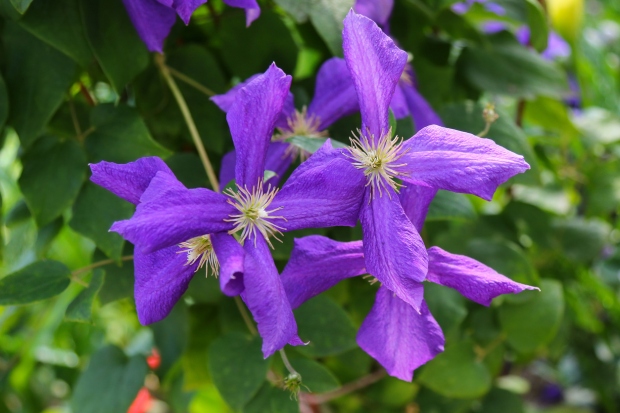
Group 3 clematis are the latest blooming varieties, flowering in late summer or early fall. They bloom on the current season’s growth and include Gipsy Queen and the smaller groups like viticellas, orientalis, tangutica, and texensis.
Since Group 1 clematis flower on old vines, the general rule of thumb when pruning them is to avoid pruning. Severely pruning these plants removes all of the developed buds, resulting in a plant that won’t flower.
Instead, you can trim or shape them lightly just after they finish flowering for the season. Trim back no more than one-third of the plant as they do not like severe pruning. Pruning them early in the season encourages new growth that develops buds for the following year.
Group 2 clematis are a cross of the other two groups. Some flower buds develop on wood from the previous year and some form on the current season’s new vine growth. A light pruning is best with this type unless the plant has grown too large for its allotted space.
Plan to prune Group 2 clematis in early spring just as active growth starts for the season. This is typically February or early March. Wait until the flower buds turn green and begin swelling, so they are easy to see.
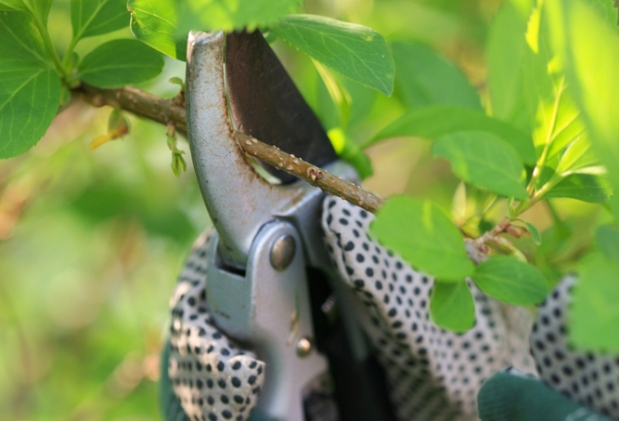
Start at the top of each vine and work your way down. When you reach the first pair of strong, healthy buds, make a pruning cut just above them. Repeat this process for each vine on the plant.
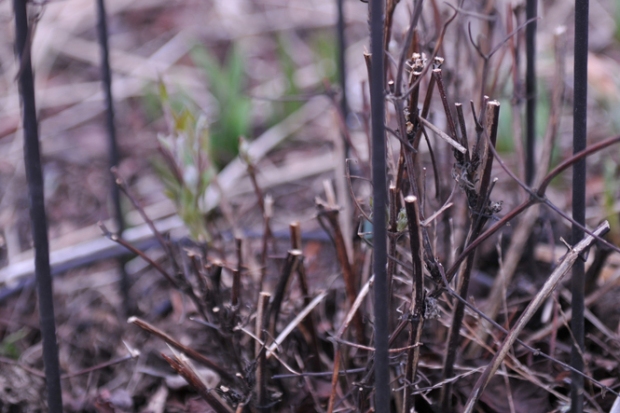
Pruning Group 3 clematis varieties is the opposite of pruning the other two groups. This group thrives when pruned hard since the flower buds develop on the season’s new growth. If these plants are not pruned to remove the majority of the plant, the base develops a leggy appearance that is leafless and unattractive.
Group 3 clematis should be pruned in February if you live in Southern growing zones and early March if you live in the North. Some gardeners prune their plants – with great success – in late fall as they go dormant for the year.
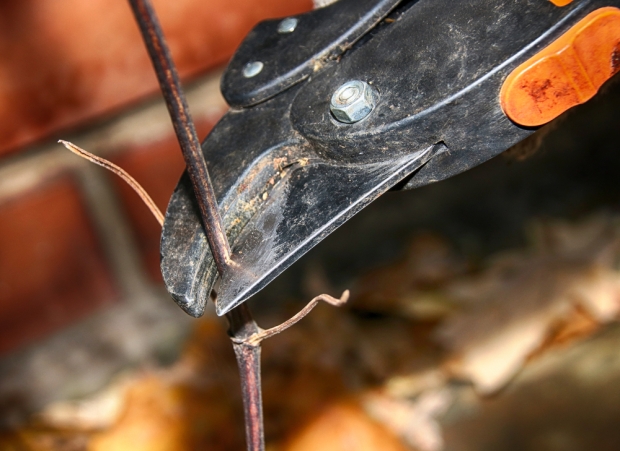
If pruning in the spring, start at the bottom of each vine and work your way up from the ground. When you come to the first pair of strong, healthy buds, make a pruning cut just above them. Then repeat the process for every vine on the clematis plant.
You can lop the entire plant off about 12-15” from the ground for fall pruning.

How to Control Lawn Weeds
摘要没改Adding color is a great way to improve the visual appeal of your garden. The issue is that many novices are unaware of how to use color effectively. This article will teach you the basics of color theory 40 words
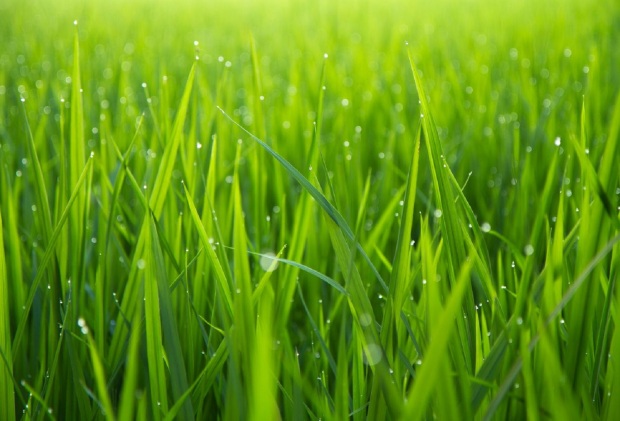
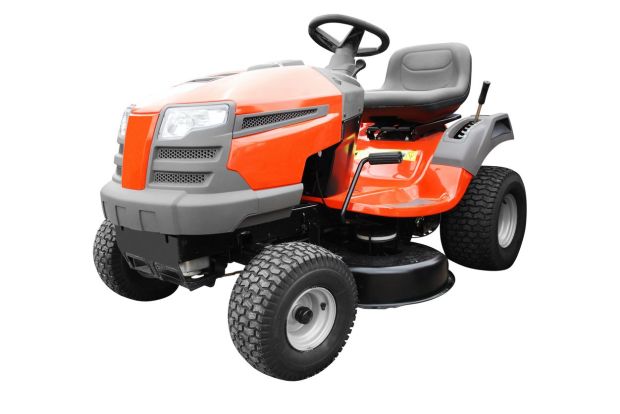
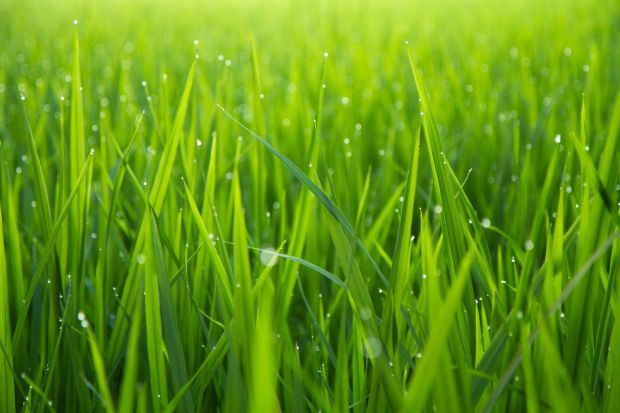
Weeds are an unsightly bane on the people everywhere taking care of their lawns. If you want to get rid of weeds in your lawn and prevent them from growing back year after year, stick around for more information on how to obtain and maintain a healthy weed-free lawn. Appropriate mowing, irrigation and fertilization habits can prevent most weed difficulties. Mowing every 3 to 5 days during growth periods helps keep your lawn at an appropriate height of during the summer months. Be sure to leave the grass clippings on the grass after mowing. This helps to provide approximately 20% of the fertilization needs of most grass types.

Annual grassy weeds such as crab grass reseed themselves at the end of the growing season and then die. The following spring, the seeds germinate to grow new plants. The conditions that cause the growth of annual grassy weeds are overwatering, a mower blade set too low, or compacted soil.
Broadleaf weeds include weeds with leaves, such as clover and dandelions that grow in lawns with low nitrogen fertility, compacted soil, or the mower blade is set to low.
Perennial grassy weeds go dormant in the winter along with your lawn grass and come back in the spring. They tend to spread through the roots and seeds. They establish themselves in lawns that have a mower blade set to low, have compacted soil, or are overwatered.
When lawns have disturbed soil, it brings the weed seeds to the surface and then establish themselves in your lawn. The seeds can also blow in from neighboring areas, once again establishing themselves in your lawn.
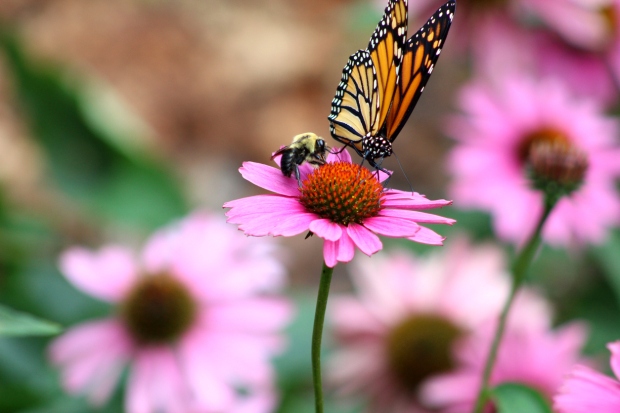
15 Beautiful Garden Plants to Attract Butterflies
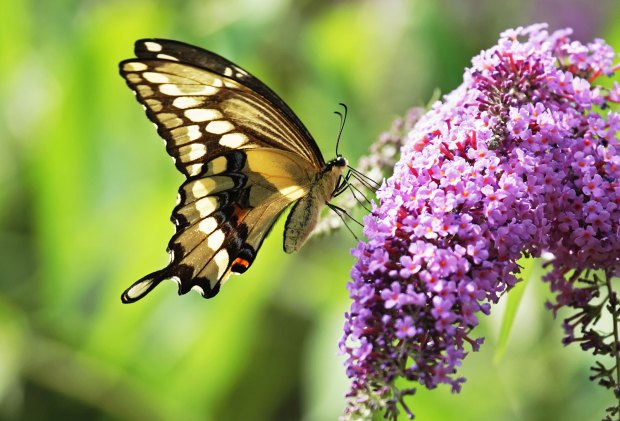
Butterflies are delightful garden visitors, and some plants are particularly good at attracting them. Adding these to your outdoor space will not only benefit you, it will also be a boost to these beautiful animals themselves, by providing them with pollen and nectar. Plus, butterflies are often attracted to vibrant hues, so planting flowers that they like will almost always add new, brilliant colors to your garden!
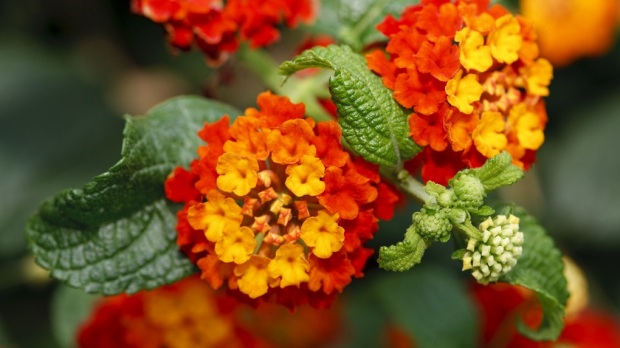
The Common lantana is a flowering plant that grows best in tropical environments. It spread outside the Americas when the Dutch brought it to Europe. The plant is generally regarded as an unwanted weed that reduces biodiversity. Additionally, it is toxic to livestock and harms the output of farmland.
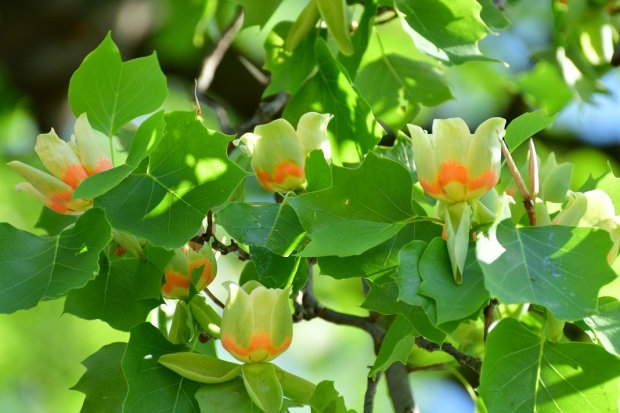
The Tulip tree is not a poplar at all but is a member of the magnolia family. It gets its name from the tulip-shaped flowers that are green and yellow. It is the tallest Eastern hardwood and was prized by Native Americans as a favorite tree to use to make dugout canoes.

Buddleja davidii, commonly known as Butterfly bush , is a fast-growing shrub native to East Asia. This vigorous plant is usually cultivated as an ornamental, due to its extravagant purple inflorescences. It carries the name Butterfly bush because its flowers are a valuable source of nutritious nectar for numerous butterfly species.
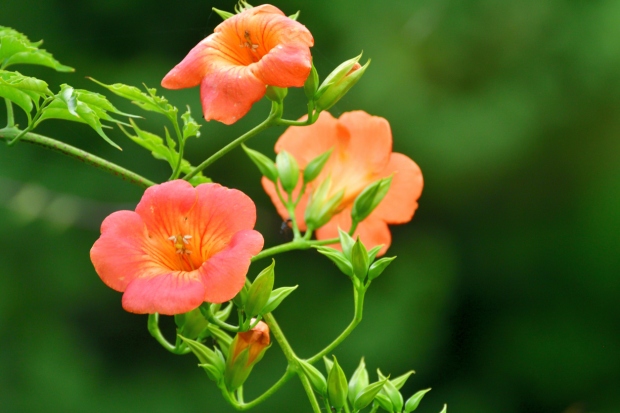
The Trumpet vine is a flowering plant that climbs as it grows. It gets its nickname from its bright flowers, which are shaped like long trumpet bells. The shape matches them well with the hummingbirds that love to visit for the nectar. The Trumpet vine is originally native to eastern North America.

Catalpa bignonioides, commonly known as Southern catalpa, is a medium-sized deciduous tree native to North America. This species is widely used for ornamental purposes due to its favorable growing qualities and magnificent clusters of showy flowers.
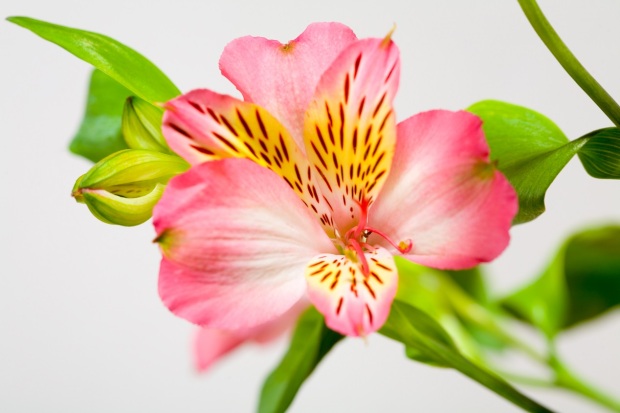
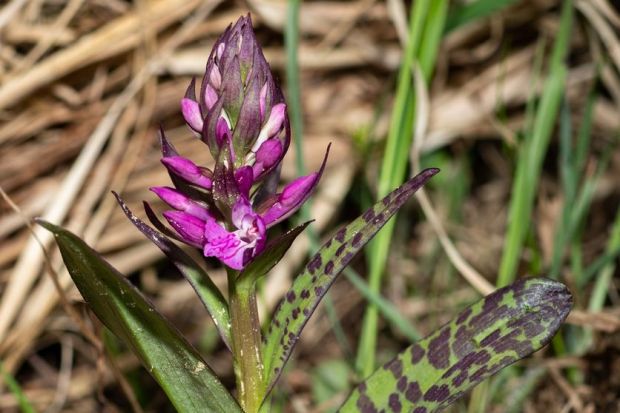
Peruvian lily (Alstroemeria aurea) is a tuberous perennial with stunning orchid-like flowers, most commonly cultivated as an ornamental. Flowers are usually yellow to orange, spotted or striped. They are often visited by bees, butterflies and other pollinators. A number of varieties have been selected over the years to create greater diversity of flower colors.
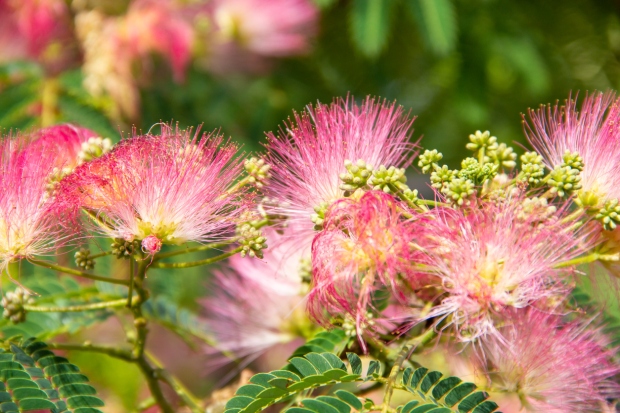
Albizia julibrissin, colloquially known as Persian silk tree, is a deciduous plant with characteristic pink, fuzzy inflorescences. Persian silk tree is mainly cultivated for decorative purposes. Its flowers have a mild, sweet smell and are often visited by butterflies, bees and hummingbirds.
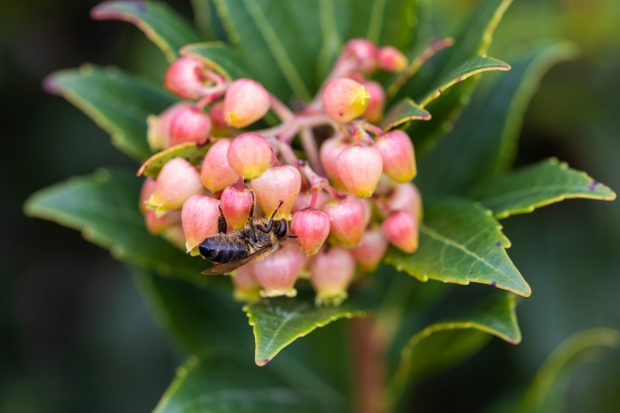
Arbutus unedo is an evergreen shrub or a small tree native to Europe. It is colloquially called Strawberry tree because its bright red fruits somewhat resemble strawberries. The fruits of this lovely plant are very nutritious and full of sugar, which is why they are mostly used for making jams, pastries, fruit yogurts, and alcoholic beverages.
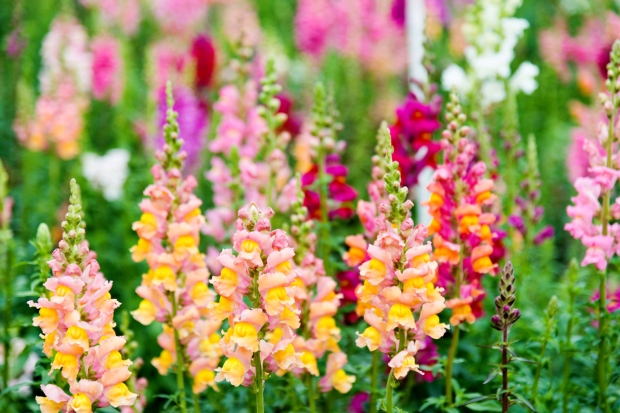
The Common snapdragon (Antirrhinum majus) is a flowering perennial that is commonly cultivated as an annual or biennial ornamental plant. When the throats of its flowers are squeezed together, its lips snap open like a dragon’s mouth; this is the origin of the common name. The Common snapdragon’s speedy cultivation and ease of pollination made it a good target for research, so it has now become a model organism for plant genetics studies.
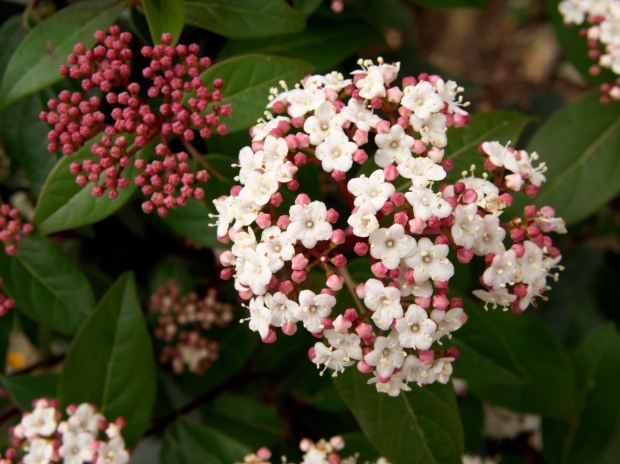
Laurustinus (Viburnum tinus) is a flowering shrub native to the Mediterranean region. It is cultivated as an ornamental plant and it often adorns winter gardens. When little else is growing during cold days of winter, Laurustinus produces numerous clusters of tiny white flowers.
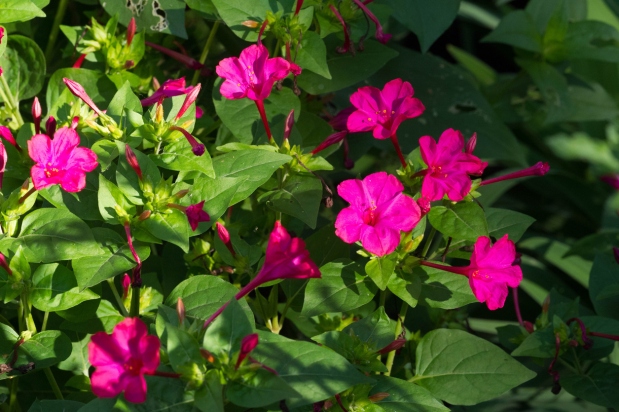
Marvel of peru (Mirabilis jalapa), also known as the marvel of Peru, is a perennial, herbaceous, bushy plant with fragrant, showy flowers, commonly cultivated for ornamental purposes. During bloom time, its flowers are closed most of the day; they open between four and eight o’clock, hence the common name Four o’clock flower .

Hibiscus moscheutos, colloquially known as Crimsoneyed rose-mallow, is a common ornamental plant, a vigorous cold-hardy perennial which thrives in moisty soils. Its showy white to pink flowers are often visited by pollinators. Crimsoneyed rose-mallow is a larval host of various butterfly and moth species.
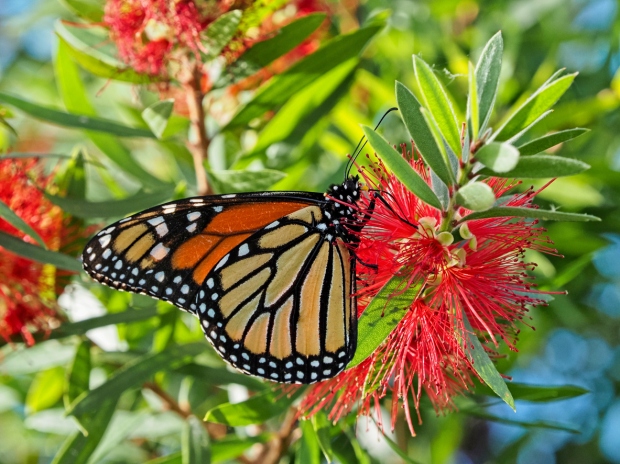
Crimson bottlebrush is a shrub commonly found in swamps and near rivers. The source of the common name is easily seen in its flowers’ appearance. Those flowers produce sweet nectar which attracts numerous species of birds. The specific epithet, “citrinus,” was given because the Crimson bottlebrush’s leaves give off a citrus-like scent when crushed.
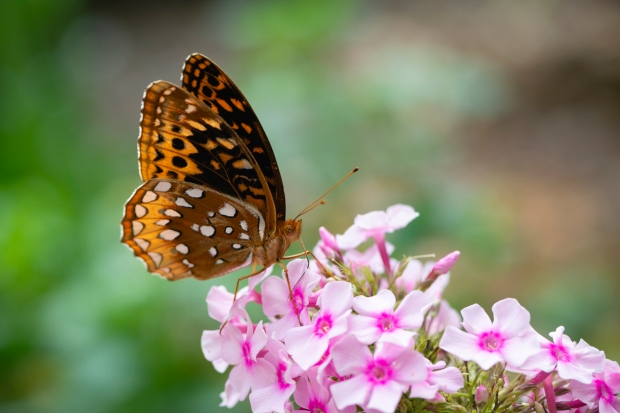
The Garden phlox is a flowering plant that is native to the United States. The name, phlox, comes from the Latin for “flame,” reflecting its bright colors. Garden phlox flowers can become important food sources for insects and hummingbirds.
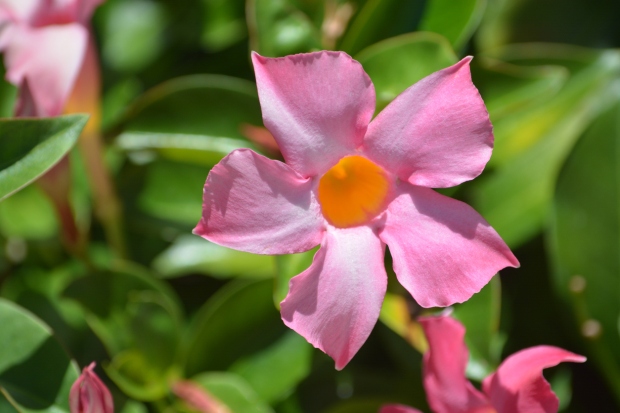
Mandevilla sanderi, colloquially known as Brazilian jasmine, is an ornamental perennial vine native to South America. Its velvety flowers are most often white, scarlet or pink in color. Brazilian jasmine contains white latex, which is toxic and can have an irritating effect when it comes in contact with skin or eyes.
How to Care for Your Plants During a Hot Summer
摘要未改Adding color is a great way to improve the visual appeal of your garden. The issue is that many novices are unaware of how to use color effectively. This article will teach you the basics of color theory 40 words
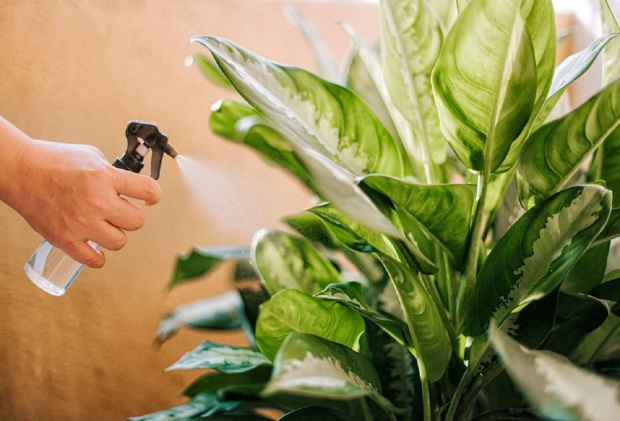
Are you looking for tips on caring for your plants during the upcoming summer weather? Stick around and find out more on how to protect your plants during the summer heat. As the temperatures rise across the US, it is time to get your plants ready to take on the summer heat. There are many sun-loving plants that are quite admirably adapted to the elevated temperatures and low water levels, such as succulent and cacti. However, if these plants are used to being inside, they will not be able to manage the elevated temperatures of being outside. Leafy tropical plants are very prone to heat damage and may not recover from the heat. Although your first reaction to elevated summer temperatures is to panic and run for the water hose, slow down as it might not be the best thing for your plants. Stay tuned to learn more on how to keep your plants healthy during the summer heat.
In this section, we will discuss the most common signs of heat stress in your plants. Most of the stress for plants are either from too much heat or too little water. Therefore, you want to learn to recognize the signs of heat stress, which include the following:
Thinking ahead of time can help you catch stress problems before they arise on your indoor plants. Following are more signs of heat stress and how you can combat them:

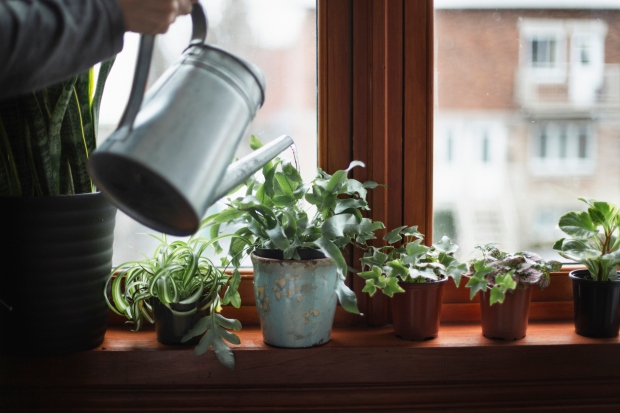
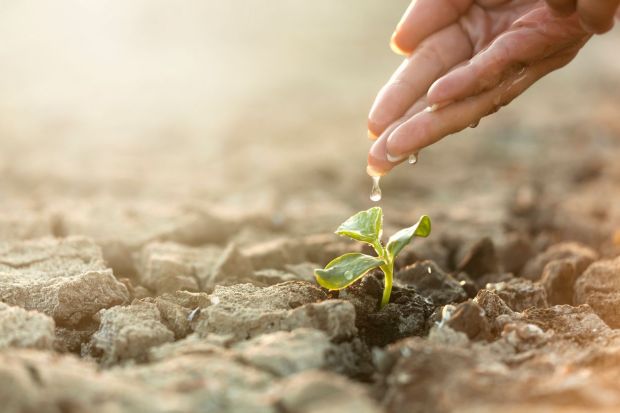
Water is a vital requirement of all a plant’s biology. Since they are mostly water, keeping the cells hydrated is crucial to maintaining the health and growth of plants. When you water deeply, you encourage the plant to grow sturdier, larger, live longer, and deliver greater yields.

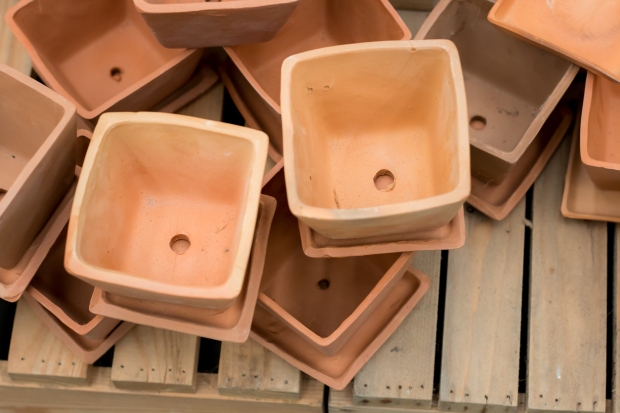
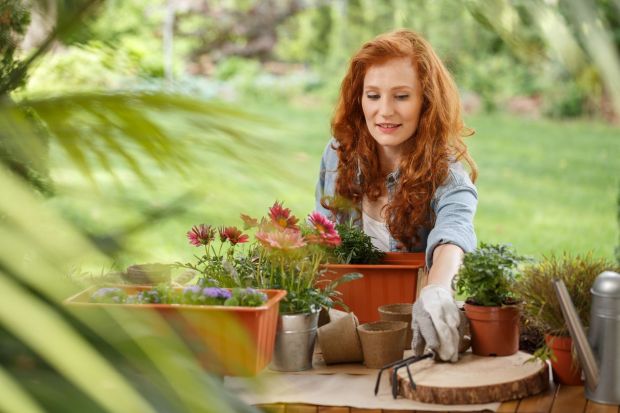
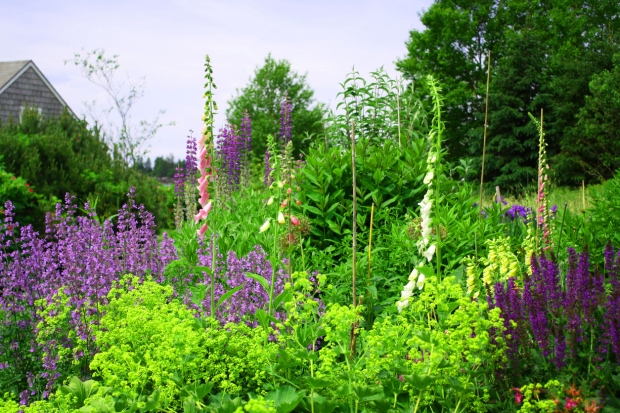
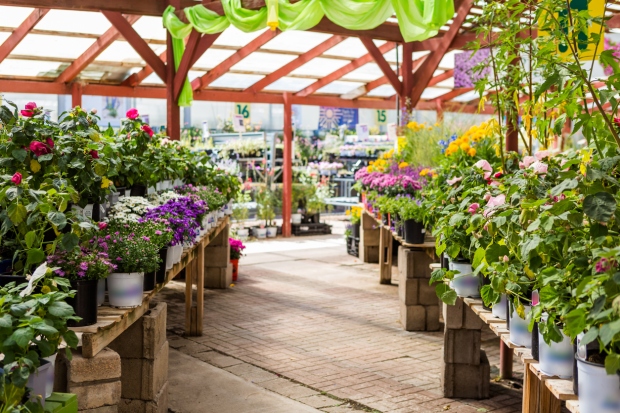
What Is a Container Garden and How to Create One?
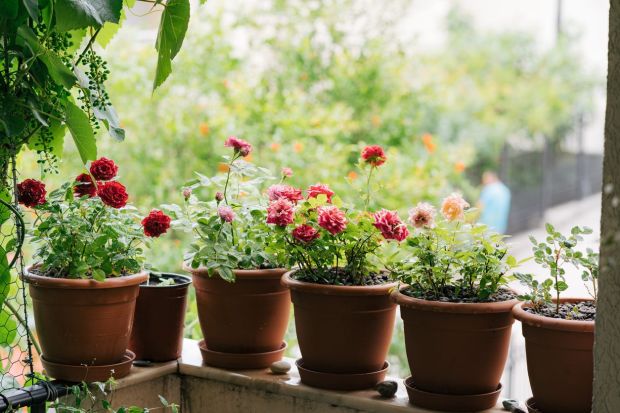
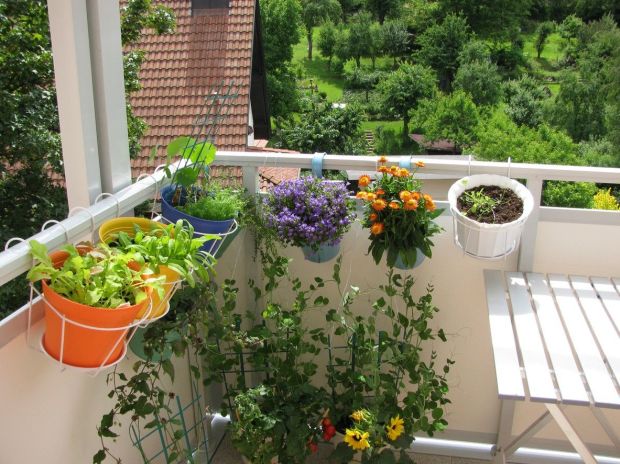
Using pots to grow colorful flowers, vegetables and herbs in your garden can add to the overall appeal and allow you to pretty up spaces where it’s not practical to grow in the ground. Pots are portable and can be moved around easily. Here’s how.
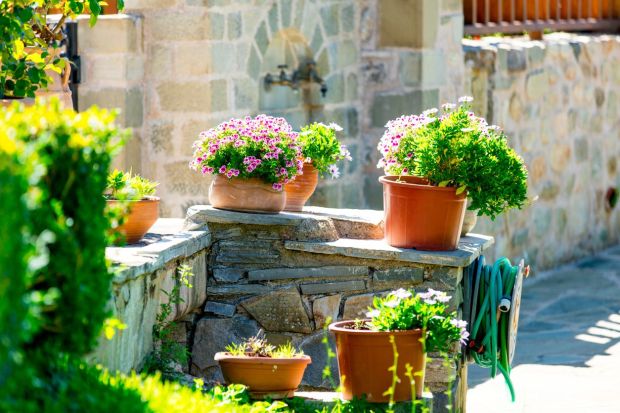
Pots have been used by gardeners for centuries to add diversity to their garden and also to grow in places such as balconies, patios, porches, and beside driveways. Some gardeners even bury colorful pots of flowers or herbs in the ground. This is especially useful for adding interest to your garden if you have really poor soil.
Even those of us who have a reasonable sized garden with friable soil, still add a few pots here and there. It allows us to increase our gardening space and adds color and interest. Plus, there are many benefits to growing in pots.
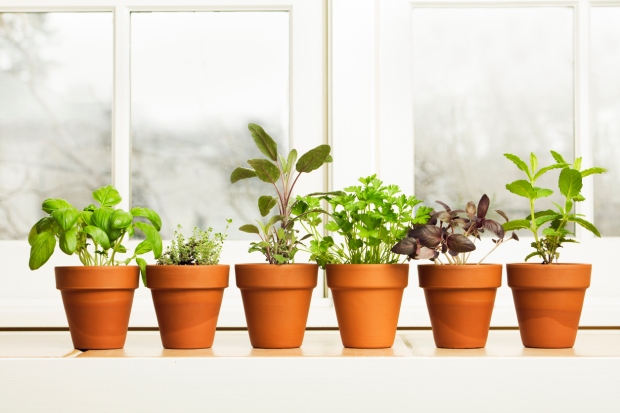
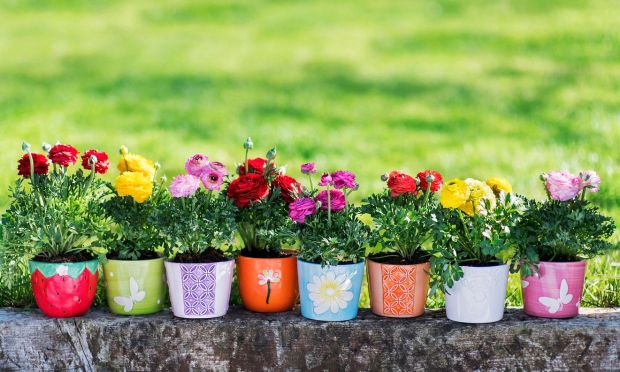
Quite simply, a container garden is where you have a collection of pots of different shapes and sizes that you place together harmoniously to grow lots of different vegetables, herbs, flowers and even small fruit trees.
Container gardening is something that everyone can enjoy, whether you have a yard or not. It’s also the ideal way for people who live in apartments to grow their own fresh vegetables and herbs.

Growing in containers is also a great alternative for those living in areas where the yearly temperatures vary greatly. If your area receives frost and snow in winter, you can simply move the pots to a more sheltered position or bring them indoors.
In really hot climates, it’s easy to move the pots so that they receive shade in the afternoon. This protects the plants from the scorching heat of the afternoon sun.
There are numerous benefits to growing in a container garden. It’s a great way to add additional space to an already fully planted garden. Or, if you don’t have an outdoor garden at all, pots allow you to grow anywhere you can find a sunny spot to place a pot or two.
Even if your outdoor area doesn’t receive a lot of sun, the beauty of growing in pots means that you can move them around easily to take advantage of any sunny spots available during the day. Plus, there are plenty of plants that you can grow that will live happily in shade. This even includes a variety of vegetables and herbs.
Here’s an explanation of some of the major benefits.
As mentioned above, unlike plants that are planted in the ground, pots can easily be moved around your outdoor area. You can even move them inside if it gets too cold where you live.
Growing in pots is also a viable alternative for people who are renting or who move around from state to state. Because pots are portable, you don’t have to leave your prized plants behind when you move. You just take them with you and can have an instant garden as soon as you move into your new home.
Pots come in many different shapes and sizes, therefore, you can use them to fill in small pockets in your yard or on your balcony with lovely fresh vegetables or colorful flowers.
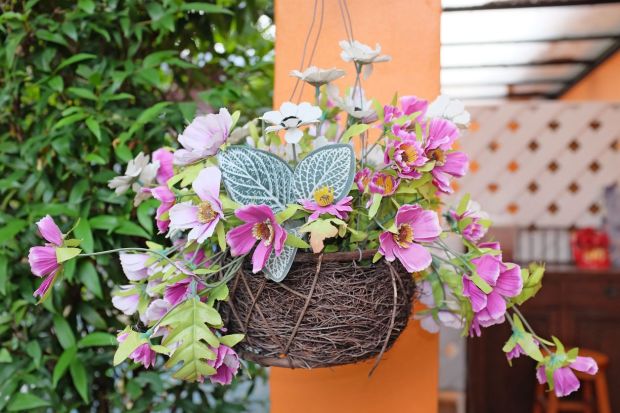
Then, there are hanging pots that can be used for flowers, succulents, strawberries or even cucumbers. These types of pots allow you to use the vertical space above the ground to grow your favorite plants.
Improving soil in the ground is difficult and can take many years to get the best results. However, when you grow in a container garden, you fill the pots with premium potting mix that is open and friable. This gives the roots of the plants a great growing environment and they will reward you with lots of luscious, healthy growth.

Using hanging planters and vertical wall planters means that you can use space that would otherwise just be empty. With pots, you can fill these areas with color and lovely green foliage.
Starting a container garden is easier than you might think. Just follow this step-by-step guide.
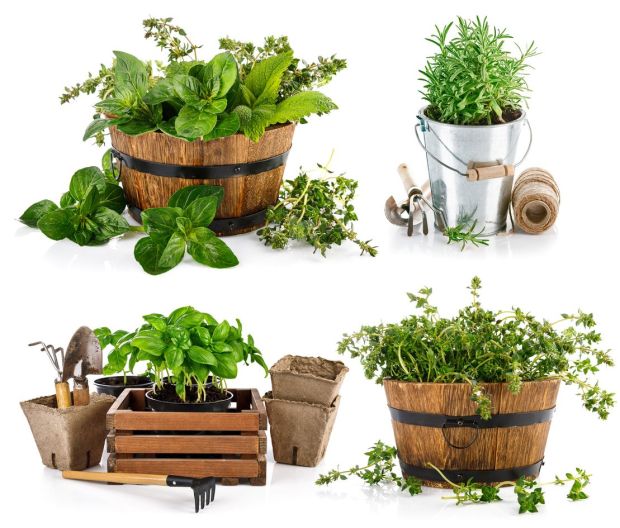
There are so many different pots to choose from. They come in many different shapes and sizes too. There are plastic pots, terracotta pots, hanging baskets with coco liners, and even grow bags.
In choosing your first set of pots, consider the plants that you want to grow in them. Hanging baskets are great for colorful flower displays as well as strawberries. You can even plant them up with a selection of different herbs.
Smaller pots are suitable for single plants while larger pots can incorporate a mini garden with a variety of plants in the same pot.
Once you’ve chosen the pots to start with, it’s time to decide what you want to plant in them. Do you want to grow your own vegetables or herbs? Or, maybe you just love flowers. Larger, taller pots can even be used to grow small fruit trees in such as lemons and limes.
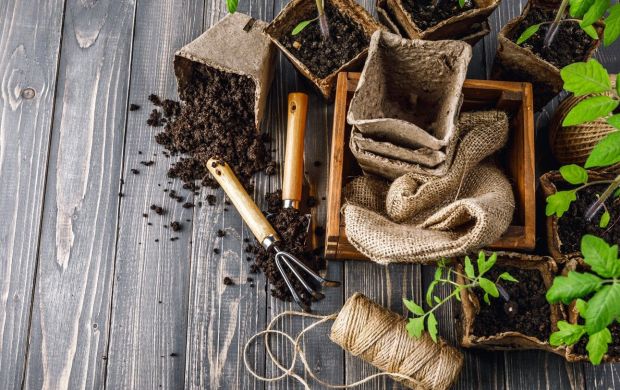
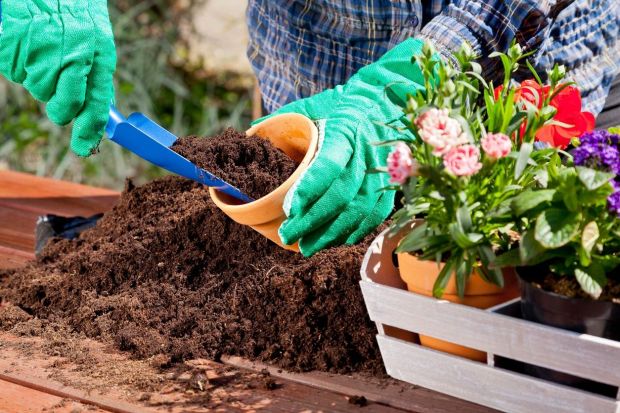
Before planting into your pots, you need to fill them with a growing mix. Don’t ever use garden soil as this too heavy and doesn’t have the structure suitable for pot-grown plants. If you visit your garden center, you’ll find potting mix that is specifically designed for container gardening.
This mix will be open and friable and will consist of ingredients such as compost, perlite and composted bark. Some mixes even contain slow release fertilizers.
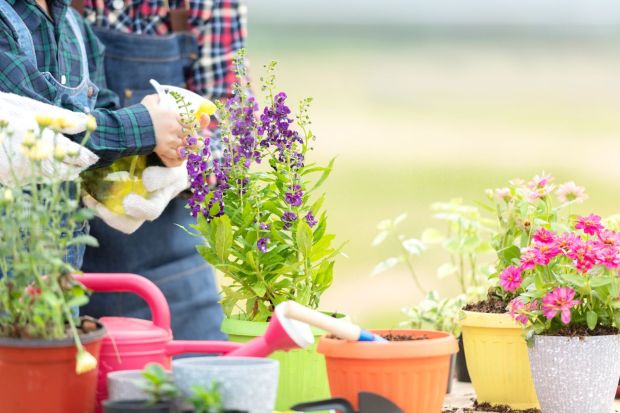
Once you’ve filled your pots with mix, its just a case of putting in your plants and giving them a good watering. You might even like to add a little liquid fertilizer to get your plants off to a good start.
The most common problem that gardeners have with growing in containers is under or over watering. Plants in pots tend to dry out much faster than those growing in the ground.
Therefore, you should keep a close eye on your containers to make sure that the soil does not dry out. You can also get some water-holding crystals to add to the potting mix. These crystals will swell with water and then release this to the plants when needed.
On the other hand, over-watering shouldn’t be too much of a problem if your pots have adequate drainage holes as the excess water can easily drain away.
If you have a tendency to underwater, you could always consider setting up a drip system or use water globes or spikes. Then all you have to worry about is keeping the water reservoir filled at all times.
Container gardening can be both rewarding and fruitful. Growing in pots allows you to grow any number of fresh vegetables, herbs and flowers in areas where there is no soil.
Colorful pots are also a lovely addition to an in ground garden to add some additional interest all year round. The pots can be buried in the ground and replaced when the flowers have finished blooming.
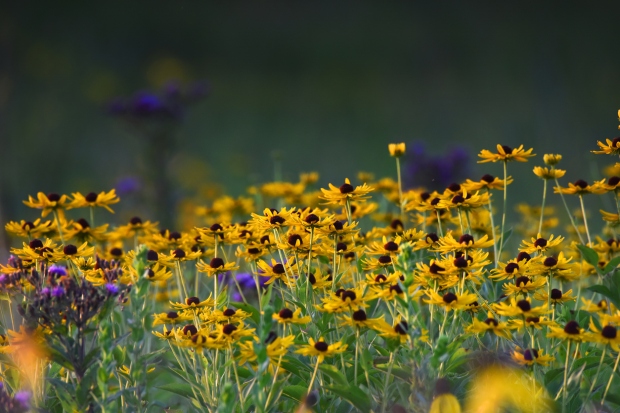
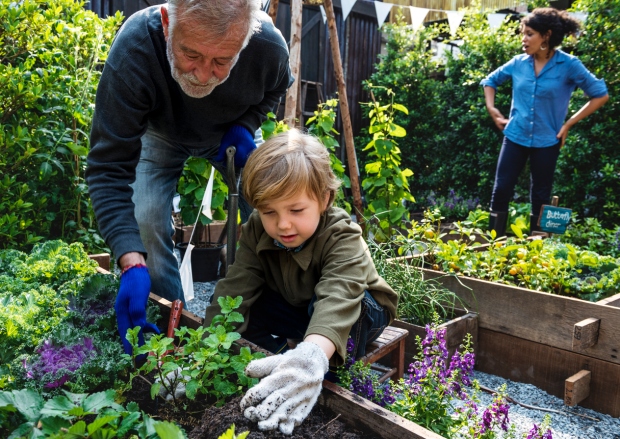
Try Native Plants in Your Garden! Benefits Are Many
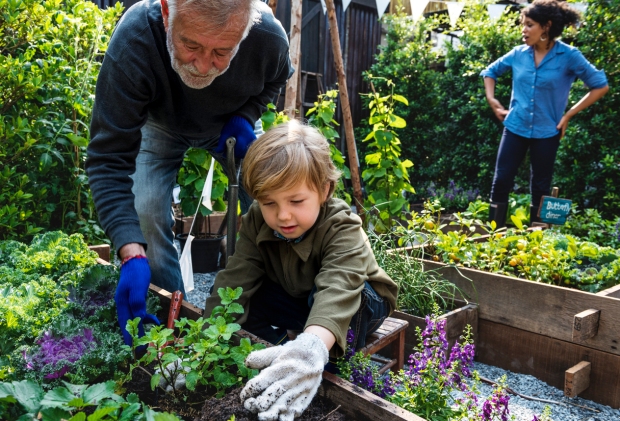
Everyone should consider growing some native plants in their garden. The benefits are many. They attract pollinators, they’re easy to maintain and they’re less likely to become invasive. Find out how to choose the best native plants for your garden.
Whether you are a seasoned gardener or just starting out, we all have times and spaces where we just don’t know what to plant. One solution you should consider is to add native plants to your garden plan. Native plants are those that grew in an area naturally without any intervention from humans.
No matter where you live there are a variety of benefits to using native plants in your garden. Keep reading to learn just what those benefits are and how you can use native plants in your garden.
Pollinators play such an important role in the growth of our food. We need them to pollinate many fruit trees along with other fruits and veggies you might have in the garden or the surrounding area. Native plants attract pollinators your garden needs, because they have adapted to feed on them. Too many non-native plants means those pollinators wont have enough pollen or nectar or in some cases the non-native plants might be completely inedible.
Not only will having native plants in your garden provide food for those oh so important pollinators, but it will in turn help with native wildlife that might be endangered. Native plants provide food and shelter throughout the year. Even in winter.
Besides that, non-native plants introduced by humans sometimes become invasive, competing for space and resources with animals, endangering them further. We will touch more on invasive species later.
Want to mow less? Or maybe you’re interested in not dragging out that garden hose and running up your water bill ? How about less chemical applications? Native plants can really help you achieve all of these things because they are easier on natural resources.

Reducing your mowing time is just one of the benefits having a large area of native plants. Fewer mowings means less gasoline. Because they have survived without help from people the yearly rainfall is usually enough for them to survive. This means less watering on your end. They also have developed a resistance to many of the local insects requiring little to no pesticide applications. This doesn’t mean they won’t ever have insect issues, but it is greatly reduced.
Besides all of these great benefits to our natural resources, the root systems of native plants are usually pretty strong, especially after they get established. These root systems don’t just keep the plant healthy, they also prevent soil erosion and washout.
Maybe you don’t have the greenest of thumbs, or you are just tired of the plants you add not lasting throughout the entire season or through the winter. Native plants are a great solution. Not only will they have a better chance of surviving in your area, they are more likely to thrive than non native species. As we touched on above, they are more resistant to insects and usually rainfall provides enough water for them to survive. They have also evolved to survive cold winter temperatures.
This doesn’t mean they don’t need some care and will always survive everything Mother Nature throws at them, but these plants have adapted to survive in their location and that means surviving the weather.
Maybe you have heard of invasive insects or animals. Well, plants can be invasive too. Usually this happens when non native plants introduced to the area find they like the habitat and have nothing to stop their growth. Invasive species take over space and resources that are essential for animals and plant species. Not only are native plants less likely to become invasive, some aggressive native plants can even compete with the populations of invasive ones.
Native plants really don’t need as much help from you to grow, especially once they are established. As we have touched on, they don’t need a lot of extra water and you won’t have as many chemical applications. But in addition, you don’t have to worry as much about treating the soil. There are so many non-native species that require very specific soil specifications. Planting native plants can reduce your costs for soil treatments and also your time.
Native plants often add a beautiful and natural look to your landscape, but how can you possibly choose which plants to add? The first step is to do a little research. Finding out what is actually native to your area is crucial. If you are having trouble, your local Extension Office or horticultural group will be able to offer you some insight.
You will likely find information identifying native plants by region. Once you know your region, you can decide what will work best for your specific location, whether you live on a lake, on the prairie, in a mountain range, next to an ocean or in the dessert.
To get you started we can look at some plants that might work depending on your location.
Sometimes native plants can look a little out of control or wild. Much of a design of a garden is dependent on the gardener. Start out by asking yourself how you want yours to look. Do you want a natural, not manicured look or are you looking for a well groomed, tidy garden? Once you know what you want it to look like, start looking for plants that fit your location and your conditions. What type of soil do you have? Is it predominately shade or sun? You will also need to decide the size of the space you want to work in. Will this be filling your whole back yard or just a small bed on the side of the house?
Select plants that will work well together, this includes checking on the size of the mature plant. You don’t want one native plant to outgrow and overshadow another. This will cut out resources and hurt the smaller of the two. Make sure you know how tall and wide something will get before you add it to the garden. Some people make the mistake of not checking and the plants end up taking over the bed and reaching into a nearby walkway.
Great gardens are also designed to stun throughout the entire season, with different plants blooming at different times. Information accompanying the plant will tell you when the peak blooming time is or when leaves might change color.
It is so easy to feel overwhelmed when you are just starting out. Remember you don’t have to have the entire bed figured out in one year, especially if it is a large flower bed. And you don’t have to do it alone. There are so many organizations that can give you ideas and support as you plant. Don’t be afraid to ask.

How to Control Common Garden Pests Active in Summer?
The most common garden pests in summer are Japanese beetles, aphids, slugs and snails, caterpillars and grasshoppers. You might also have problems with rodents, rabbits and other animals such as deer. Here’s how to keep them out of your garden.
There is nothing more frustrating than putting so much hard work into your garden only to have it destroyed by pests. Gardeners can face many hurdles on the path towards harvest, and pests often give gardeners a ton of headaches.
Knowing what pests you are likely to find in the summer months and how to keep them in check will ensure your garden continues to thrive. Continue reading as we break down some of the most common pests you might come across and what you can do to keep them from destroying your garden this summer.
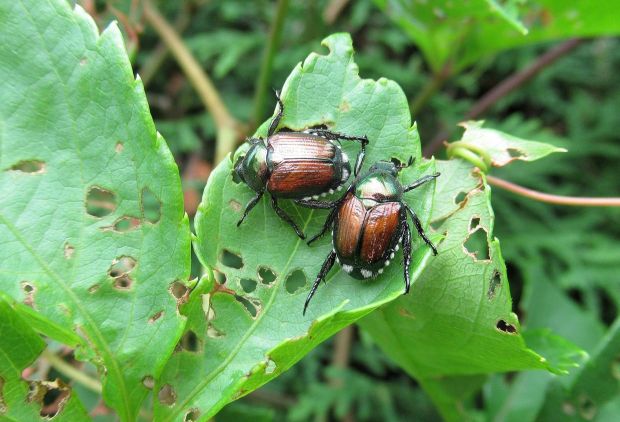
Have you have seen a metallic blue-green insect buzzing around your yard? If so, you saw a Japanese beetle. These insects wreak havoc on not just vegetable plants, but flowers and trees as well. The adults eat leaves, chew flowers and consume fruits and veggies and their larvae aren’t much better. They devour plant roots in your garden and your lawn.
Insecticides are one option when it comes to controlling these pests. If you are looking for a non chemical option, floating row covers can be implemented in gardens and you can physically remove them by shaking the plants in the early mornings. Baited traps are also commonly implemented.
Aphids appear on fruits, vegetables, shrubs and trees, sucking the sap and causing leaves to drop. The waste they produce is called “honeydew.” It is a sugary liquid that can encourage sooty mold on your plants branches or leaves. Honeydew also attracts ants. The tiny, pear shaped insects have long antennae and their abdomens have two small tubes projecting from them. Aphids populations multiply quickly and it won’t be long before your garden is overrun, so catching them early is so important.
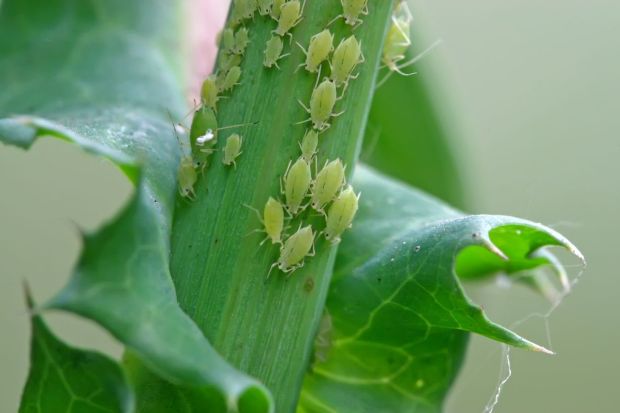
Spraying cold water on the leaves of an infested plants is used to remove aphids. This knocks them off the plant, and don’t usually go back to the same plant. Your pantry might contain an aphid deterrent. Flour is used to get rid of aphid infestations because when dusted on the plant, it constipates the aphids.
Other options include wiping the plants and its leaves with a mild soapy water solution. You will only need a few drops of dish soap in the water for the solution to be effective. Adding a pinch of cayenne pepper to the dish soap water solution is just another variant.
If you aren’t sure about these options, add diatomaceous earth around the plant. This non-toxic material kills aphids, but use with caution, as it can also kill the good insects you need to pollinate your plants. Avoid using this when your plants are blooming.
These slimy pests definitely put a damper on a gardener’s day. Slugs and snails devour your garden produce, munching on leaves as they move along.
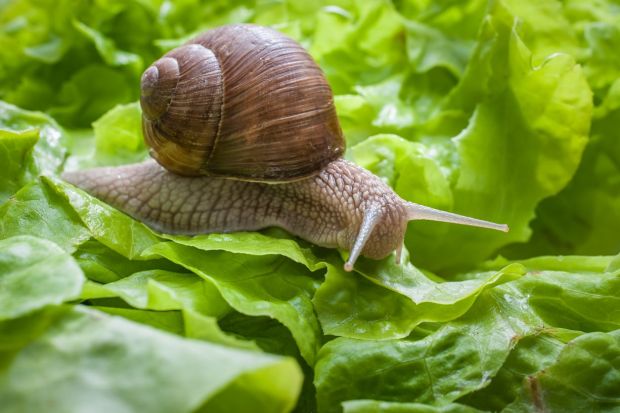
Slugs and snails can be controlled by welcoming their natural predators into the garden. Garter snakes eat these slimy pests and many other garden pests that might be bothering your garden plants. It might be hard to think about making your garden snake friendly, but these animals only help in your garden and they don’t hurt people.
If snakes aren’t something you want to encourage, another option would be to add gritty substances, like egg shells or diatomaceous earth, to the area. These substances will cut the snail or slug’s body, injuring them. Eventually these pests will either be killed or be deterred from bothering your plants.
Ever heard of the very hungry caterpillar? Well it isn’t just a children’s story. These garden pests will eat their way through your vegetable garden, especially your cabbages, broccoli, kale and cauliflower.
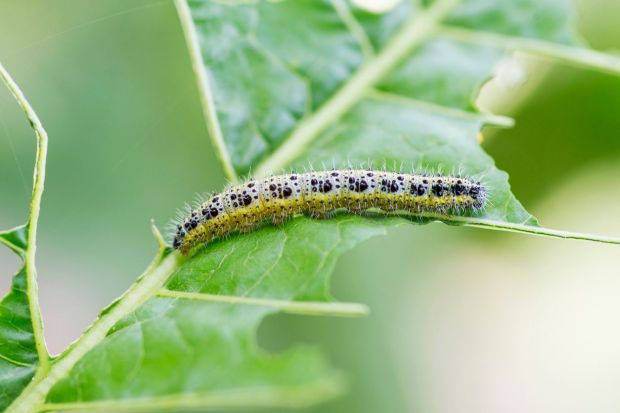
Besides removing these garden pests by hand, insect barrier fabrics are often used to keep them away. The benefit of using the barrier fabrics is you aren’t just protecting your plants from caterpillars. Other insects won’t be able to get through either.
There are also insecticides available if you want to go with a chemical approach. These can be found at local hardware stores. Follow all the directions and recommendations on the label for the safest and best results.
Grasshoppers will consume everything in their path if they make it in the garden. They eat leaves, flowers, fruits and veggies non stop. They can eat as much as half their body weight each day.
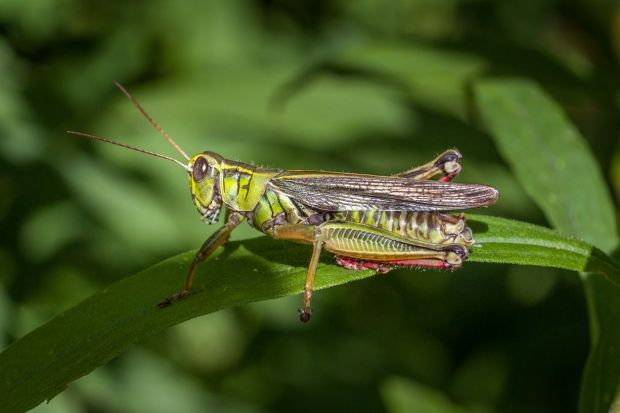
Making your garden friendly to their predators is a great way to control grasshopper populations. Bluebirds for example are a great eater of grasshoppers. Toads and snakes also make these pests a meal.
Another option would be to explore insecticides that target grasshoppers. There are many options when it comes to insecticides to help control infestations of grasshoppers.
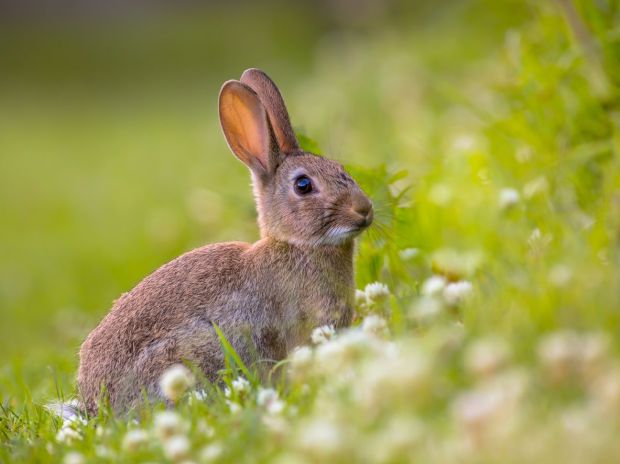
If you are an avid gardener you probably have had some run ins with some other kinds of pests that aren’t insects. Chipmunks, mice, rabbits, raccoons and even deer can wreak havoc on a well planned garden. They nibble on seedlings, and decimate harvests. Raccoons often like to dig up plants you just put in the ground.
Fencing is an animal friendly prevention method to keep your garden plants safe, but be sure you are using fencing with very small openings. Small garden pests, like chipmunks can easily slip through common fencing. One option to keep even some of the smaller pests out would be to use hardware cloth. This is available at hardware stores. When it comes to keeping out the big pests, like deer, your fencing should be tall. White-tailed deer are able to jump over fences as high as eight feet.
For some animals adding plants they don’t like can act as a barrier. Marigolds, onions, garlic, lavender and catnip are just some options you might look into if you have a rabbit problem. This is an animal friendly way to keep those pests from getting your tasty garden produce.
Other wild animals can be trapped in live traps and taken to another location where it is safe for them and your garden. If you are nervous about trapping animals, contact your local animal control or a pest removal service and they can help.

Now Is the Time to Prune Your Garden Roses
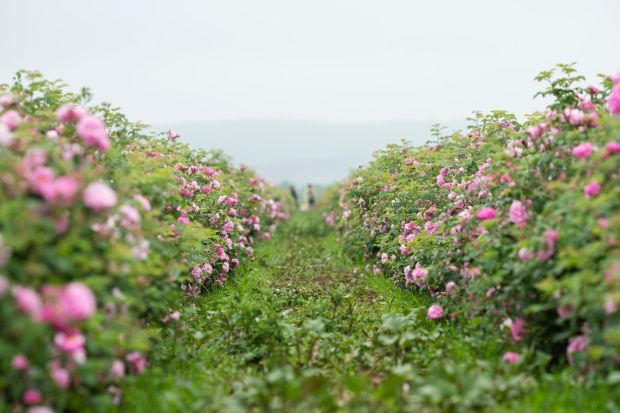
Roses benefit greatly with a regular, hard prune before the weather warms up and the bushes are dormant. This encourages lots of new growth and plentiful blooms. Follow these tips on pruning your roses.
Roses are one of the few shrubs that thrive with frequent, strategic, if not heavy pruning. While pruning roses may seem intimidating, the basics are simple to understand, beginning with understanding what type of rose plant you have in your garden.

There are many types of rose bushes ranging from climbing, hybrid tea, floribunda, and more, and each has a slightly different method for pruning.
Knowing when your type of rose bush blooms will help direct you on when to prune it correctly. All roses are essentially pruned in the same way – first in spring with a hard prune, and again after they bloom to remove old flowering stems. Since there are some roses that bloom just once a year, they may only need the heavy spring pruning while other types may need tidying up throughout the season after they re-bloom.
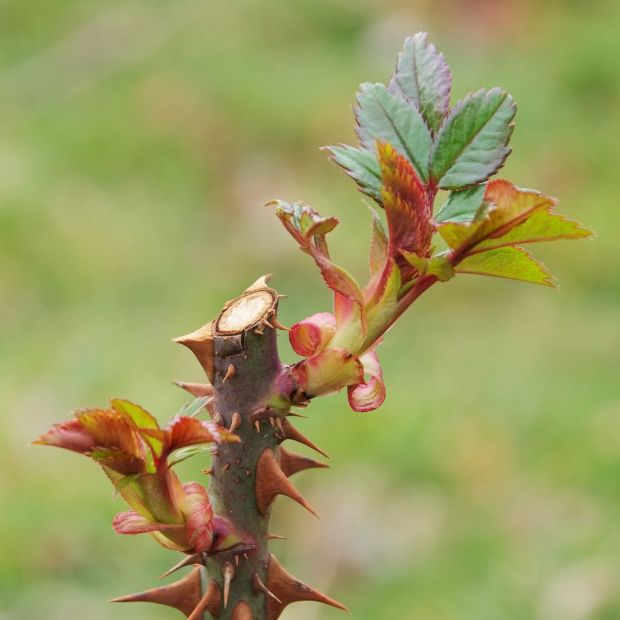
Imagine that every new bud will grow into a long cane, and you can visualize what the shrub may look like in mid-season. The shorter the canes on the first spring pruning, the healthier and thicker the new canes will be.
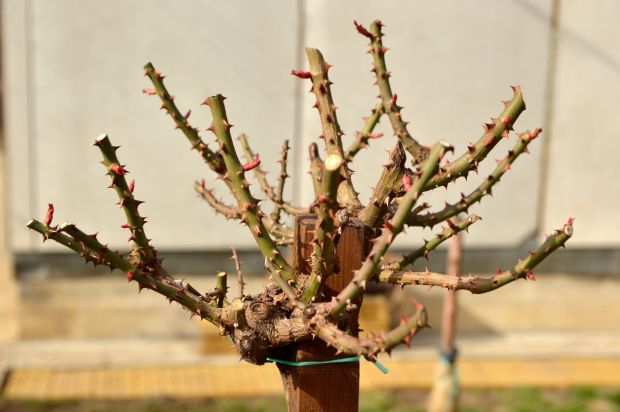
The first hard prune is always in late winter or spring, removing dead canes and reducing healthy stems to help stimulate strong, healthy growth. Every cane should be cut back at least halfway to the ground and reducing the plant to just a few canes will result in stronger stems.
It’s hard to over-prune a rose bush. The basic rose pruning essentials apply to all roses and while there are many techniques and methods, as long as you don’t cut the plant to the ground, you are safe to cut. Nearly all roses are grafted onto a hardier or healthier rootstock (near the soil line) so it is hard to make a serious mistake unless you cut where the rose branches near the ground.
If overwhelmed, begin by removing all old or weak canes in spring just as the rose bush is beginning to sprout. Leave only the thickest, youngest and strongest canes, reducing their length to at least half. Older stems can be identified by being woody, grey, or thin and branchy. These will not produce solid flowering stems All roses bloom on the current season’s new growth sp cut back to the strongest, most robust emerging new stem. This may be near the trunk and rarely at the end of a cane.
Always prune after your plant blooms (deadheading) except if your rose bush forms lovely rose hips that are also a feature of some species and varieties. Cut flower roses like hybrid teas and many modern hybrids considered ‘everblooming’ will require the faded flowers to be removed. Those flowering stems are best reduced by half to stimulate a second and third set of flowers throughout the season.
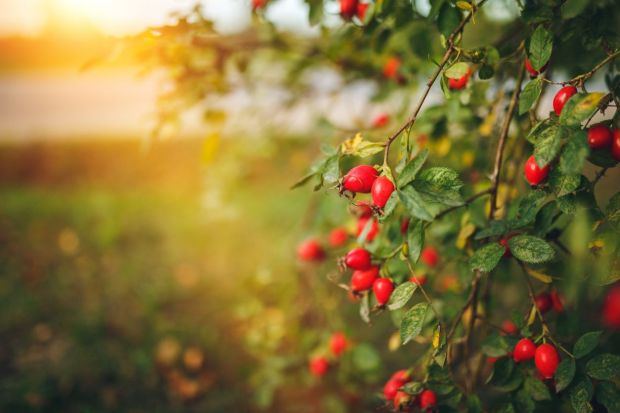
Some shrub roses and old-world or antique roses are grown not just for their flowers but often for their unique, showy, and edible rose hips. Most roses grown for their rosehip display are pruned only in the spring, requiring just some tidying up with pruning shears during the growing season. This is particularly true with the Rosa rugosa varieties often known as Beach Roses.
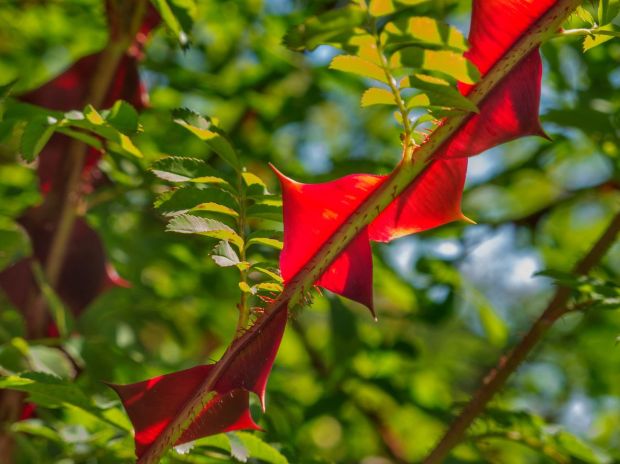
Not all roses are grown for their flowers and rose hips. A few garden varieties are cultivated more for their attractive thorns or foliage. Rosa glauca does produce nice pink, single flowers but is often included in gardens for its lovely purple foliage. Thorns are often more attractive than flowers too. Rosa sericea subsp. Omeiensis f. pteracantha (the Chinese Winged Rose) is grown strictly for its long, translucent and scarlet thorns. Savvy gardeners will often prune these shrubs lightly if at all, to retain all their attractive features.

Unlike other shrubs, where once tends to trim and sheer the plant to create a pleasing shape or form much as a barber might work, roses require the opposite approach. Pruning out all branches that are weak or thin, regardless of the shape of the final bush. Obviously form is still important but pruning a rose bush is more like pruning a tree than it is a topiary or a typical flowering shrub. You will need to visualize and imagine every new growth emerging from a bud as a long cane.
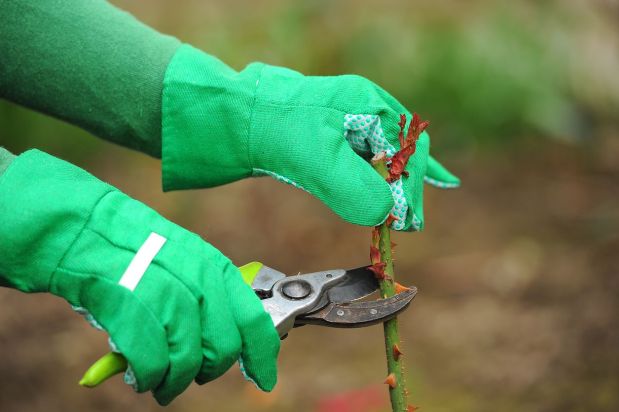
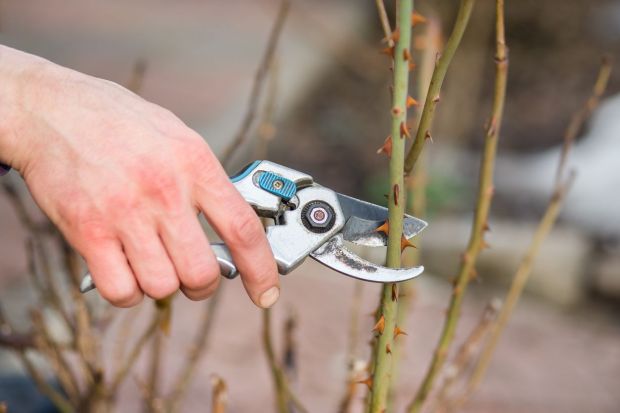
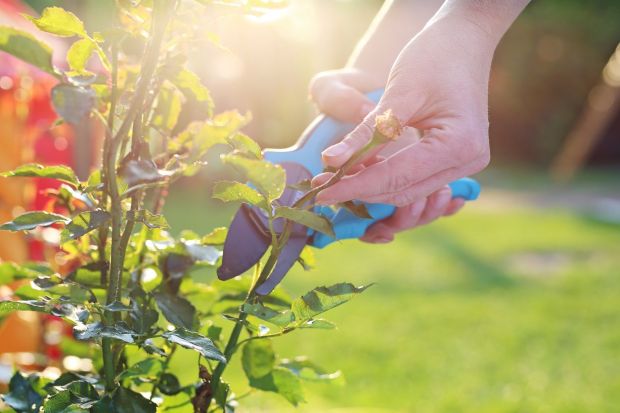
Always use sharp cutters. Ideally, secateurs that are clean and sterilized with a 10% bleach solution between cuts as nearly all roses are susceptible to many pathogens spread from plant to plant. Removing and disposing of all cut stems and foliage, especially at the end of the season, is wise (never compost such waste to encourage the spread of diseases). In warmer climates, rose enthusiasts even cut and remove any green foliage that is old at the end of the season to reduce disease transmission.
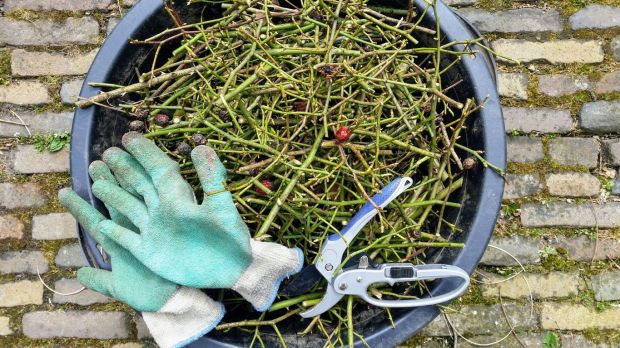
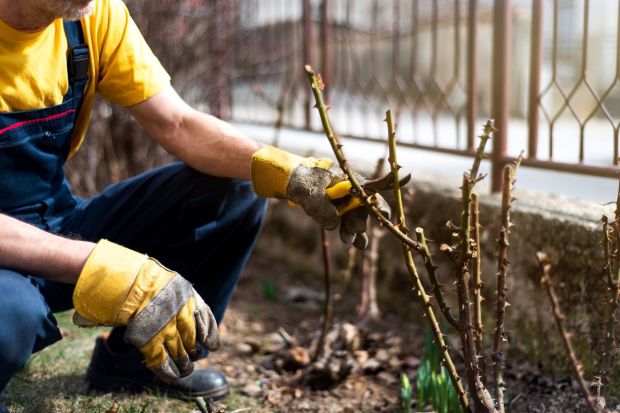
Roses can be dangerously thorny so invest in leather or suede pruning gloves, an essential tool when cutting long canes. Keep a trash bucket or wheelbarrow nearby in which to drop cut canes. Leaving any on the ground invites injury to children, bare feet or pets. Cut exceptionally thorny branches into smaller bits and send them to the trash bin rather than the compost pile.