


17 Easy Annual Flowers That You Can Grow From Seeds
What could be more natural than pushing a seed into the earth, or scattering a handful across the ground? And yet, we all know the disappointment that can come from planting seeds only to find nothing happening. Don’t let this turn you off from trying again! The species on this list are all known to do well when started from seed.
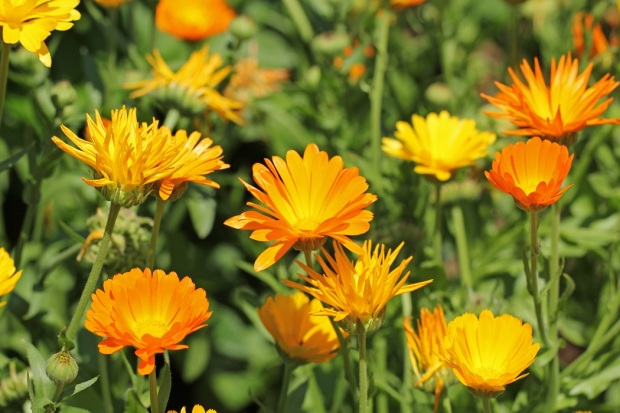
The Pot marigold is a herbaceous perennial plant often recognized by its thick, orange-yellow blooms with numerous petals. Flowers of the Pot marigold have a long history of table use. They are often served in salads or as a decoration. The flowers can also be made into a similarly-colored dye for foods, textiles, or cosmetic products.
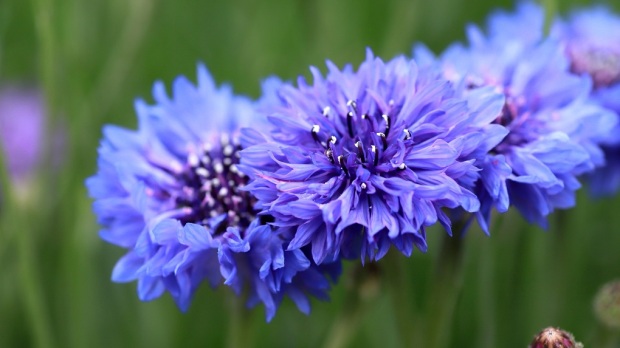
Centaurea cyanus is known by several names, like cornflower and bachelor’s button. This flower has a beautiful blue color that was a favorite of famed Dutch painter Johannes Vermeer. Today it is a Crayola crayon color as well as an HTML color name. The color is defined as a medium to light blue that contains very little green.
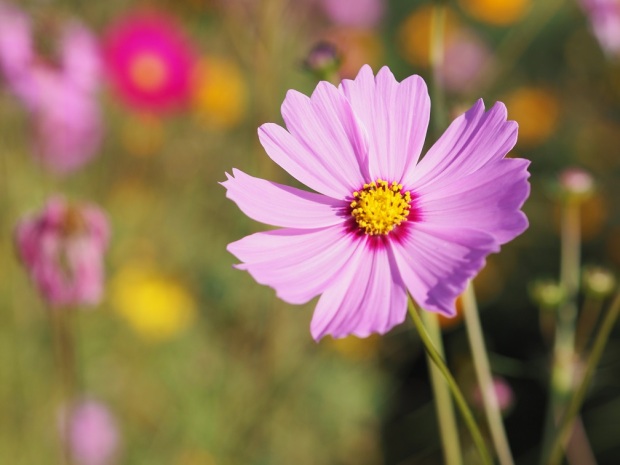
Garden cosmos (Cosmos bipinnatus) is a herbaceous annual plant often cultivated as an ornamental in temperate regions. Due to its self-sowing ability, Garden cosmos can grow on the same spot for several years, even though it is an annual. Not surprisingly, this quality also made it an invasive species in certain areas of the world.
Sulfur cosmos (Cosmos sulphureus) is an annual flowering plant native to Mexico, Central America, and South America. Though widely used as an ornamental plant, Sulfur cosmos is considered an invasive species in the United States. It attracts bees and butterflies, including the notable monarch butterfly.
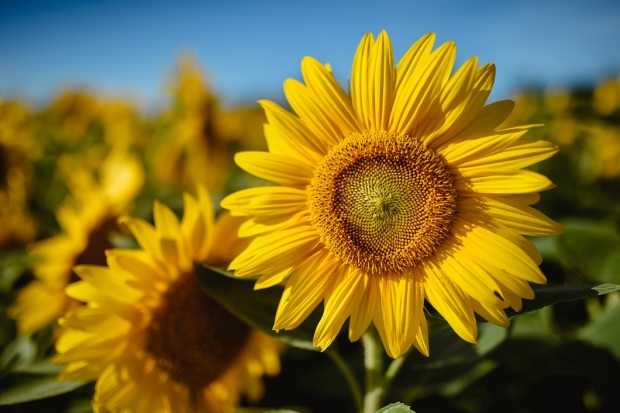
The Common sunflower is recognizable for its bright flower on a very tall stem. It is often grown in gardens. These flowers have been important in culture: they were worshipped by the ancient Inca people, and today, they represent eco-friendly movements. The artist Vincent Van Gogh made a famous series of paintings about Common sunflower s. Wild versions of the plant branch out to many flower heads, but domesticated plants typically only have one.
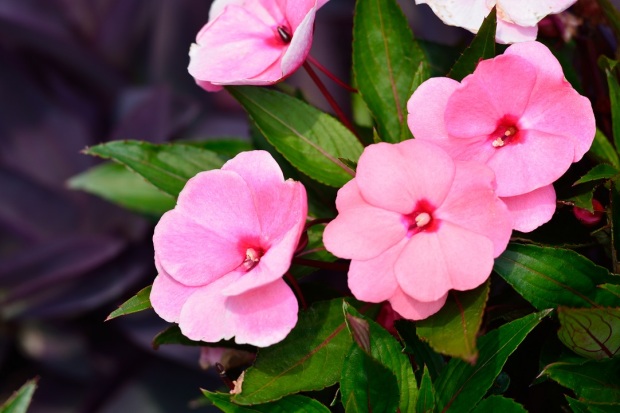
Impatiens (Impatiens walleriana) is flowering herbaceous plant native to Eastern Africa. Its vividly colored, elegant flowers have made it one of the most popular ornamental plants in the world. Impatiens is often used as a bedding plant in parks and gardens worldwide.
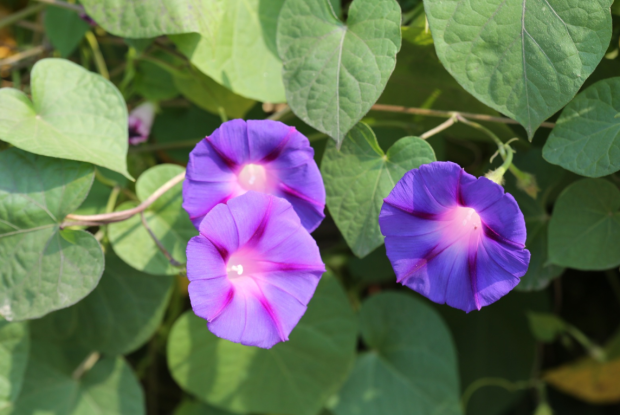
Common morning-glory natives in Mexico and Central America and is commonly planted as an ornamental plant prized for its colorful trumpet-shaped flowers. It is naturalized in temperate and subtropical areas globally and in many places, always grown weedy and is considered to be invasive in many parts of the world.
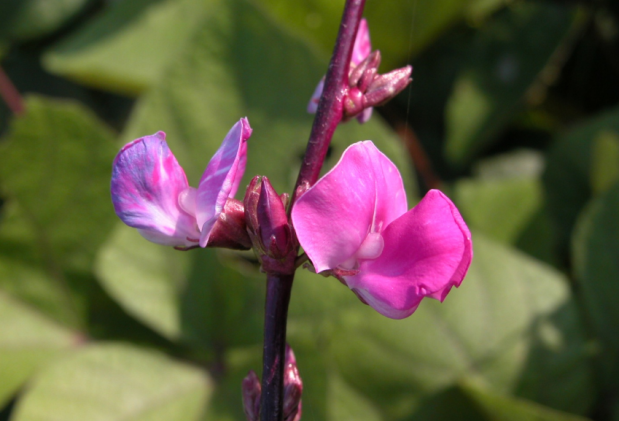
Hyacinth bean (Lablab purpureus) is a bean plant native to the tropics of Africa. Its beans are consumed as a food and it is also referred to as the butter bean or the poor man’s bean. Young pods are consumed widely as a vegetable in Asia. If not properly cooked, Hyacinth bean is toxic.
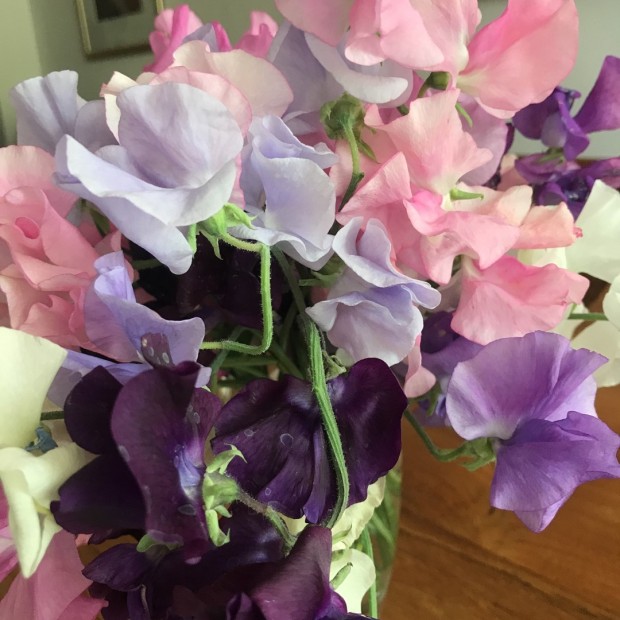
Sweet pea is a staple of flowering climbers and has been since the Victorian era. The Sweet pea, which uses tendrils to climb when correct supports are available, grows to a height of 40 in 80 in. The highly fragrant flowers are purple when found in the wild, but domesticated cultivars can be found in nearly every color.
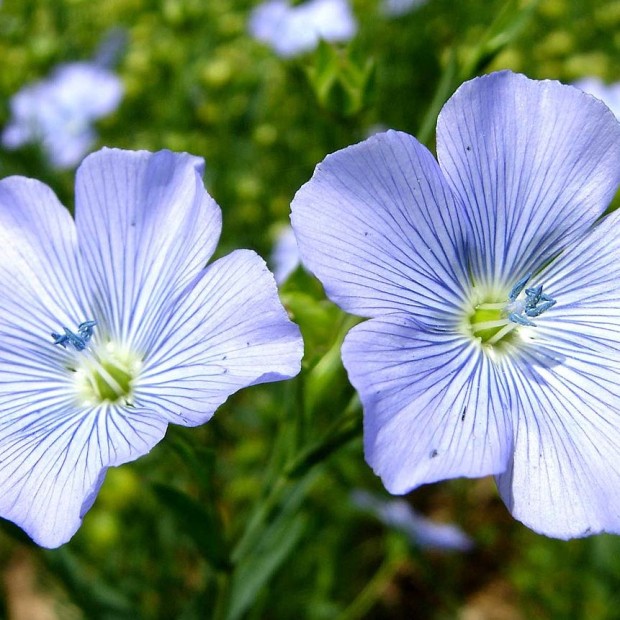
Flax (Linum usitatissimum) is a slender, straight, and narrow-leafed annual that produces sky-blue flowers in June and July. After blooming, each flower produces a seed pod of 4 to 10 seeds. Flax is cultivated for its fiber, linseed oil, and edible seeds. It prefers full sun and cool weather and will grow from 2 to 3 feet tall.
Lobularia maritima, commonly known as Sweet alyssum, is an annual flowering plant that grows very low and has a tendency to spread its branches over the soil, creating a mat. That is why this lovely ornamental is an excellent choice for a groundcover or a bedding plant.
The Common poppy (Papaver rhoeas) is an annual flower that carries great symbolism in many cultures. During World War One, the Common poppy could be found blooming between trenches in France and Belgium; afterwards, it became an international symbol of fallen soldiers. This poppy does not produce opium.
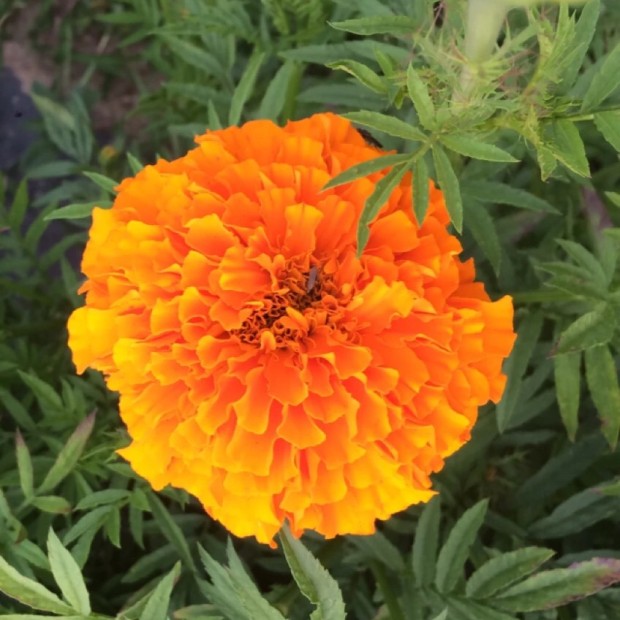
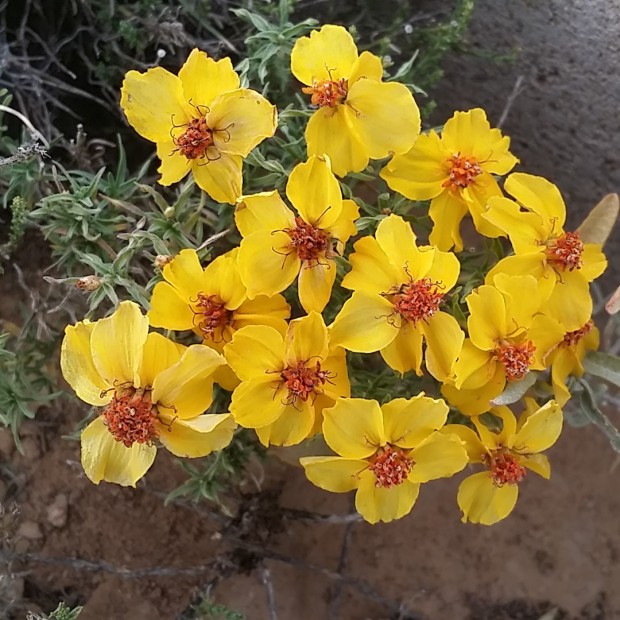
Mexican marigold is a common garden plant with bright orange or red flowers. Its use in decorative and ceremonial gardens dates back to ancient Aztec civilizations. Not only does Mexican marigold add bright colors, but it is also known to repel insects, rabbits, and deer thanks to its toxic latex.
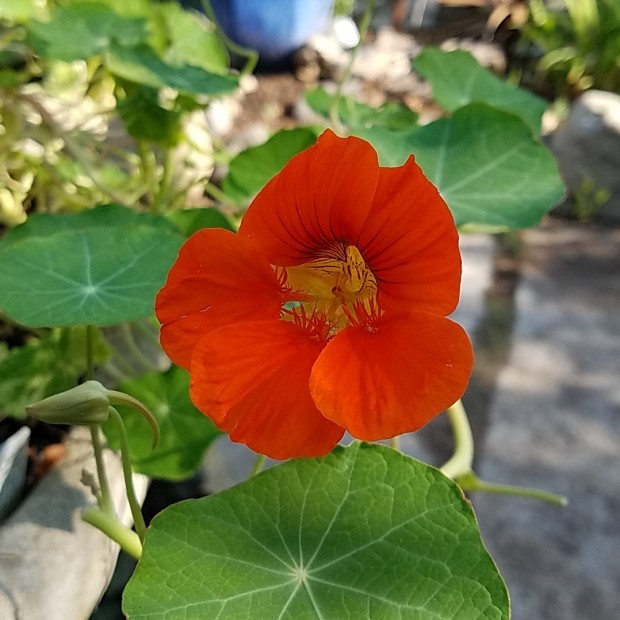
The Nasturtium is often associated with the “Elizabeth Linnaeus Phenomenon”, an optical illusion that makes the contrasting orange flowers and green foliage appear to flash brightly as it shakes in the wind. Nasturtium is cultivated as an ornamental plant. The disc-shaped leaves and seed pods are edible, usually getting used as garnishes and dressings.
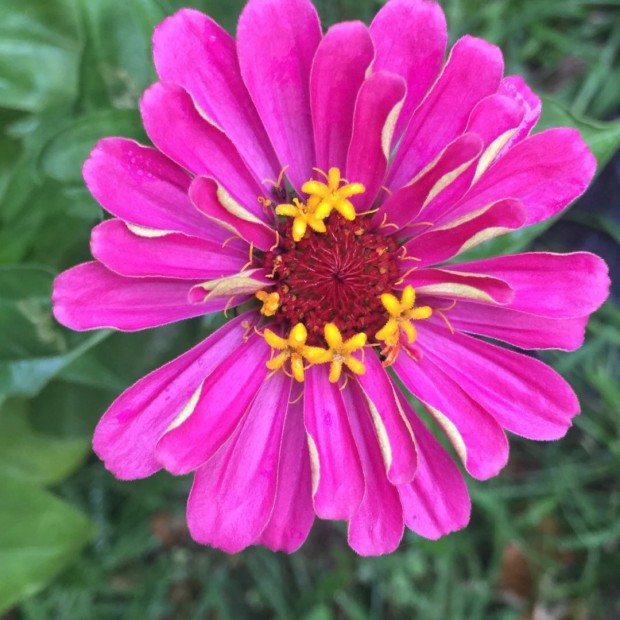
The Common zinnia is a popular garden plant. It thrives in relatively dry conditions with good airflow. Garden varieties come in many colors, usually having been hybridized from different wild varieties. Common zinnias are considered an allergy-safe pollen-producing flower.
Rocky mountain zinnia (Zinnia grandiflora) is a small subshrub that can grow to be 22 cm tall. Rocky mountain zinnia is native to the southwestern United States, the southern central United States, and Mexico. This species was traditionally used by the Zuni people in spiritual ceremonies.
Love-in-a-mist is a member of the buttercup family with leaves that resemble those of the dill plant. The flowers, which bloom in early summer, sport tiny black seeds at their centers. Love-in-a-mist seeds get added to bread in some Middle-Eastern countries with a flavor like oregano or nutmeg. But note that it could be toxic if ingested in quantities.
Terrariums to Expand Your Planting Options
There are numerous ways that gardeners can enjoy their plants indoors. One of the most enticing options is to create a terrarium. Learn how to complete this exciting DIY project, and soon you will get to grow some unique plants in your home.
Avid gardeners are always looking for ways to expand their planting options. One of the best ways to do that is to create a terrarium to house some species that you would not otherwise be able to grow. Read on to learn what a terrarium is as well as how you can make one for yourself.
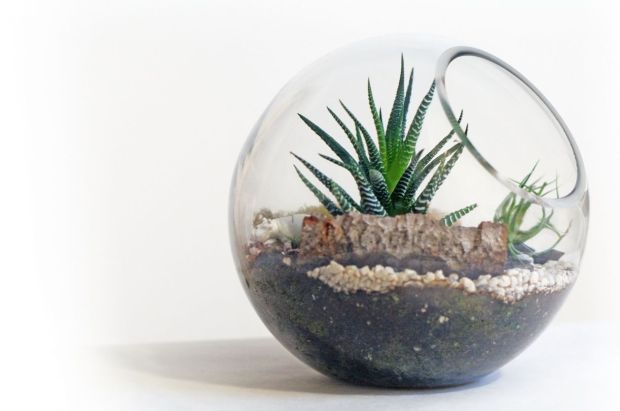
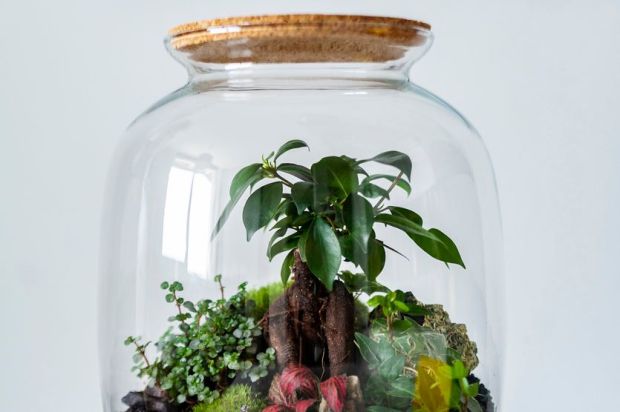
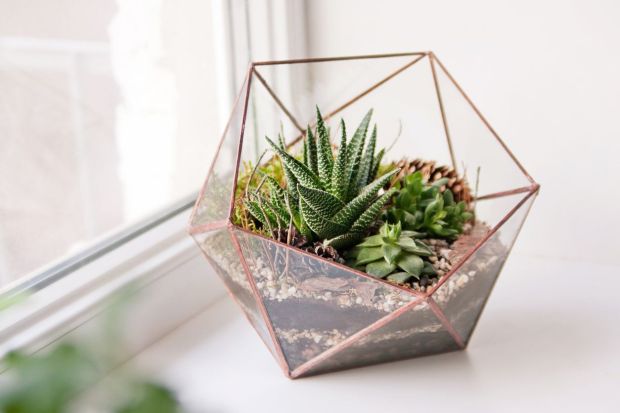
A terrarium is typically a glass container in which plants grow. These containers may be entirely sealed, or they may have an opening that allows air in. People usually use terrariums as a way to grow ornamental plants indoors. The enclosure that the terrarium provides offers a unique internal environment in which many intriguing plants can grow.
The fact that terrariums are often glass containers makes for some interesting conditions inside. Compared to the surrounding area, the inside of a terrarium is often hotter and moister. That is because the glass material of the terrarium allows sunlight to enter but does not allow heat or water to escape. This setting creates a miniature water cycle where:

That effect is what grants you the opportunity to grow plants that would not otherwise survive in your region. Now that you understand the basics, we’ll move on to learning about how you can make your own terrarium at home.
Creating a terrarium is not all that difficult. But there are a few steps that you will need to follow to meet success with such a project. The next few sections will provide the information you need to get started.
Your first step in creating a terrarium is to find a suitable container. If you search online, you will find that many companies make containers specifically for this purpose. While those products are great options, there are alternative paths you can take. If you choose not to use a pre-made terrarium container, you could always take a DIY approach and use one of these common containers instead:

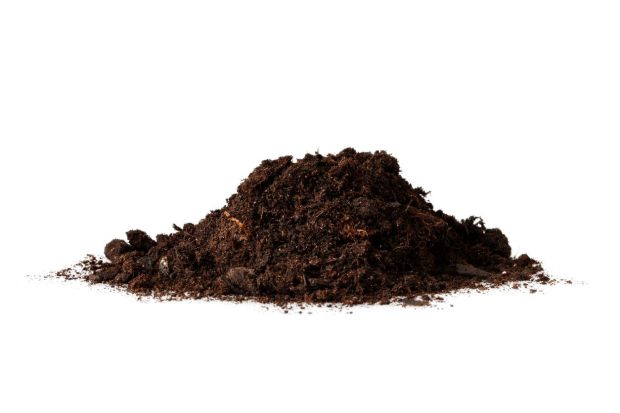
Once you have selected your preferred terrarium container, it is time to fill it with a growing medium. Using nutrient-rich houseplant soil should work well for most of the plants you intend to grow. Thankfully, these soils are easy to find at most garden supply stores. Once you have found soil that works for you, begin filling your terrarium container. Fill the terrarium with soil until you are about halfway to your desired final soil level. Then move on to the next step.
With your terrarium partially full of soil, it is time to add plants to that soil. Address your plant first by removing it from its container. If you notice root binding, make sure that you rough up the root ball to encourage healthy future root growth. Then make small holes in the soil to fit your plants inside. At this stage, you still have a chance to arrange and rearrange your plants so that they look their best from all angles.
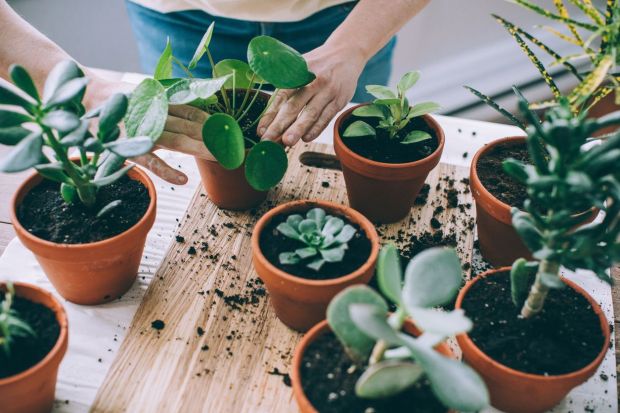
Now that your plants are in place, you can complete the planting process by adding more soil. Aim to cover all of the roots of your plants so that none of them have exposure to the air. Press firmly on the soil to set your plants in place.

This last step is optional. But many people like to add accent items to their terrariums to make them a bit more appealing. Some people enjoy adding attractive stones or other ornamental features to their terrariums. While adding these items is not necessary, it is an opportunity to be creative and take your terrarium design to the next level.

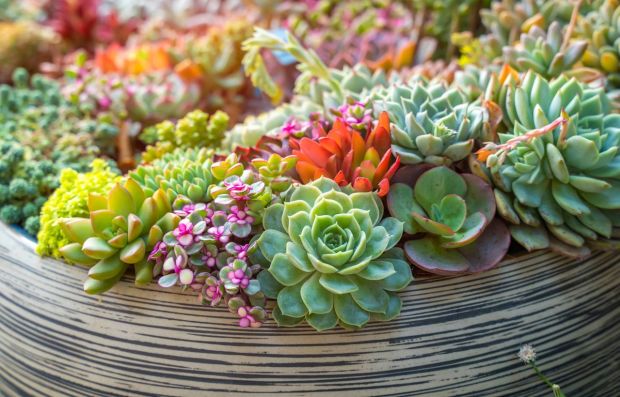
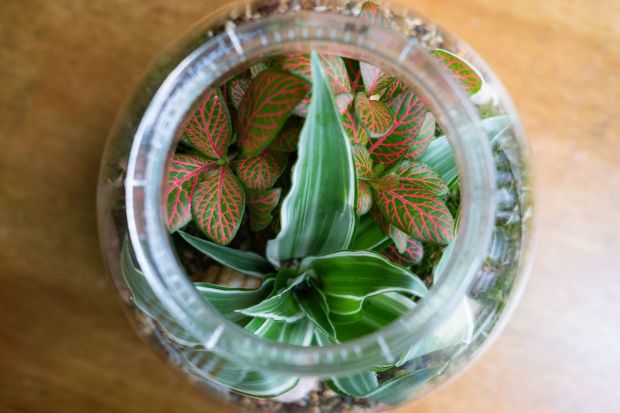
Let’s conclude by looking at a few of the best plants to grow in your new terrarium. It is often best to choose species that grow slowly and remain small enough to live healthily in the limited space a terrarium provides. As we mentioned before, having a terrarium is also an opportunity to grow plants that would normally thrive in a warmer region. In fact, that ability is one of the leading benefits of making a terrarium in the first place. When it comes time to add plants to your terrarium, here are a few varieties that should be at the top of your list:
Common Grass Types for You to Choose
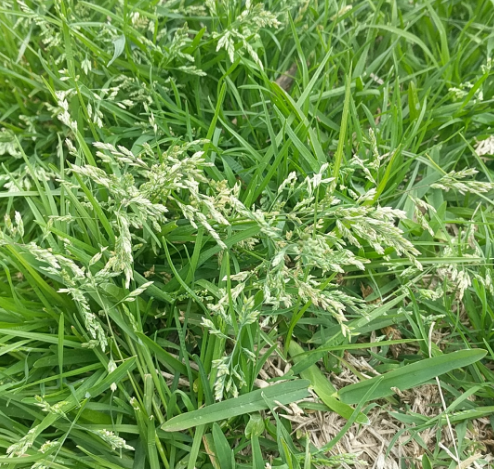
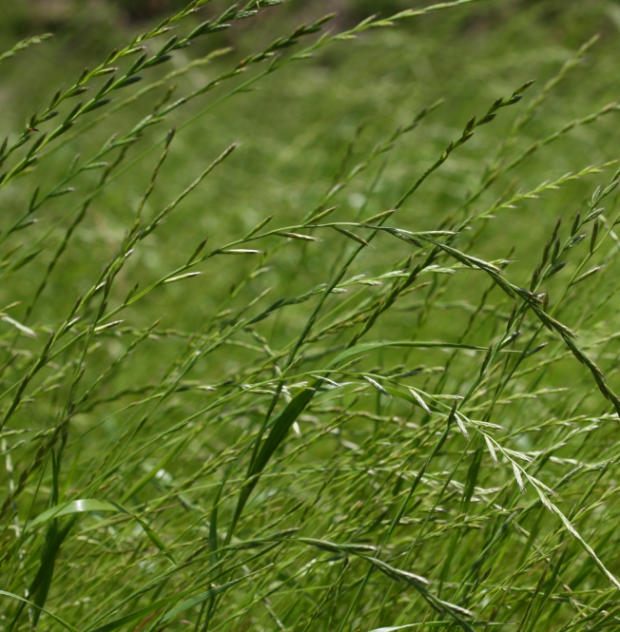
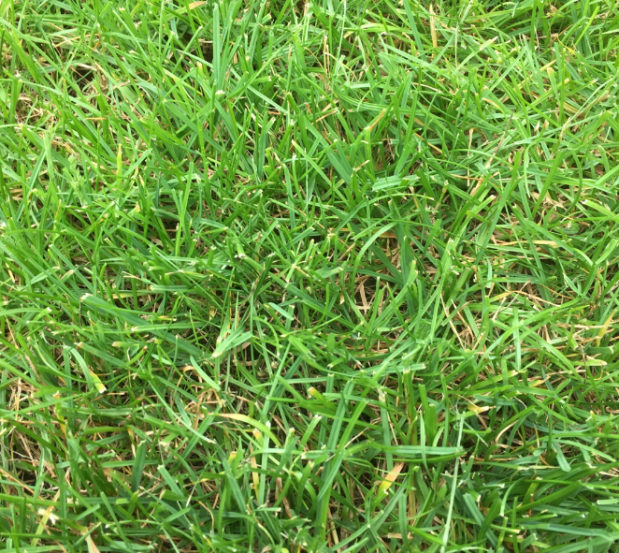
We rarely think of lawn grass as diverse, but the truth may surprise you. Many grasses can serve as ground cover and can lend your yard a unique appearance. Here we’ll introduce 4 kinds of warm-season grasses that are good for warm-weather and 3 cold-season grasses that serve colder regions.
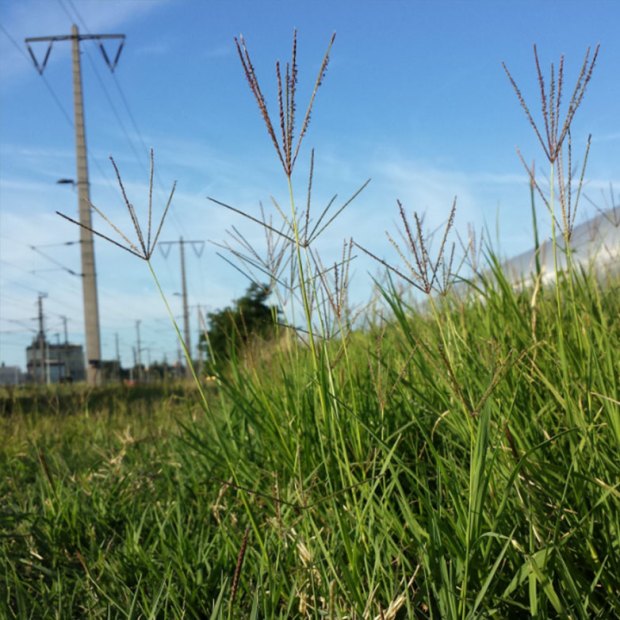
Bermuda grass (Cynodon dactylon) is a grass native to the eastern hemisphere, though it is not native to Bermuda. In Bermuda, Bermuda grass is considered an invasive species. Hybrid breeds of Bermuda grass may contain cyanide and poison livestock, so caution should be exercised with regard to livestock.
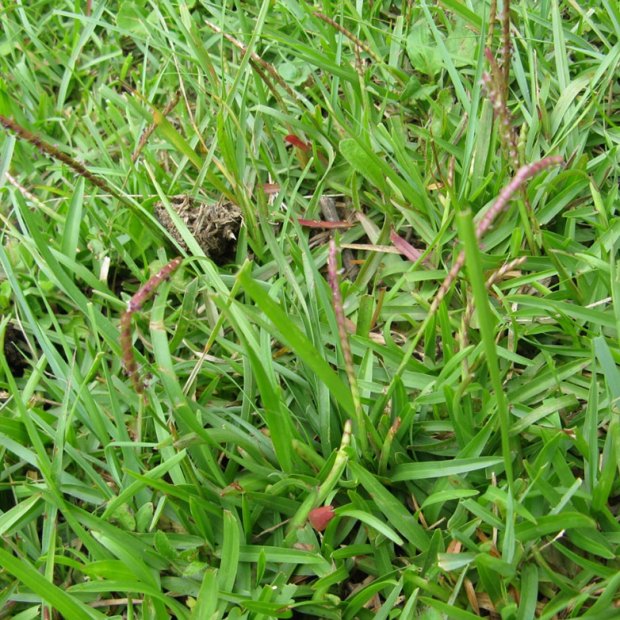
Centipedegrass is a warm season lawn grass. It is a thick sod forming grass that spreads by stolons, and is medium to light green colored. It has a coarse texture with short upright seedhead stems that grow to about 3-5 inches. Centipedegrass seed is native to southern China and was introduced to the United States in 1916. It has since become one of the common grasses in the southeastern states and Hawaii. Centipedegrass can also be considered a weed.
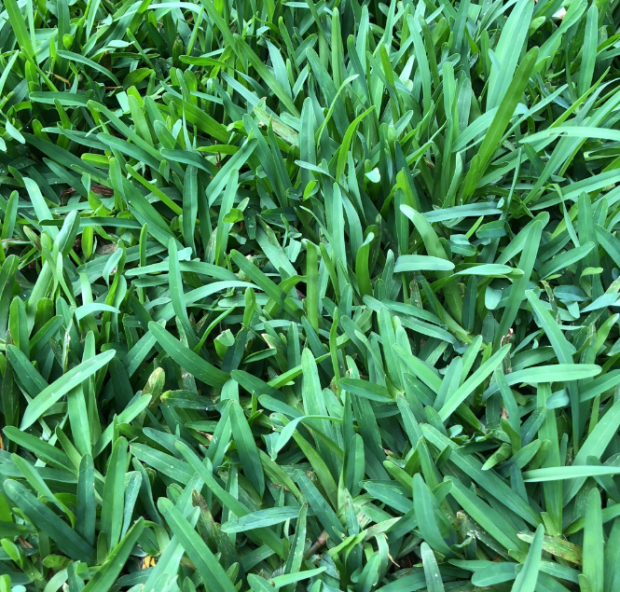
St. Augustine’s grass (Stenotaphrum secundatum) is a plant species also known as St. Augustine grass. It is a common lawn grass as popular as Bermuda grass, and thrives in the Mediterranean region and tropical climates. It is common in the southern United States, Hawaii, South Africa and New Zealand.
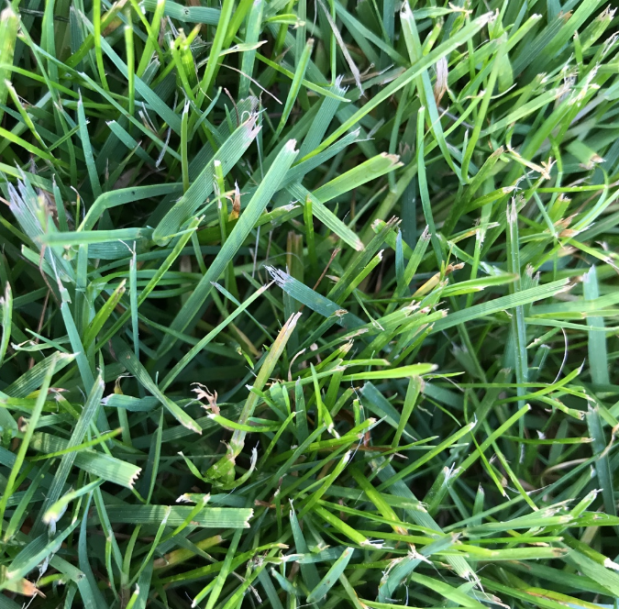
For a lush lawn in high traffic areas, Korean lawn grass, or Zoysia japonica is a solid choice. Also used for sports fields, golf courses, and commercial lawns, this grass is thick and lush. It is typically planted as sod, although some varieties will grow well from seed. Korean lawn grass needs to be mowed short and its soil needs to dry out between watering so that it can develop a more drought resistant root system.
Kentucky bluegrass is one of the most commonly planted grasses for lawns in cool and humid parts of the United States. The name refers not to the color of the grass stalks, but instead is due to the purple-blue flowers that are seen if the grass is allowed to bloom. A good spot to see Kentucky bluegrass is at Lambeau Field in Green Bay, Wisconsin, home of the Green Bay Packers football team.
Perennial ryegrass (Lolium perenne) is a plant species native to Eurasia. Perennial ryegrass is used in mixtures of lawn seed to feed cattle and to control erosion. Perennial ryegrass is also used to create turf for golf courses because of its hardiness. In countries where it’s imported, this plant is often considered an invasive species.
Tall fescue (Lolium arundinaceum) is a perennial grass that grows 2 to 4 feet high. Many people consider it an invasive species because it causes ecological problems in woodlands, savannas, and grasslands. This species is native to Eurasia and was brought over by early colonists for livestock grazing.
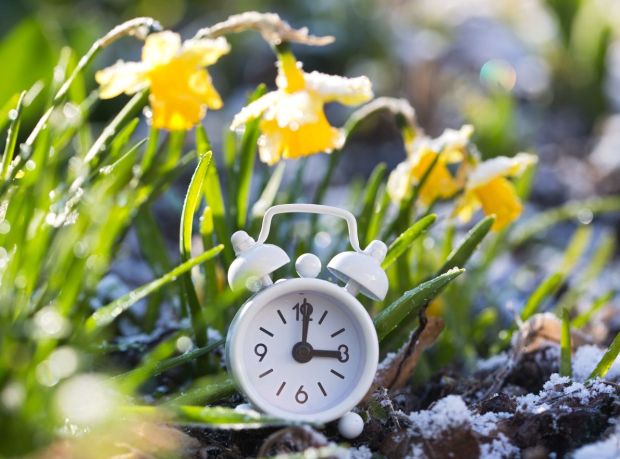
Starting Seeds Outdoors (in Spring and Early Summer)
Starting your seeds outdoors when the weather warms up has many benefits. Many seeds benefit from direct sunlight as this allows the plants to grow stronger with vigorous root systems. Here’s a complete guide on how to start your seeds outdoors.
In colder climates, many people must start seedlings early indoors (under lights or in a greenhouse / cold frame). Yet, while some plants benefit from an early jump-start of a few weeks or months indoors, a surprising number of flowers and vegetables grow better if sown outdoors a bit later in the season.

Regardless of where you garden is and what you are growing, outdoor sowing has plenty of benefits. Direct sunshine provides the ideal light quality, especially in late spring and early summer. The full spectrum light combined with light wind and breeze naturally aids growth, resulting in stronger, robust seedlings with thick stems and vigorous root systems.
Many of your plants will be much happier if they are started outdoors. The following information will give you step-by-step guidance on how to start your seeds outside successfully.
Begin by assessing what each seed requires for good germination. Every type of seed has slightly different requirements in regards to temperature, moisture, and light. As with baking, gardening is sometimes more of a science than a craft. It’s wise to research the specific requirements each type of seed needs in regards to temperature, moisture, and light before you begin seeding.
Be sure to consider climate and location as well. A gardener in Los Angeles must contend with a different set of growing conditions than a gardener living in London.
It’s best to organize one’s seeds by planting time rather than alphabetically. Many flowers and vegetables prefer to be sown much later than the earliest date suggested on a seed packet. Nearly all flower and vegetable seeds germinate faster and grow better when they are sown later in spring or early summer.
They also thrive when seeded outside versus indoors. Flowers like marigolds, cosmos, asters, zinnias, and even rudbeckia, while offered for sale in early spring (often already in bloom) at stores, will truly grow much taller and have a far more extended bloom period if sown outdoors. If there is any doubt, note that this is how many flower farmers grow them – in successive plantings all summer long.

An outdoor seedbed is often ideal for starting many seeds that are pre-started indoors. The seedbed can be a simple area set aside from other plants and competition where the soil is bare and where one can easily access it to water and weed. Some people used a portion of a raised bed in their vegetable garden as their seedbed. The seedbed can also be within an outdoor cold frame with heating cables if located in a colder climate.
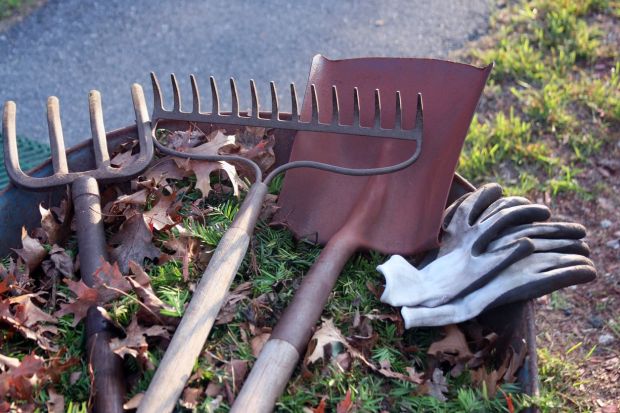
Most seeds prefer a loose, friable soil that is neither too wet nor too dry. Prepare the soil by turning it over with a tiller or fork to loosen it and remove any large rocks or roots with a rake. Compost added to the soil will add moisture retention and nutrients. Extra fertility is rarely needed, but a water source nearby will help during dry spells. Few seedlings can tolerate dry periods due to their small size. A sprinkler or a nearby hose will be helpful.
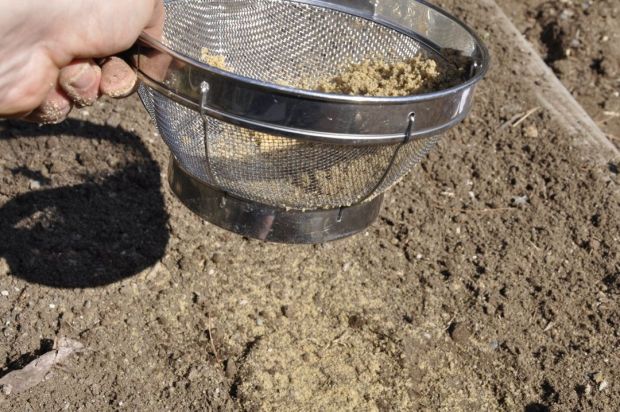
Very small seed can be mixed with sand to help distribute it evenly.
Few seeds grow well if sown too thickly. Since you will be transplanting seedlings to different locations, leave some distance between seeds. A tiny seed can be especially challenging to sow thinly, but a good trick is to mix a packet of dust-like seed in some dry sand before sowing, which will help distribute the seeds more broadly. A kitchen sieve can be helpful for this task.
Some seed requires exposure to daylight to germinate, while others require complete darkness. Daylength (Photoperiod) too can affect growth and bloom time. For example, marigolds and zinnias will bloom quicker if planted in mid-summer rather than in early spring. Use the description on the back of the seed packet as a starter guide and research online to see if there is more information available. The larger seed companies often offer commercial grow-sheets as free, downloadable pdfs that offer in-depth cultural details for most of the larger crops they sell.
Keep outdoor seedbeds watered during dry spells and free from weeds. The goal is to reduce any stress that can interfere with the growth of young plants. Thin any seedlings that are growing too close to each other. A good guide is to leave at least one inch (25.4 mm) between seedlings. This distance will provide enough room to dig out plants without damaging nearby seedling roots. If one sowed seed thinly, this should not be an issue.
Zinnia seeds sown outdoors in a tray after the weather is warm will grow many times faster than any started early indoors.
Sowing seeds outdoors in cells, plug trays, or modules is a convenient alternative to sowing directly into the ground. This method is different from preparing seed trays for germinating indoors under lights or in a germination chamber. Plants often respond far better to conditions outdoors. They germinate and grow stronger with the benefit of bright, natural sunlight. Furthermore, the natural temperature differentiation between night and day and some light wind will ensure that the stems will grow sturdier and thicker than if they were grown indoors.
While nearly any container will suffice for starting seeds (from recycled yogurt cups and take-out containers to professional plastic pots, modules, and plug trays), be sure that the containers are at least 2 inches deep and have drainage holes. Be sure not to use garden soil as it will become too compact in the containers. A sterile professional potting mix is ideal as it will be both well-draining and have some moisture retentive material in it (usually coir or organic compost).
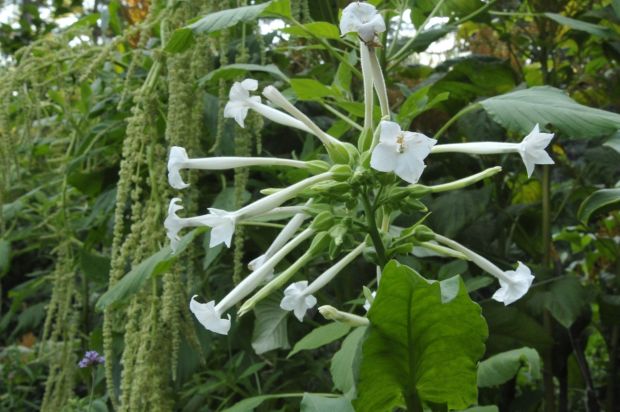
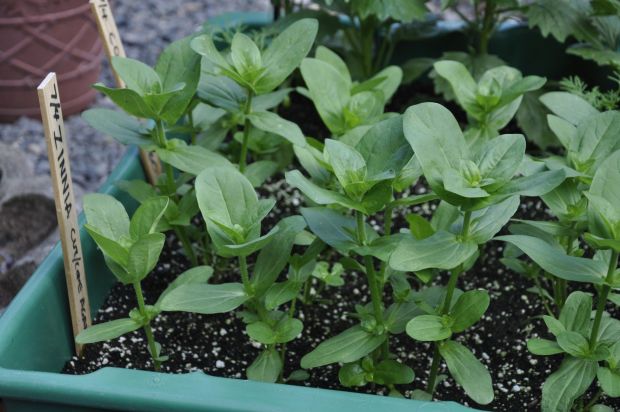
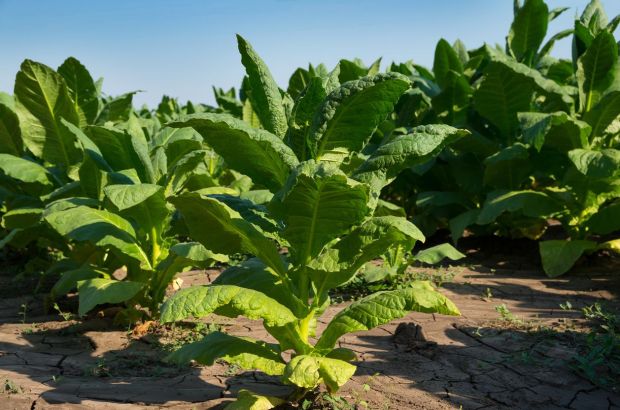
Warm weather annuals that dislike root disturbance such as flowering tobacco are best transplanted to their final flower beds just as the young plants have produced their second or third pair of leaves.
Lastly, don’t allow seedlings to grow too large before transplanting them to their final location. A good rule of thumb is to lift and divide seedlings once they have produced their second or third pair of true leaves (never count the first leaf or first pair of leaves). Lift the young plants carefully with a fork or spade and relocate to their final growing spot in another bed or container.
The Best Flower To Give Your Dad This Father’s Day
Did you know that many men appreciate flowers just as much as women do? That’s why the official flower for Father’s Day is a red rose. Red roses are a universal symbol of love and most Dads would love to receive a bunch. Here’s why.
The first Father’s Day began on June 19, 1910 in Spokane, Washington. After hearing a Mother’s Day sermon at church, Sonora Smart Dodd wanted a similar sermon to appreciate her own father. Her father had raised her and her five siblings alone on a rural farm after their mother’s death. The pastor agreed.
And it was with that first inaugural Father’s Day in 1910 came the official flower: the rose.
The official flower of Father’s Day is the rose. Why? Sonora Smart Dodd selected the flower herself, suggesting that people wear a white rose to honor a father who has passed away, or a red rose to honor a living one. While some countries still honor this practice, many others simply give gifts.

While we often associate red roses with romance and Valentine’s Day, they’re also a universal symbol of love.
Many people’s first thought was probably not flowers as a present. Gift guides try to tell us that our fathers would rather have a steak, a fishing rod, or whiskey. You know, that really stereotypical image of the stock, ultra-manly man. The image that doesn’t really represent many men at all.

But it really depends on who your father is and what he likes. Many men love flowers. They become florists. They learn flower arrangement. They love to garden, or just wish they had a green thumb. They like a pot of bright daisies outside their door to welcome them home. And some men would rather have a steak.

Will your dad like getting flowers? Can’t tell you that. You know your father best. And if you’re still not sure, try it and find out. He might love it because you gave it to him, or you might just find he’s been waiting to get a bouquet of his own all his life, but couldn’t admit it.
If you love the idea of this tradition but your father isn’t into flowers, you can still honor him with a rose pinned to your lapel.
While roses are the official flower, there’s no rule saying you must give roses. Think about what flowers your father will like. If he’s a gardener, he may enjoy a live plant to add to his burgeoning garden.
Florists suggest big blossoms in bold colors (avoid pastels unless your father likes them), with more structure to the arrangements. The official colors of Father’s Day include black, white, dark red, and dark blue, if you want to get even more into the symbolism.
Something sophisticated
Something cheerful
Something living
This Father’s Day, honor your father with a bouquet of roses or other flowers. This might be the Father’s Day present he’s been hoping for.
An Introduction to International Floriculture Expo in America
The International Floriculture Expo is the largest floral-related event in North America and brings together industry thought leaders, buyers, and vendors together in one place. You can make new contacts and compete in the Designer Competition for a chance to win some amazing prizes.
If you’re not in the flower business, you might not have heard of the International Floriculture Expo. While it might be the largest floral-related event in North America, it is strictly for B2B businesses such as event planners, retail florists, online retailers, nurseries, distributors, supermarkets, and more. However, if you do happen to be a key buyer, it’s an excellent event not just to source flowers but also to learn from industry thought-leaders.
The IFE started decades ago initially under the name Super Floral Show (SFS). It was eventually acquired by a new owner back in 2005, which came with the name change to IFE. Since its inception, the event has attracted attention from companies around the country. As of today, it remains the largest high-volume B2B show in North America offering a wide range of products from fresh cut flowers and greens to potted plants, containers, technology, balloons, care and handling, and more. There are over 200 vendors at the event from around the globe so you’ll definitely be able to find what you’re looking for.
Depending on your business, you can choose to come as an attendee in order to source flowers, accessories, and services. Or, if you are a retailer, you can exhibit to increase your clientele list. Considering the event attracts thousands of interested buyers, there’s a huge opportunity to really get your business off the ground.

In addition to networking with thousands of floral professionals and checking out the latest and greatest products, the expo also offers educational panels to help you grow your business. Panels range on a variety of topics including current trends, business advice, and floral design.
Even if you’re not able to make a panel, the IFE provides on-demand content for free through their Floral Connect. These videos focus on yearly trends for the floral industry and how you can apply them to your own business. From talking about consumer habits, marketing, sales trends, color trends, etc. you can find plenty of topics that will help your business grow.

The IFE is held every year over the course of four days. Costs to attend vary based on when you register and what you plan on doing. If you only intend on going through the exhibit hall, the pricing ranges from $50~$100; while if you also wish to attend educational day, the full package ranges from $295~$395 depending on when you register. If it’s your first IFE or if you are a small business, it might make more sense to just pay for the exhibition hall pass than the full package.
If you’re an exhibitor, you will have to fill out a form to apply for a booth. Prices vary based on the size of your booth. If you don’t plan on selling but want to attend as a supplier or service/provider, you are subject to a $3,500 fee to attend.
The event takes place in Miami Beach, Florida, which is a notoriously expensive city in the United States. However, there are plenty of affordable food and even hotel options available if you’re willing to be a little further away from the main convention center. Make sure budget for travel and hotel accommodations as well as meals while you are in attendance.
The IFE has two popular events with the first being the flower naming ceremony. The ceremony honors pioneers who have made an impact in the floral industry by naming a flower after them. In order to be considered for the ceremony you, or whoever you nominate, must meet the following criteria:
Once the naming ceremony has concluded, it is immediately followed by the second most popular event – the Iron Designer Competition. Competitors must put their design skills to the test to create a beautiful design based on the yearly theme in just 20 minutes. Anyone can enter, but only one person will be the winner.
The IFE is a must attend event for anyone who is in the floriculture industry. Not only will you be able to network with thousands of other professionals, you will also be able to learn more about the business. If you’re feeling up for it, you can even enter a design competition. Even if you don’t, there are plenty of things to do at the largest B2B floriculture expo in North America.
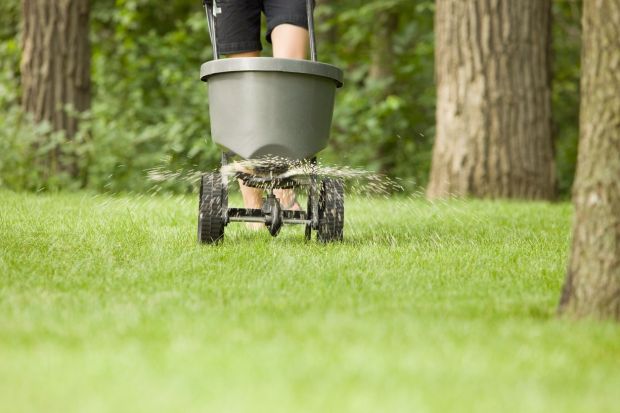
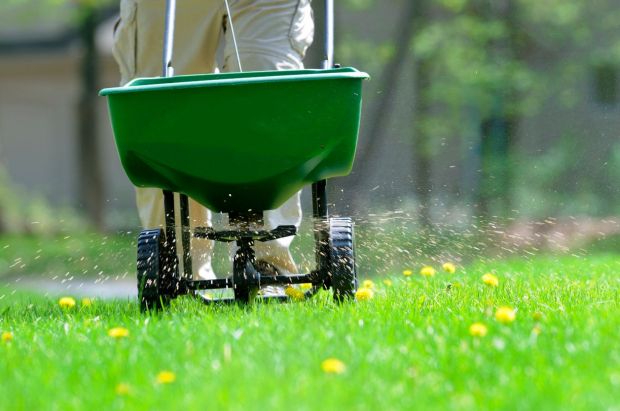
What You Need to Know About Fertilizer
If you want to grow healthy plants, you need to know what to feed them. Learn all about the benefits of fertilizer, what to look for in a fertilizer blend, and the best strategies for applying it to your plants.
When you’re looking to grow the healthiest plants possible, sometimes they need a boost. Fertilizers promise to give you long-lasting blooms, bigger harvests, and more productive plants. But, knowing where to start with fertilizer can be overwhelming when you’re first getting started.
Here’s a closer look at how fertilizers work and what you need to know to choose one for your garden.
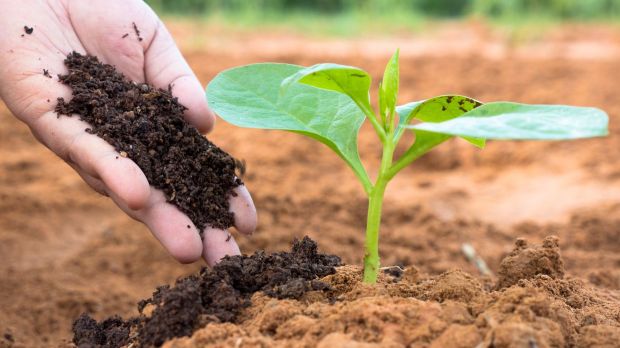
Plants pull everything they need to thrive out of the soil through their roots. Over time, they absorb such a large concentration of nutrients that the ground becomes depleted. Adding fertilizer to your garden replenishes these nutrients so that plants continue to grow well.
Put another way, adding fertilizer to a garden is like putting money back in the bank after draining your savings account.
Though fertilizers can contain dozens of compounds that promote plant growth, three primary nutrients make up almost the entire formula: nitrogen, phosphorus, and potassium. On a soil bag, you’ll see these represented as N-P-K, or as numbers in place of each letter to represent the ratio of each nutrient within it.
For example, a 100-pound bag of fertilizer could be labeled 5-7-4. This means it contains five pounds of nitrate, seven pounds of phosphate (phosphorus), four pounds of potash (potassium), and 84 pounds of filler materials.
Here’s why each nutrient is important:
As one of the most common elements in nature, nitrogen is critical to all forms of life. Homemade compost and animal manures contain lots of nitrogen. This nutrient is responsible for giving plants vibrant green foliage, and too little leads to stunted leaves. However, excessive nitrogen can be just as problematic, as it makes plants prioritize leaf and stem growth at the expense of producing flowers or fruit.
This nutrient is critical for root growth and bloom formation, making it an essential component for all fruiting plants. A lack of phosphorus will lead to stunted tomatoes or squash plants that never develop blossoms. Good sources of phosphorus include bone meal and rock phosphate.
Potassium promotes photosynthesis and helps the interconnected systems within plants function together. Without it, plants look weak and spindly. Wood ash can restore potassium levels, though too much can burn plants.

Beyond these three main components, plants need smaller quantities of other critical nutrients.
An all-purpose 5-5-5 fertilizer will typically provide an ideal ratio of nutrients plants need to thrive. If your soil has specific deficiencies, you will need a specialized formula that can address them.
One primary decision every gardener needs to make is whether to use synthetic or organic fertilizer.
Synthetic fertilizers are made through a chemical process that typically uses oil and other nonrenewable resources. Most synthetic fertilizers are water-soluble and prioritize the three main nutrients (NPK), which means plants can take them in fast and show improvements quickly.
However, these fertilizers tend to be deficient in other essential nutrients, potentially leading to problems for plant health over the long term.
In contrast, organic fertilizers come from naturally occurring materials that may include mineral deposits, bone meal, fish emulsions, or composted manure. In most cases, organic fertilizers are not water-soluble, which means they release their nutrients into the soil over time.
Ideally, you want to apply them in the fall so that they can break down over the winter and be available for your plants by spring.
Beyond feeding plants, organic fertilizers improve the soil’s structure and create habitat space for beneficial soil microorganisms that aid plant growth. They also tend to be more complex than synthetic options and will provide plants with all the necessary secondary plant nutrients.
So, in short, synthetic fertilizers are easy to use and offer fast results but often don’t support long-term plant health. Organic amendments work more slowly, but they promote overall soil health and give plants a better balance of essential nutrients.
Some gardeners may find a blend of both works best. Consider using organic fertilizers in the fall to enrich your soil and promote microbial life, and apply synthetic fertilizers as needed over the growing season to keep things vibrant.
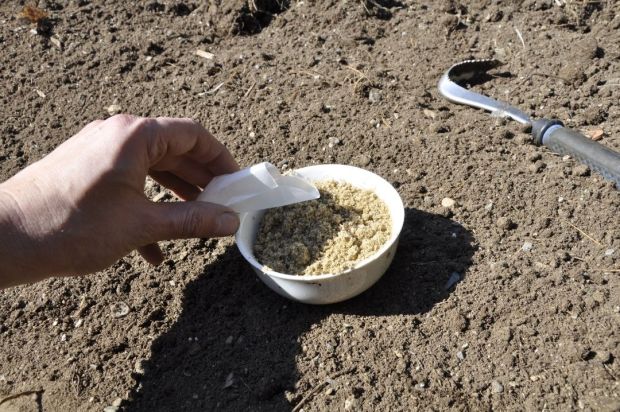
Fertilizers come in multiple forms depending on your preferred method for feeding your plants. Here are some to be aware of.
Dry Fertilizer: As the easiest type of fertilizer to apply, dry fertilizers can be scattered by hand (wear gloves!) or dispersed over a larger area with a spreader. You can add more around the base of plants over the growing season to aid their growth.
Slow Release: This fertilizer typically comes with a coating that breaks down over time after heat and water exposure to slowly release its nutrients into the soil. This makes it possible to fertilize without fear of burning your plants. To use, sprinkle directly into the ground.
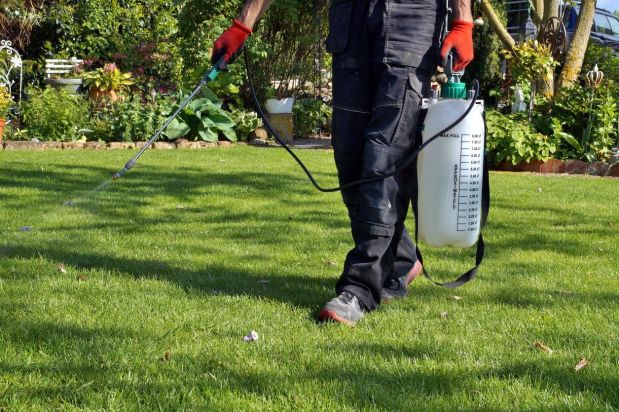
Liquid: Plants can absorb nutrients up to 20 times more efficiently through their leaves than the roots. For this reason, liquid fertilizers are usually sprayed directly onto plant leaves, so it absorbs the nutrients directly. Any that drips into the soil will get taken in by the roots. This provides plants with a quick nutrient boost and is one of the best ways to revive fading plants. As liquid fertilizers are potent, you must take care to dilute them according to the manufacturer’s instructions.
Choosing the right fertilizer for your garden is an important decision. Take time to research what’s best for your plants, and your garden will thrive from your effort.
15 Perennial Plants That Bloom in Early Springtime
After the long winter months, we all want a pop of color to liven up our outdoor spaces! As soon as spring shows its face, you can count on these spectacular and rather hardy plants to bloom and brighten up your garden.
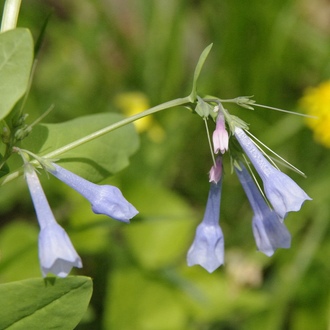
Virginia bluebells (Mertensia virginica) is native to eastern North America. However, it’s being increasingly threatened in its original environment by both destruction of habitat and the obstruction of natural river flooding. It has nearly hollow stems, so they’re fragile and break easily. Flowers start off pink, and then gradually turn light blue.
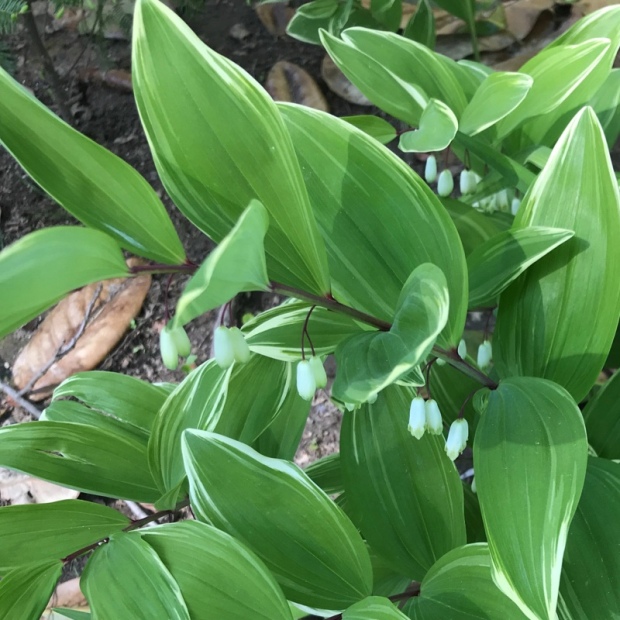
Smooth solomons-seal (Polygonatum biflorum) has scars on its rhizome (an underground stem) that look like ancient Hebrew writing – thus the name that references the Hebrew King Solomon. It produces small white bell-shaped flowers in spring and blue-purple berries afterwards. Care must be taken since the berries are poisonous to human.
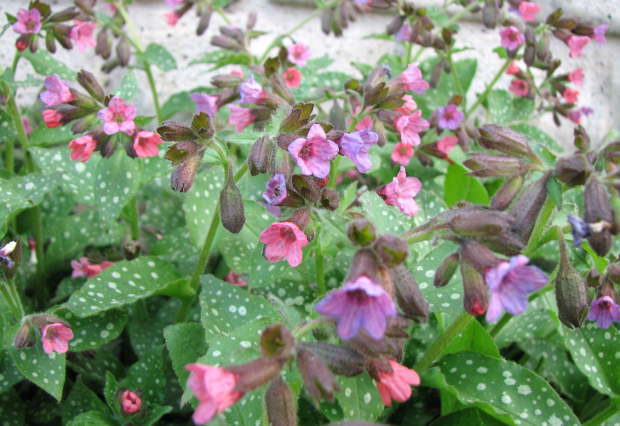
Common lungwort is an evergreen perennial, and “Pulmoa” from its genus name means “lung” in Latin. If you look closely, you’ll see that the Common lungwort’s leaves have the appearance of a somewhat unhealthy lung. The unique flowers of Common lungwort are red at first and change to blue as the pH of the plant changes.
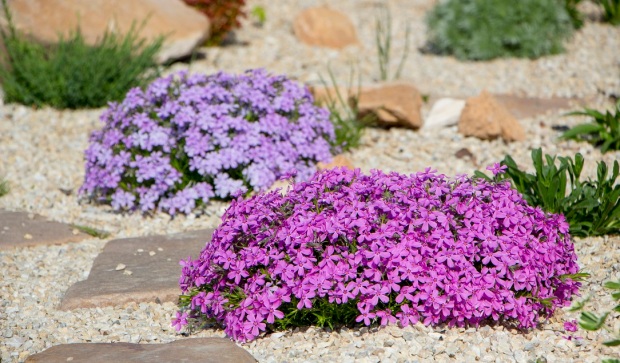
Moss phlox (Phlox subulata) is a flowering plant native to the United States. The Latin name Phlox subulata means needle-shaped, which describes its leaves. Moss phlox is sometimes confused with marijuana due to its similar smell.
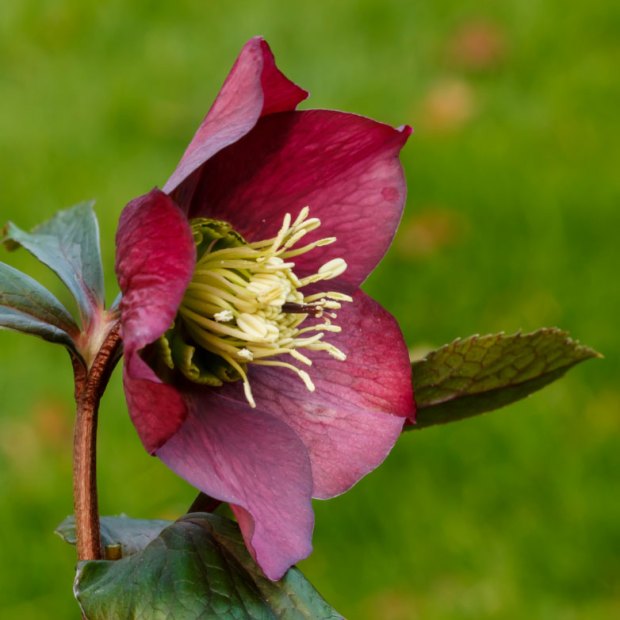
The Lenten rose has been cultivated since the Germans began to do so in the mid-1800s, with varieties being created in the United Kingdom shortly after. Between the 1920s and 1960s, there was little interest in its cultivation until Helen Ballard bred new varieties. They blooming early in the year hence they get their name of Lenten rose.
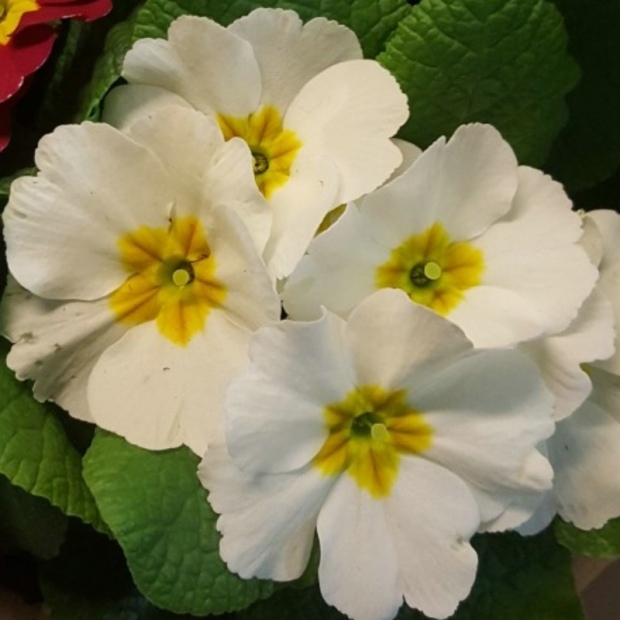
Primrose is a welcome sight in an early spring landscape. The vibrant colors of the flowers and a light, delicate scent make the Primrose a favorite. This plant provides vibrant color to any container or flowerbed, with hues available in yellow, pink, purple, blue, orange, red, white and bi-color.
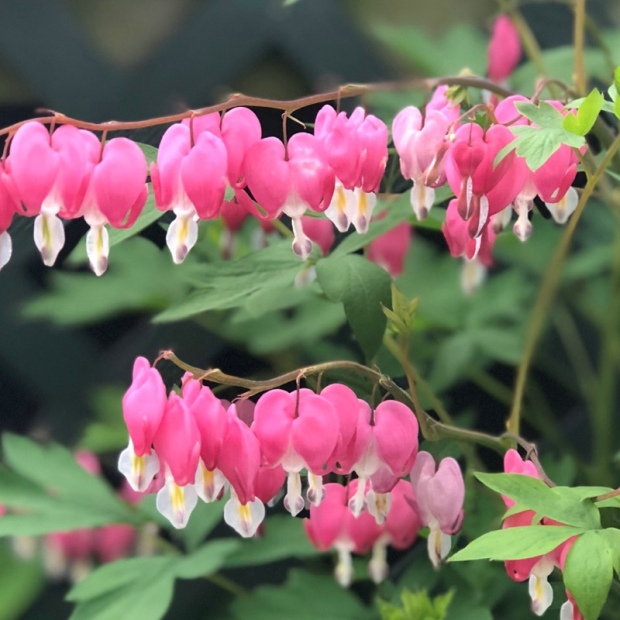
Bleeding heart is a highly valued flowering plant belonging to the poppy family. The flowers are a conventional heart shape, which explains its name, with a small droplet that falls just beneath the flower. The seeds contain elaiosome, a popular food source for ants. They take the seeds to their anthills, aiding in seed dispersal.

Heartleaf bergenia (Bergenia crassifolia) is a plant species that is tolerant to cold and warm climates. This species has leaves that change color and range from rust brown to brown-red. Heartleaf bergenia leaves are used to make tea in Siberia. Its latin name Bergenia crassifolia means thick-leaved.
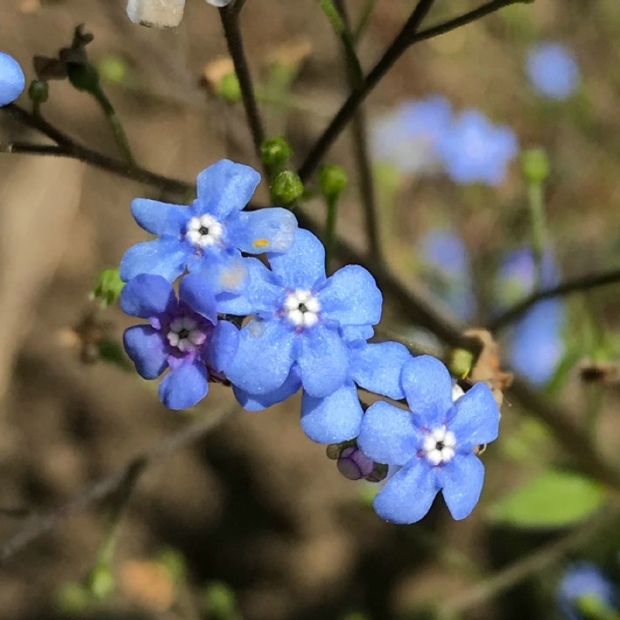
Siberian bugloss (Brunnera macrophylla) is a flowering plant native to the Caucasus. Siberian bugloss is also known as the forget-me-not. The latin name Brunnera macrophylla means large leaves.
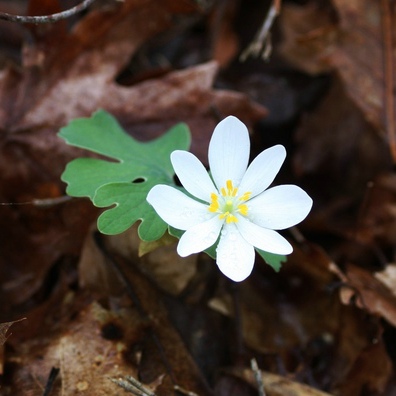
Bloodroot (Sanguinaria canadensis) is a plant species native to eastern North America. In the wild its early spring blooms can be seen spreading across the forest floor or along riverbanks. Its common name comes from its reddish orange-sap, which can be made into a dye. Bloodroot seeds are often spread by ants who take them back to their nests.
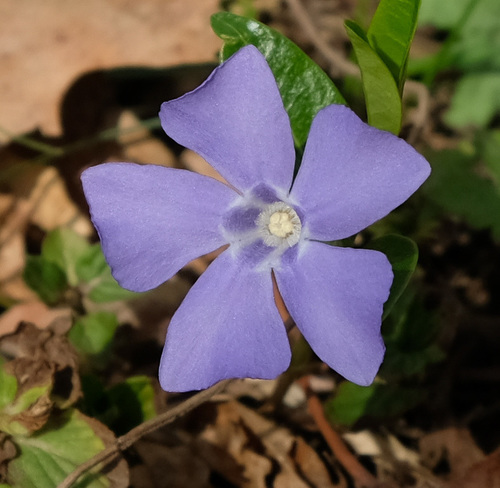
Common periwinkle (Vinca minor) is a trailing evergreen subshrub that forms large, dense colonies. Because of this quality, Common periwinkle is commonly used in landscaping as a groundcover. It is a mildly toxic plant, but due to its pungent taste, it rarely gets ingested in amounts significant enough to cause toxic effects.
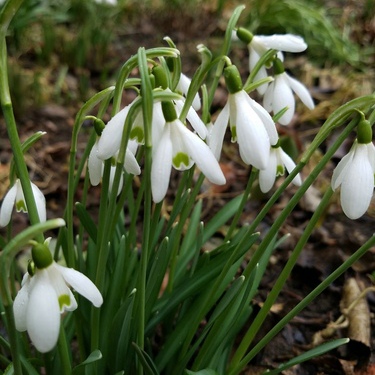
A herald of spring, the Snowdrop grows up to around 7-15 cm tall. Sprouting from bulbs, the drooping bell-shaped white flowers are accompanied by two slender, erect leaves. These flowers have been noted throughout history, with references going as far back as the fourth century.

Wild daffodil (Narcissus pseudonarcissus) is a perennial flower that grows from bulbs. It is a common ornamental plant, famous for its pale-yellow flowers with a bright-yellow central trumpet. In the wild, Narcissus pseudonarcissus can be found in forests, grasslands, and rocky terrains. Its bulbs and leaves are poisonous when ingested.
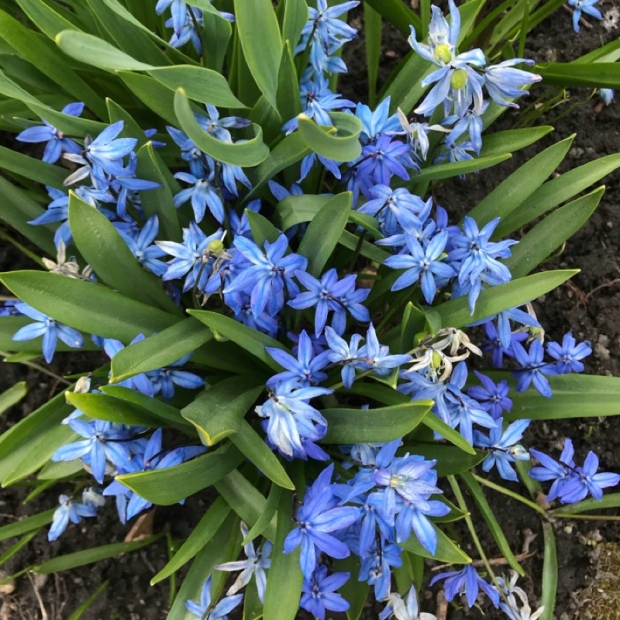
Siberian squill (Scilla siberica) belongs to the lily family. Its common name is a misnomer, since it’s not native to Siberia. Siberian squill originated in other parts of Russia. It’s a plant that’s been cultivated since 1796 and grows best in partial sunlight.
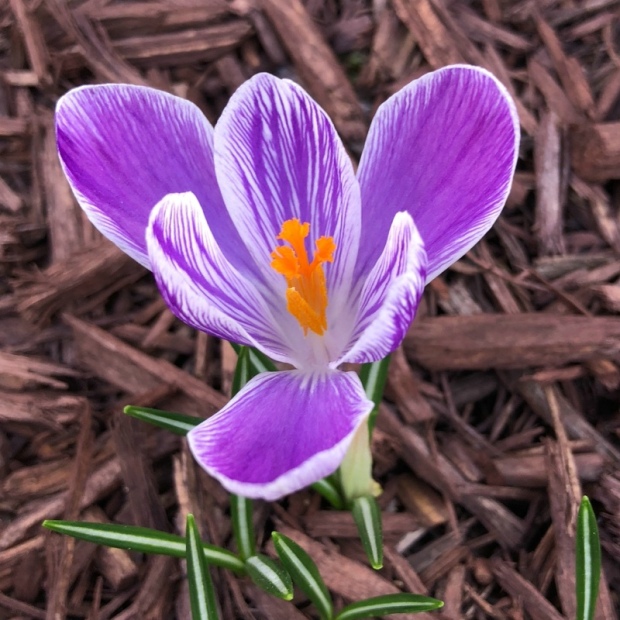
Dutch crocus (Crocus vernus) is an early spring blooming bulb with large flowers that range in color from yellow, white, and purple to striped or bronze. The plant grows 4 to 6 inches tall in full sun or partial shade. Makes a colorful display when planted under trees, in rock gardens, or in flower beds.
What You Should Know About Mosaic Viruses
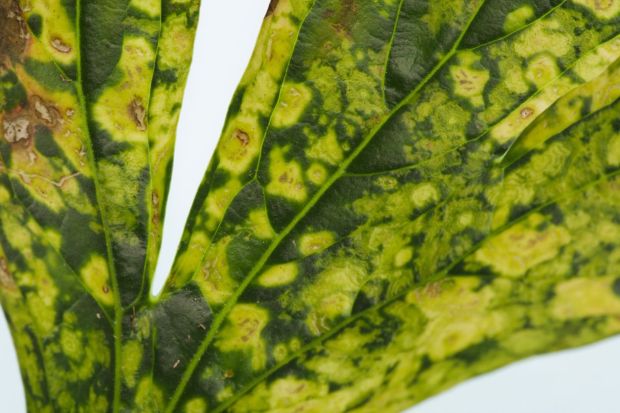
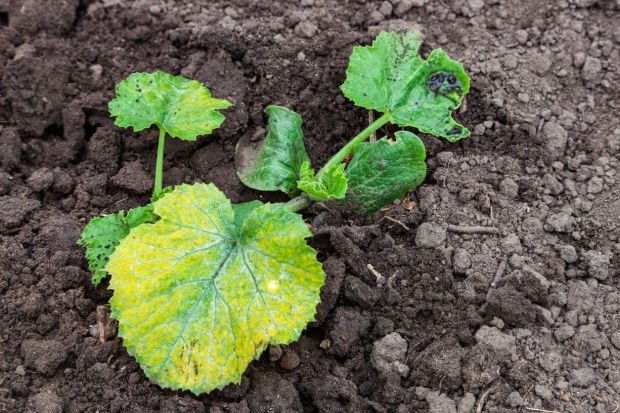
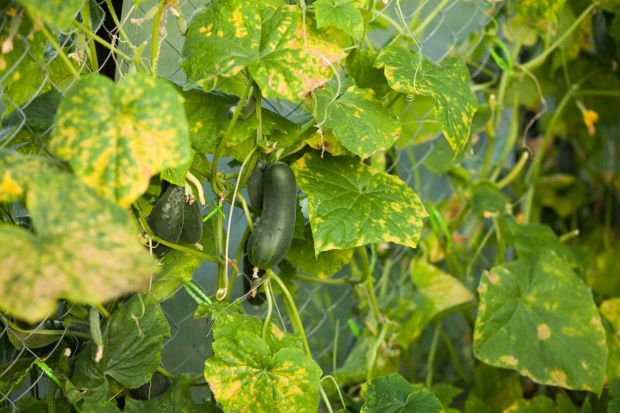
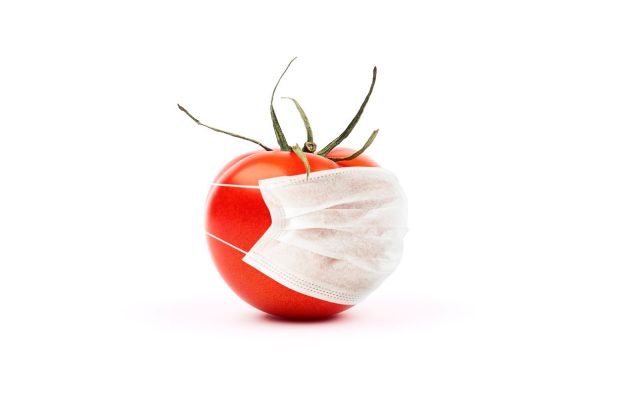
Mosaic viruses affect many different types of plants grown in your garden. These include tomatoes, cucumbers, peppers and fruits such as grapes, bananas and papayas. Find out how to identify this virus and what to do about it.
The term Mosaic Virus is a broad description of many plant viruses that can cause mottled and deformed foliage on at least 150 agricultural and ornamental crops. Home gardeners are most likely to encounter viral problems with a handful of plants that they grow, most likely tomatoes, cucumbers, squash, and beans in their gardens. Still, there are mosaic viruses that affect many other important plants such as fruit (grapes, papayas, and bananas), grains (such as corn, rice, and oats), and even certain houseplants (poinsettias, freesias, and orchids), to name a few.
With dozens of species-specific Mosaic Viruses found worldwide, there is one thing that they all share in common – there is no cure. That said, there are proven ways to eliminate the virus from one’s garden and ways to avoid an outbreak.
The Tomato Mosaic Virus (ToMV) – The Tomato Mosaic Virus (T0MV) is so closely related to the devastating Tobacco Mosaic Virus (TMV), that without submitting samples to a plant disease laboratory, identifying and diagnosing exactly which virus your plants may be suffering from can be nearly impossible. However, the symptoms of most Mosaic Viruses appear identical, their treatment is typically the same.
Look for these tell-tale symptoms and signs on tomato plants (as well as the other crops affected by ToMV and TMV, such as cucumber, pepper, petunia, tobacco and lettuce.).
While cucumbers are also susceptible to Tomato and Tobacco Mosaic Viruses (they are all closely related), they also have their own Mosaic Virus. The Cucumber Mosaic Virus (CMV) affects most plants found in the squash and melon family (Cucurbitaceae). While cucumber crops, in particular, are affected by CMV, this special virus also attacks other crops, including lettuce, peppers, beans, celery, and spinach. It’s easy to see why identifying each Mosaic Virus can be challenging, but how you treat affected plants and solutions is relatively the same.
The cucumber Mosaic Virus manifests itself slightly differently from the tomato and tobacco viruses, but it still includes the typical deformed foliage and miscolored leaves. Affected plants typically start showing symptoms with immature or chlorotic foliage (extreme yellowing of the leaves) followed by curling and distorted young leaves that often appear thread-like. Flowers may abort before bearing fruit, and any fruit that does mature will usually exhibit roughly textured skin.
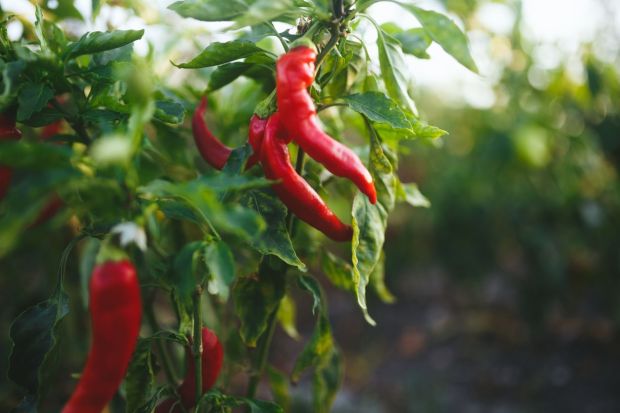
Pepper Mosaic Virus (PMMoV). The pathogen that affects peppers often called the Pepper Mosaic Virus is also known as the Pepper Mild Mottle Virus (PMMoV). Its symptoms are similar to other TMV and are considered closely tied to the entire Tobacco Mosaic Virus family. The Pepper Mosaic Virus is unique to peppers (whereas the Tobacco Mosaic Virus affects all most plants in the tomato family (Solanaceae). Spread mainly by infected seed, it’s the single major pathogen affecting pepper crops worldwide.
All of the mosaic viruses spread quickly. Most commonly, transmission occurs via humans as they handle infected plants. Cross-contamination can also occur from gloves, tools, and even clothing, so cleanliness is essential. The virus is also easily spread by contaminated seeds. Since the virus can live in soil for a few years, never re-plant the same crop where infected plants once grew a year or two earlier.
The best prevention is to remove and destroy infected plants, rotate crops, sanitize and disinfect any tool or material that came in contact with the disease.
While no plant is known to be 100% immune to any specific Mosaic Virus, many hybrid plants or selected ones can be relatively disease resistant. Look for disease-resistant varieties of tomato, bean, and cucumber in seed catalogs and on plant labels. The codes for disease resistance are usually listed at the end of a description. For example, some tomatoes highly resistant to ToTMV and TMV are ‘Sungold’, BHN-444, and ‘Big Beef.’
Tobacco is a significant vector in spreading many Mosaic Viruses. Avoid handling plants if you smoke cigarettes or use any tobacco product. The TMV virus particularly lives on dry tobacco and can easily be spread from fingertips to plants, even to houseplants.
While you can eliminate the virus from their garden quickly, there is no guarantee that the virus will not return. There is no fungicide that will be effective because the problem is a virus, not a bacteria or fungus. While insects can introduce or spread the pathogen from a neighboring garden that has infected plants, use of pesticides is not effective nor recommended.
You can casually introduce the virus via infected seed as the virus can lay dormant on a dry seed coat for years. Look for seed that has been heat treated or hot water treated. Be cautious when saving your own garden seed or when purchasing seed from private sellers online who may not have sterilized their seed correctly.
More often than not, the virus will appear unexpectedly with no fault of the gardener, as an infected tomato or pepper plant often won’t show the tell-tale mottled or deformed foliage until the plant is nearly mature during the heat of summer. It’s rarely seen on young plants or during cold or wet weather. Remove any infected plants once discovered.
If a crop exhibited the virus in one season, rotate the bed or garden with crops that are not susceptible to the virus for at least two years, or allow the bed to lay fallow. Clean and sterilize anything that came in contact with the plants with a 10% bleach solution, including garden tools, gloves, and even staking material. Growing crops in sterilized potting soil and clean containers will also improve results. Never reuse old potting soil from a previous season.
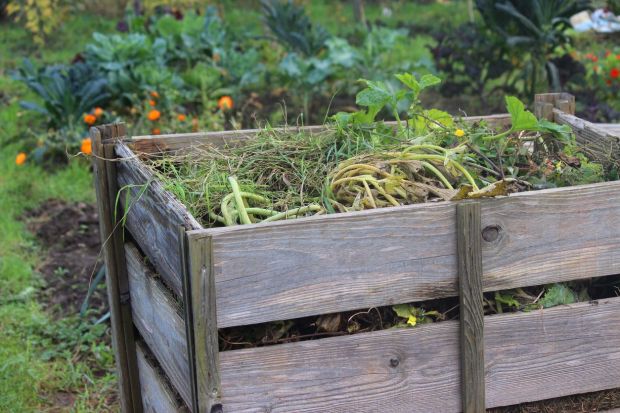
Take care when cleaning the garden in the fall. Dispose of any affected debris properly (burn or trash, and never introduce it to the compost bin). Be sure to remove any roots and underground parts for plants like potatoes to ensure that none of the pathogens remain within decaying plant material.
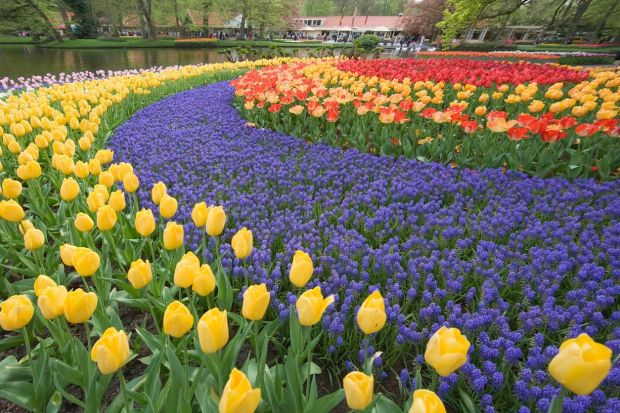
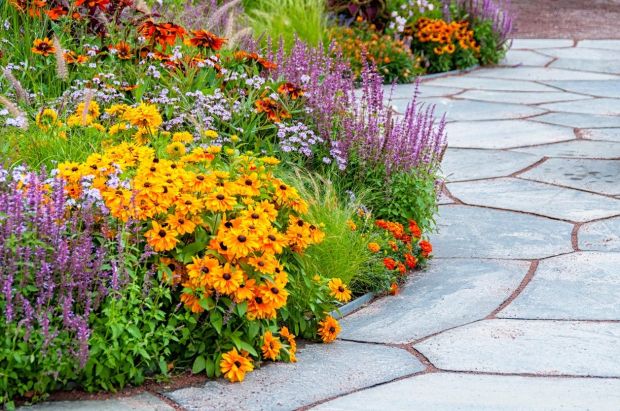
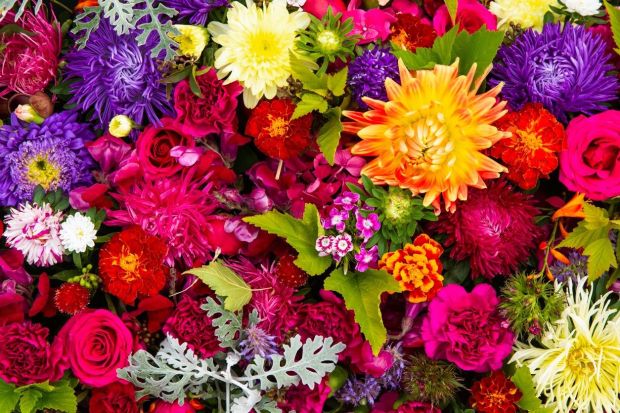
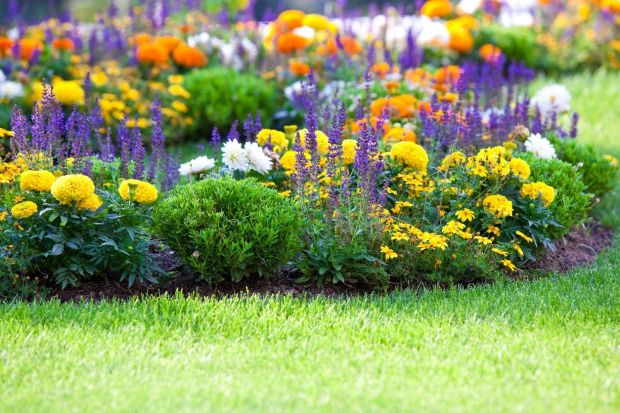
Using Color in Your Garden to Create a Colorful Scene
Adding color is a great way to improve the visual appeal of your garden. The issue is that many novices are unaware of how to use color effectively. This article will teach you the basics of color theory and how you can begin using color in your garden.
Color is one element that can bring more life to your garden than nearly any other. However, working with color in the garden is a more challenging task than you might expect. That is why we created this guide to using color in your garden. After reading, you will be ready to arrange plants in a way that inspires awe in all who visit your property.
Color is important in many artistic ventures. For that reason, humans over the centuries have developed different theories about colors regarding how they appear to the human eye and how they interact with one another. Understanding the basics of color theory will serve as your first step towards using color in your garden or any other visual pursuit.

Today, we divide colors into several distinct groups. This classification helps us to know how different colors will mix with one another and how to use each one effectively in a design. Here are the basic color groups that you should know:

As you may already know, we create secondary colors by mixing two primary colors. For instance, a mixture of red and blue will yield purple. Knowing about those basics will set you up to begin creating color themes for your garden.

Consider the color groups we mentioned above to be your building blocks as you attempt to create a design in your garden. Now that you have those basic blocks at your disposal, you can begin to develop a unique color theme for your garden space.
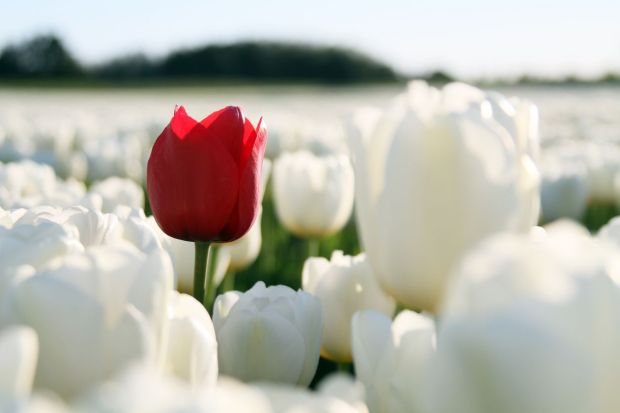
For example, you may be someone who wishes to see bold pops of color in their landscape. In that instance, you will want to use bright colors such as red, yellow, and orange, as these colors are the ones that will catch your eye most quickly.
Alternatively, you may want a more subdued color pallet. In that case, it makes more sense to use cool colors such as blue and purple. While these colors do not call as much attention to themselves as bright colors, they are a great complement to a calm, shaded garden space.
The color that you choose to use is entirely up to you. Your main goal here should be to choose a set of colors that pleases your eye. That way, you can ensure that you will enjoy your final product and that it will be an expression of your aesthetic preferences.
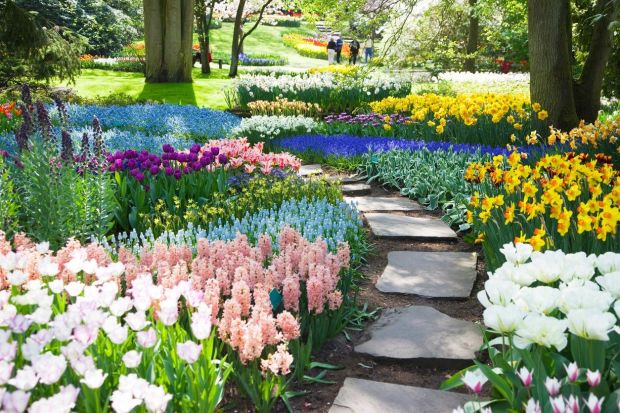
Although we have not explicitly stated this yet, we believe that the most effective way to add color to a garden is by planting flowers. However, there are some other factors that you will need to evaluate. What many people fail to recognize is that their garden already has a color theme. The structures and garden features that exist on your property will contribute to the overall color pattern. Be sure to complement these existing elements as you create your planting plan. Doing so will lead to a more cohesive final product.
Two other important influences of color design, and design in general, are continuity and contrast. Mastering the proper balance between these two opposing forces takes some time. But when done well, a pleasing mixture of continuity and contrast will make for an astounding floral display.
Using these elements properly is a matter of artistic taste. While that can be difficult to cultivate, there are a few tips you can follow. One reliable approach is to choose one color that will be present in different forms throughout the design. Then choose a contrasting color to appear here and there throughout the garden. This will allow your design to maintain its cohesion while also adding some excitement to the visual experience.
Building an understanding of color theory is challenging enough. Now you must also face the inherent challenges of the medium you are using. Unlike in many other art forms, a garden design relies on colors that will change throughout the season.
Anyone who has spent time planting and tending gardens knows that flowering plants each come with a specific bloom time. Because of this, you will need to use careful planning to make sure that the color you want to appear together will do so at the proper time.
For example, if you want to create a flower bed that will show a strong contrast between some purple and yellow flowers, you need to confirm that the purple and yellow flower species you plant have an overlapping bloom time. Otherwise, your color scheme will not have the impressive impact you seek.
Our last point proves that timing is an essential concern when planting a colorful garden. But timing is not a topic that is exclusive to bloom times. What you should also consider is your lifestyle as well as when and how you intend to use your garden space.

For your own benefit, you should think about choosing flowers that will bloom during the times of the year that you use your garden the most. If you have a tradition of hosting a Fourth of July party at your home, your best bet would be to choose some summer-blooming plant species. With such an approach, you and your friends will get to see your garden in its best form during the times of year that it matters most.

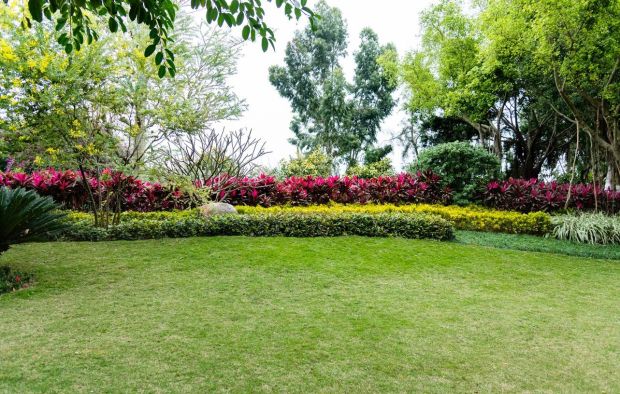
Our final tip on this topic is that you should not neglect green as an important color in your garden. Green is so widespread in the plant world that many people take this hue for granted. However, you might be surprised by home much a swath of green foliage can enhance your garden design.
Green leaves serve as a fantastic backdrop to the colorful flowers you plant. They also offer their own intrigue through interesting shapes and textures. Healthy green leaves also make it so that your garden will look lush and lively even when the flowers are not in bloom.
