Getting Garden Design Inspiration From Around the Globe

Getting Garden Design Inspiration From Around the Globe

There’s more than one way to garden — in fact, there’s a world of options! Learn about some of the most popular gardening styles from around the world to gain inspiration for your own growing space at home.

When it’s time to design your garden, it can be hard to know which direction to take. Humans have been cultivating plants for thousands of years, and have developed unique methods for doing so all over the globe.

There’s no reason to stick with what’s popular in your region — an entire world of gardening styles awaits. Use this guide as inspiration for finding a gardening style that speaks to you and makes sense within your own yard.

With a little creativity, you can combine some of these ideas for a growing space that’s uniquely your own.

14 Garden Styles from Around the World

Gain inspiration for your own garden from these popular horticulture styles from around the globe.

Dutch Garden

Renowned for their efficient use of space, sculpted bushes and trees, and canals throughout, Dutch gardens are tranquil spaces. They tend to be small, self-contained, and often less formal than gardens in England and France. But in contrast, the region is also famous for its massive beds of tulips planted in cascading rainbows.

Butterfly Garden

These gardens are designed to provide habitat space for butterflies and similar insect species. They will include a variety of flowering plants filled with nectar that serve both as food sources and sites for laying legs and hatching from chrysalises.

Popular with nature-lovers worldwide, butterfly gardens tend to be somewhat protected from the elements. They often include water sources and windbreaks to keep these pollinators safe and happy.

English Garden

English gardens strive to capture an idealized view of nature. They tend to be somewhat informal and typically include groves of trees along gently rolling hills, often with bridges or recreations of ancient structures like chapels or temples.

French Formal Garden

Renowned for their symmetry and precision, French gardens are imposing and luxurious. They tend to be impeccably manicured with short-cut grass, well-kempt hedges, ample pathways, and flower beds bursting with blooms.

Japanese Garden

Designed to cultivate a sense of tranquility, Japanese Zen gardens highlight the natural landscape with water and aged materials to give them a timeless look. There’s a preference for greenery, and flowering plants are less common than other garden styles. Oftentimes, trees and shrubs are meticulously pruned to give them a cultivated “wild” appearance.

English Cottage Garden

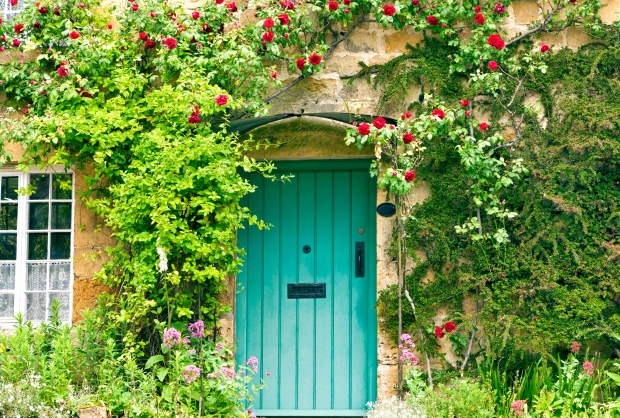
Known for their informal design and use of traditional materials, English cottage gardens contain a mix of edible and ornamental plants arranged in charming ways. They are a reaction against formal gardening styles and prioritize a wilder look, emphasizing plants that are both productive and beautiful.

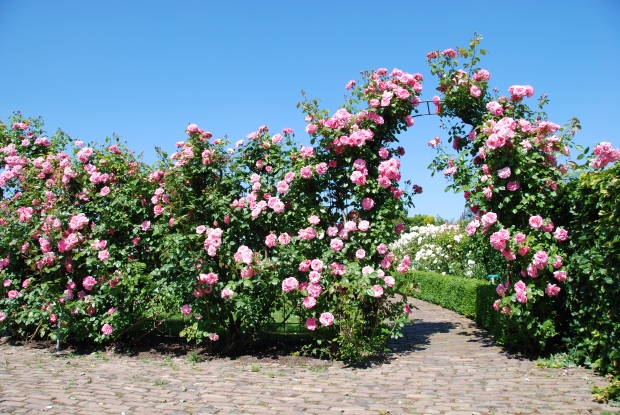
For example, many cottage gardens are renowned for their abundant rose bushes that are allowed to grow large and slightly rogue.

Keyhole Garden

Unique in design, keyhole gardens got their start in Lesotho. They are typically circular growing spaces about two meters wide with a keyhole-shaped indentation on one side. Within this indention, gardeners make compost that can be applied to the rest of the growing space once it’s finished.

The appeal of this design is that the beds are easy to weed and harvest from every angle, ensuring easy access for gardeners with limited mobility. Most keyhole gardens rise a meter above the ground and are shaped with wood or stone walls. This works to trap moisture in the beds for less maintenance in the long run.

Spanish Garden

These formal gardens are often found in courtyards and usually consist of potted plants and vines growing along the walls. Frequently, they are accented with fountains and other water features.

Colonial Revival Garden

Designed to evoke a sense of the colonial period in the United States, colonial revival gardens usually consist of simple rectangular beds with straight pathways between them. Most are enclosed by low walls or fences and will include everything from perennial plants to vegetables and ornamental flowers grown together.

Their primary purpose is to provide food for a household, and as such they are usually located close to the kitchen.

Chinese Garden

As a style that has evolved for more than 3,000 years, Chinese gardens tend to be intimate spaces that express a sense of harmony between humans and nature. Most will include enclosed walls and ponds with rock sculptures, trees, and flowers arranged along bridges and pavilions.

The goal is to style the garden so you can’t see everything at once, meaning that you see new vistas with every few steps you take.

Forest Gardening

As the name implies, forest gardening is a growing style dedicated to producing food within a woodland ecosystem. This low-maintenance form of gardening tends to focus on perennials like fruit and nut trees and is designed to work within natural landscapes so that you can produce food without ruining habitat space for native plants and animals. While the movement originated in the UK, you can find forest gardens worldwide today.

Aquascaping

Made popular in the Netherlands throughout the 1930s, aquascaping is essentially gardening underwater. It’s a practice of arranging aquatic plants, rocks, driftwood, and other accent pieces in aesthetically pleasing ways within an aquarium. Most aquascapes include fish, but it isn’t necessary.

Shakespeare Garden

This whimsical garden theme requires you to grow some or all of the 175 plants mentioned in the writings of William Shakespeare. They are a popular attraction in public parks and universities, especially in the United States.

You will likely encounter signs near each plant with relevant quotations from the Bard, and the gardens often include reproductions of English architecture from Shakespeare’s period.

Permaculture Garden

Originating in Australia, this gardening approach consists of a set of design principles for an ecologically sound growing system. Permaculture (permanent agriculture) emphasizes the idea of growing food in harmony with nature in ways that regenerate the soil and create a self-maintaining system. It’s a whole-systems method of growing that prioritizes long-term sustainability over short-term production.

Many permaculture growing techniques come from traditional and indigenous practices, and they put a lot of emphasis on how gardens are oriented within the larger landscape.

Get Inspired for Your Own Garden Style!

This is just the tip of the iceberg in terms of garden styles to consider. Find the ones that speak to you and make sense for your growing zone and space, and you’re sure to create an inspired garden that is the talk of your town.

Everything You Need to Know About the Northwest Flower and Garden Festival

Everything You Need to Know About the Northwest Flower and Garden Festival

Whether you are in the horticulture industry or you’re an amateur gardening enthusiast, there’s something for everyone at the Northwest Flower and Garden Festival. Held each February in Washington State, this convention has been a crowd-pleaser since the show started back in 1989 at the hands of Duane and Alice Kelly. Duane’s inspiration came when he visited other large flower shows in Boston and Philadelphia as well as his own love of gardening. While the Kellys no longer own the festival — it was sold in 2009 to O’Loughlin Trade Shows — it remains a mainstay for experts and hobbyists alike.

Considered the second-largest flower and garden festival in the United States, the Northwest Flower and Garden Festival serves the western region of the United States and Canada. People flock to the festival as there’s almost an endless amount of activities over the five-day event. The biggest draw for most people are the inspiring show gardens.

Magnificent Show Gardens

Each year, the festival accepts 20 garden creators from the U.S. Pacific Northwest to transport you to a different location while also giving you some ideas to use for your own garden. While the 20 participants have plenty of time to design, these works of art are constructed in under 72 hours on the actual show floor.

Getting a coveted display garden spot isn’t easy. If you’re a designer or garden creator, you’ll be competing against hundreds of other entrants for those limited spots. However, if you do manage to get a spot, your work will be in front of nearly 60,000 attendees and hundreds of other industry veterans. There might even be celebrities who see your work. You also have the chance to win a gold, silver, or bronze medal from a three-judge panel. Even if you don’t win one of the main prizes, there are other special awards, such as:

Festival Marketplace

Are you a hobbyist gardener looking for just the right plant to complete your garden? Or perhaps you’re a professional landscaper in search of some trusted local businesses to work with? You can find pretty much everything at the Northwest Flower and Garden Festival marketplace, which boasts over 350 high-quality vendors from around the world, all in one place. For the gardening enthusiast, it’s an amazing opportunity to pick up:

You can even plan out your shopping spree by visiting the virtual vendor list online. You can easily browse by category or simply go through the entire list of vendors to find the ones you are interested in. Many vendors offer special festival-only promotions while others also offer discounts for online orders. You can check out the promotions page to see participating vendors. Most will have their booth number in their profile, so when you are at the show you can check them out and see if you like what they have.

Shopping at large festivals like these is also a great opportunity to network if you’re a professional in the industry. You can chat with other businesses that complement your own work, network with those in the same niche, and check out the competition. You might even find a few clients! Just make sure to bring your business card if you plan on networking. You don’t want to lose out on any potential opportunities.

Educational Seminars

For those who want to expand their knowledge, the Northwest Flower and Garden Festival offers free seminars and demonstrations over the five days of the event. Whether you’re a novice gardener or a seasoned veteran, you can learn how to create beautiful and sustainable outdoor living spaces and gardens.

All of the speakers are carefully chosen and vetted to ensure high-quality content, including cutting-edge advice from garden designers, horticulturists, and others, as well as practical demonstrations of container gardening and other techniques. The best part is that you can go to any seminar you want! Nothing costs extra money or is exclusive to industry pros. You can also spend all five days just going to seminars if you choose as there are endless options. All seminars fall into one of seven categories:

Other Attractions

While the show gardens, the marketplace, and the seminars tend to be the main event for most visitors, the festival offers even more to see and experience. If you have some spare time, make sure to check out:

The Northwest Flower and Garden Festival usually occurs the second week of February, with the event starting on Wednesday and ending on Sunday. You can purchase two-day tickets or, for the full experience, a five-day ticket. There’s plenty to see, do, and buy so you’ll never be bored. For artisans: You can sign up to be an exhibitor and present your services or products to thousands of people.

A Must-Visit Experience

There are plenty of reasons why the Northwest Flower and Garden Festival is one of the most anticipated horticulture events of the year. It offers amazing seminars, beautiful garden displays, great shopping, and excellent networking opportunities. The festival has only grown over the years, and the future continues to look bright as more people are becoming interested in gardening. If you have the opportunity, go to this year’s festival — you’ll be glad you did.

January is the Best Time to start a Windowsill Garden

January is the Best Time to start a Windowsill Garden

Are your windowsills underutilized? With the right planning, you can turn them into productive plant nurseries. Winter is the perfect time to get started — here’s everything you need to know to begin.

Chilly winter weather can make you feel like spring will never return again. What could be more cheerful than a windowsill garden to brighten your day during these dreary months? Growing plants in sunny spots in your home has a lot of appeal and it can even give you a head start for spring planting.

However, not all plants will thrive on a windowsill. You need to choose the right varieties and give them the best growing conditions possible in order to have success. Done right, windowsill gardening is an easy and effective way to enjoy plant life indoors all year long. Here’s what you need to know to get started.

What is a Windowsill Garden?

As the term implies, windowsill gardens consist of collections of plants (usually potted) that you grow on windowsills. Some plants are grown on windowsills year-round, while others come indoors only when the weather starts to cool in the winter. It’s also possible to start seeds on a windowsill for transplanting out into the garden in the spring.

Not all windows work for gardening. South- or east-facing windows tend to work best because they maximize the amount of low-angled winter sunlight the plants can access. Windowsill gardens should ideally get at least five hours of sunlight per day. If your space isn’t suitable, you can supplement it with artificial grow lights.

You also need to ensure that the growing space isn’t drafty and that the windowsill is sturdy enough to support the plants. Temperature extremes from a cooling window in the evening can be too much for sensitive plants.

So long as you have a space available that meets these requirements, you’re ready to start a windowsill garden.

Windowsill Gardening for Beginners

Starting plants on a windowsill might feel intimidating for a beginner, but the process is relatively straightforward.

First, you need to decide what types of plants you are most interested in growing. Leafy greens and herbs tend to work best, as they can better handle changes in temperature and lighting. Hardy succulents and cacti also work well.

You may want to avoid any flowering plants and those that require full sun as they might not get enough to thrive.

Once you have your plants picked out, it’s time to get your windowsill garden started.

Seven Tips for a Successful Windowsill Garden

Here’s a basic guide for getting your dream windowsill garden established this winter.

1. Plan Out the Space

Just as with outdoor gardens, you don’t want to overcrowd your windowsill plants. Sticking them too close together restricts airflow and increases the chance of fungal growth and disease.

It’s best to research the spacing needs of each variety and measure out your total space so that you know precisely how many pots you can fit. You don’t want to start more plants than the space can support.

2. Choose Your Containers

The right containers make all the difference for success with windowsill gardening. Choose ones stable enough not to become easily dislodged, and ensure they have drainage holes through the bottom. Otherwise, you run the risk of plants developing “wet feet” and experiencing root rot.

It’s also smart to layer rocks or pumice stones along the bottom of the pots to encourage drainage away from the roots.

Note: Protect your windowsills with plates or trays to catch water spills.

3. Source the Best Potting Soil

Different varieties of plants will require different types of soil or fertilizer, so do your research before buying. For example, cacti and succulents do best with sandy mixes, while vegetable plants need material with high nitrogen content.

4. Plant the Seeds or Seedlings

Windowsill gardens can be started from seed or with established plants. Consider buying seed packets to enjoy the growing adventure from day one, or get a jump-start on the process with plants purchased from a local nursery.

Regardless, follow the included planting instructions carefully to improve the chances of germination or reduce transplant shock. Water thoroughly immediately after planting to ensure the plants or seeds make good contact with the soil.

5. Plan for Watering and Regular Maintenance

Indoor plants need plenty of attention. Make sure you establish an efficient watering system and keep them somewhere where you will walk by them regularly to spot problems early.

6. Monitor Humidity and Mist

Indoor environments tend to be dry, especially in the winter. The problem can be even worse for plants on windowsills because sunny weather can lead to fast evaporation. Help your windowsill plants thrive by keeping a humidifier close by and misting their leaves regularly. This also prevents dust from building up and keeps them looking their best.

7. Watch for Insects

Even indoors, insects can be a problem for your plants. Many varieties, especially vegetable seedlings, are prone to infestations of gnats or aphids. Monitor them regularly for signs of insect damage so you can stop an attack before it gets out of control. Make sure you check around the soil line and along the undersides of leaves.

Set Up a Windowsill Garden This Winter!

Whether you’re looking to get a jump-start on the summer gardening season or merely want to brighten up your home on dreary winter days, a windowsill garden makes for a fun and rewarding winter hobby.

So long as you plan out the purpose of your windowsill garden and populate it with plants that suit your indoor conditions, you should find success with minimal time and effort.

How to Protect Your Plants From Wildlife in the Winter

How to Protect Your Plants From Wildlife in the Winter

Your garden’s young trees, ornamental shrubs, and underground bulbs are especially appealing to certain wildlife in the winter. Follow these steps to keep your plants safe from hungry invaders.

Wintertime is generally considered a time of rest for gardeners, but that doesn’t mean there is nothing to worry about in the garden. On the contrary, with fewer leafy green options around, winter is a hungry time for animals. The tender young trees, ornamental shrubs, and bulbs nestled beneath the surface of a garden are alluring to a wide range of wildlife. It doesn’t matter how cute these garden visitors may be — if your garden is on the menu, they will quickly become unwelcome pests!

Wildlife varies from region to region, but the top offenders in winter gardens tend to be deer, rabbits, raccoons, and burrowing rodents. Protecting plants from wildlife in winter is possible, but the strategy will be different for each type of animal. Read on to learn how to protect your garden plants from wildlife in winter.

Deer

The animal offender most likely to cause serious, visible damage to a garden (in any season, but especially in winter) is deer. A small family of deer can devastate immature shrubs and trees in no time at all. Their favorite plants to graze on just so happen to be some of our favorite garden ornamentals. Deer are especially drawn to azaleas, hostas, cherry trees, maples, and most flowering plants grown from bulbs. There are two very effective ways of protecting plants from deer damage: camouflage gardening and erecting barriers.

Camouflage gardening is a method of using plants rich in chemical compounds that deer dislike as a means of discouraging them from eating the plants they do like. Plants that work well as camouflage include conifer trees, delphiniums, impatiens, irises, forsythia, larkspur, marigolds, yarrow, and zinnias. Many of these plants feature beautiful blooms, so they can be used seamlessly to add color and texture to your garden beds.

Erecting barriers is far less aesthetic a solution, but is the only foolproof solution to protecting vulnerable young trees from deer. Using hardware cloth (a stiff metal mesh), fashion a cylinder at least four feet tall and four feet in diameter. This dimension is important because it is too narrow for a deer to risk jumping inside of and is too wide for a deer to reach in to nibble the bark off a sapling. A tender young tree can survive having some branches munched, but if too much bark is removed from the outside, the tree will die.

Rabbits

As adorable as they may be, rabbits can be devastating to a garden. When normal food supplies run low, rabbits will eat the bark and low branches of garden plants, including leafy vegetables, fruit trees, and ornamental grasses. Even if they don’t destroy these plants, they can permanently disfigure them, leaving them misshapen and weak. Protecting plants from rabbits can be done with visual deterrents or camouflage planting and physical barriers, like with deer.

Camouflaging plants to use against rabbits include buddleia, catmint, coral berry, lantana, marigolds, milkweed, salvia, and spirea. Even yet, baby bunnies may still take a nibble, as they are too young to know better. Because rabbits’ tastes can vary from place to place, the best strategy is to combine camouflaging with another deterrent technique.

Physical barriers, using hardware cloth or chicken wire, can be used to protect individual plants from rabbits. Fashion a cylinder to enclose the plant that stands at least two feet high, and bury the bottom about six inches below ground. If there are too many plants, making this impractical, you may wish to use a visual deterrent instead.

A motion-activated sprinkler works perfectly to startle skittish rabbits. Some people find that suspending CDs from strings so that they move freely with the wind is also an effective visual deterrent. However, that only works during the daytime, and many rabbits come out to feed at night.

Gophers and Voles

Burrowing creatures can do a number on gardens, damaging not only plants but also creating tripping hazards in pathways. Gophers and voles like to nibble on plants’ roots, making it difficult to detect damage until it is too late. They can also girdle trees: eating the bark layer all the way around the base or roots, effectively killing the tree over time. There are two defenses against these burrowing pests: repellents and minimizing vegetative cover.

The good news is that gophers and voles have a dislike in common: They hate castor oil. This natural repellent can be sprayed in a liquid form or broadcast in granules. Because it is nontoxic and biodegradable, it can be reapplied as needed until your pest problem is gone. The other critical defense against burrowers is keeping the garden tidy and free of food and hiding places. Removing brush and debris, weeding, and removing fallen berries and nuts will make these tunneling winter pests think twice about entering your garden.

Raccoons and Skunks

While not a significant problem in most gardens, raccoons are likely to become pests if you have a bird feeder, fruit trees, grape vines, or a water feature. Skunks are much less crafty than raccoons, but both nocturnal creatures will dig up lawns and gardens in search of grubs embedded in the soil. Discouraging these nighttime visitors can be a challenge.

Raccoons are very agile, and will need to be deterred from fruit trees by placing baffles on the trunks. Motion-activated sprinklers or lights can also deter racoons, but they have to be moved frequently to remain effective for long periods of time. If grubs are the food source attracting raccoons and skunks, then your best line of defense will be to eliminate them from the lawn. Beneficial nematodes or milky spore powder are natural and effective grub controls, but it will take some time to completely get rid of them. The bonus is that your lawn will benefit, too. If all else fails, a good fence will work wonders to keep garden pests out.

Wintertime should be a time to rest, relax, and prepare the garden for spring. With a little observation and effort, you can protect your plants from hungry wildlife and ensure that they are thriving when the weather turns warm again.

How to Choose the Right Garden Gate

How to Choose the Right Garden Gate

Selecting the perfect garden gate can make all the difference in what visitors see when they enter. Learn how to pick a gate that makes a big first impression.

A gate is the first thing visitors to a garden see, and it is sure to make an impression. With the right garden gate, you can make every entrance a grand entrance. Choosing a perfect gate will add character, charm, and appeal to the garden. But how do you know what type of garden gate is the right one for your garden? There are a few different ways of looking for and finding the perfect garden gate. Read on to learn how to narrow down your decision and find a gate that will complete your garden.

Style

One of the easiest methods of choosing a garden gate is looking at your garden and finding a gate that matches your garden’s style. Even if you aren’t aware of it, your garden has a style. Every garden does. A garden’s style will be reflected in the layout, types of materials, and the varieties of plants throughout. Your garden might be more contemporary, with clean lines and a minimalist feel. It could be rustic, with lots of natural wood, stone, and earthy details. Or it might be more formal, with neatly trimmed hedges, strong symmetry, and well-defined walkways.

 A modern garden with very defined beds and distinct lines will benefit from a minimalist gate that complements the overall look and feel. A colorful, romantic garden with soft edges and large volumes is well served by a metal gate with graceful filigree work. A formal garden leading to a stately, traditional home will always benefit from a symmetrical double gate hanging from stone or brick pillars. When you understand the style of your garden, choosing a gate can be as simple as determining what type of gate will best match the rest of it.

Materials

Another straightforward way of choosing a garden gate is looking at the materials used in your garden and selecting a gate that is the same or complementary. A garden that is already enclosed by a fence will usually look best with a gate that continues in the same material. For example, a garden surrounded by a tidy white picket fence won’t look quite right with anything but a white picket gate. However, a walled garden gives a little more room for variation with a contrasting gate material. Whether the garden wall is stone, brick, or stucco, the gate is an opportunity to break the line visually with a gate that differs.

While walled gardens offer an exception to the rule, generally speaking, garden gates look best when they continue in the same material as the fencing. Just remember that the gate is an entry, and therefore a focal point, so it should make a strong visual impact. Even if the material is the same as the fence, it can break the line by forming an arch, a dip, a peak, or some other visually interesting shape.

Function

While it’s easy to get carried away with the design of a gate, a critical thing to keep in mind is the gate’s function. If your top priority is privacy, then you’ll want to choose a garden gate made of solid wooden slats or some other sort of material that is visually opaque. If you are primarily concerned with beauty and design, then you can play with more ornate styles that harmonize with your garden’s overall look. If you need to keep animals in or out, it will be important to choose a gate that is solid enough to do so.

Many gardens feature climbing roses or flowering vines, and an arbor over a gate provides an ideal structure for them to grow into and enhance. If you choose a gate with the intention of giving plants a support structure, make sure you use a long-lasting material that can resist rot or rust. Roses and vines are fine, but ivy will destroy wooden structures over time. Wooden gates should be made of treated wood and well-sealed or painted. Decide what purpose you want your gate to perform, and let that function guide your decision making process.

Budget

It’s the least fun to think about, but because you are going to have to pay for your gate, you should consider your budget before you start making any decisions about your garden gate. Unless you are very handy, you’ll also have to factor in the costs of having the gate installed. Much like hanging a door, putting in a gate takes careful measurement and know-how, and a professional can make sure it’s done right.

There is no hard and fast rule to how much a gate will cost. A highly customized wooden gate costs more than a simple prefabricated metal one. However, the more simple a gate, the less likely it is to break the bank. If you are in the market for a bespoke, custom gate, shop around before you settle on a contractor. If one quote seems outrageous, the next one might be perfectly reasonable. Make sure your contractor is reputable — ask to see examples of their work. If they are local, they should be able to direct you to nearby projects they’ve worked on. If you’re lucky, you might even get a testimonial from a past customer.

A custom-built gate is always going to be more expensive than one that is prefabricated. That said, with a little resourcefulness, you might find a bargain on your dream gate. Keep an eye on listings for people giving away or selling items in the neighborhood. It’s not unusual for home buyers to replace older fences and gates with newer ones. Of course, if money is no object, then you may want to take a look at high-end architectural salvage yards where you can come by antique metal gates.

The key to choosing the right garden gate is taking your time. You want to match the style, choose the right materials, and make sure that it will perform the function you want — all within your budget. The entrance to your garden is important and is worth investing in. You’ll be glad you did every time you walk through the gate you chose so carefully.

How to Choose the Perfect Flowers for an Aquarius

How to Choose the Perfect Flowers for an Aquarius

Aquarius is the 11th zodiac sign, represented by the symbol of the water bearer. Despite the “aqua” in its name, Aquarius is actually an air sign. The main trait of Aquarians — those born between Jan. 19 and Feb. 20 — is their rebellious nature that pushes back against authority.

At the same time, they are generous and have kind hearts toward the important people in their lives. Aside from their independent spirit, Aquarians are creative, forthright, and curious. They can also be unpredictable, stubborn, and short-tempered.

Aquarians thrive when they are given plenty of freedom and space to express their individuality. They enjoy having contrary ideas, unusual style, and an attitude that breaks with the norm. They are assertive and have opinions about everything, but at the same time are easy-going and adaptable. Most Aquarians are big-picture thinkers.

If you are looking for a floral arrangement to delight the Aquarian in your life or you want to use flowers to express your own character as an Aquarius, there are several fantastic options. Flowers have long been imbued with deep symbolism that conveys messages or represents a person’s personality. These five flowers are some of the most suitable for the Aquarian in your life.

1. Orchids for Uniqueness and Individuality

Orchids are some of the rarest and most unique flowers, which makes them a natural fit with the boldly unconventional nature that is associated with the Aquarius sign. With a wide variety of shapes, scents, and colors — including some truly unexpected combinations — orchids delight with their novelty.

Not only are orchids fantastic and beautiful, but their growing habit itself is unusual. These plants are epiphytes, meaning that they do not need soil to grow. Instead, you can find orchids in the branches of trees or clinging to rocks in the wild. This is especially suitable for the air sign, Aquarius, as orchids seem to grow nurtured by air alone. For a special appearance sure to delight Aquarians, forgo the pot and get an orchid that’s growing on a plaque or branch instead.

2. Gladiolus for Strength of Character and Conviction

Gladiolus symbolizes strong conviction, moral integrity, and constancy. These traits are core to strong-willed Aquarians. Gladioli come in a variety of colors and sizes, so there is sure to be an option suitable to any occasion or preference.

Aside from the symbolic meaning of the Gladiolus, these flowers have a distinctive appearance that should appeal to those born under the sign of Aquarius. Their name comes from the Latin word gladius, meaning “sword,” due to their upright, blade-like leaves. Their sculptural appearance and singular beauty allow these flowers to stand alone as the focal point of a table, but they can also be combined with other cut flowers for a striking bouquet.

3. Chrysanthemum for Optimism and Fidelity

Aquarius is an optimistic sign, driven by idealism, loyalty, and a desire to be helpful. Because of this, the chrysanthemum is a natural fit as an Aquarius birth flower. Not only do Chrysanthemums symbolize optimism, but they also come in an array of bright colors that stand out from their surroundings — just like independent Aquarius. 

There are over 100 known cultivars of chrysanthemum available, and they come in several distinctive flower shapes. Colors range from white and yellow to deep red and purple. Bicolor flower varieties are also available.

Given their reputation as a standard autumn flower, it is easy to see why chrysanthemums represent optimism. Even as we head into the colder winter months, the cheerful and bright blooms of the chrysanthemum symbolize the promise of warmer days on the other side. Not only that, but chrysanthemums also represent intelligence, which is another main trait found in Aquarius.

4. Blue Larkspur for Openness

Larkspur is traditionally associated with open-heartedness, and this trait is typical of those born under the sign of Aquarius. While they may be a bit detached when it comes to romance, Aquarians generally are open and frank in their feelings and opinions, and they value that trait in others as well.

Although any color of larkspur can be suitable for Aquarius, blue larkspur is especially suitable. Blue or sky blue are the colors associated with this zodiac sign, and blue larkspur has such a strong blue color that it can be used to create a fabric dye and ink.

That said, all parts of the larkspur plant are poisonous. This flower should be treated with proper respect, just like its Aquarian counterparts.

5. Violets for Truth and Wisdom

Violets are the birth flower for Aquarians born in the month of February. These flowers are sometimes associated with romantic love, but they also have several other meanings. They symbolize determination, aspiration, enlightenment, and honesty.

For Aquarians who are always seeking to learn more about the world, pursue intellectual ideals, and find deeper truths, violets are a perfect match. Their flowers look delicate, but they are actually quite easy to grow and don’t need a lot of care and attention.

Violets do not typically last as long as cut flowers, so they are not often found in floral arrangements. However, many varieties are grown as perennials and come back year after year in a garden. Violets bloom early in spring, which may explain why they are associated with February birthdays.

African violets are a good choice for Aquarians who want to grow these flowers indoors. Although they have a reputation for being fussy, African violets actually thrive in situations where they are a little neglected. Like Aquarians, they appreciate being left to their own devices. African violets also come in a wider variety of colors and flower shapes than regular violets, making them suited to the Aquarius traits of eccentricity and uniqueness.

Choosing Flowers for Aquarius

These five flowers make great choices for the Aquarius in your life, but they are not the only options. Remember that Aquarians like the unusual and unexpected, so it is best to choose flowers that aren’t just conventional roses or carnations. Instead, look for flowers that appeal to Aquarians’ unique sense of style, honesty, and independence.

Prune Your Plants Before Spring for Garden Success

Prune Your Plants Before Spring for Garden Success

Winter pruning takes some planning, but it’s the best time to make structural changes for trees and other plants. Follow this guide to get started.

Chilly weather tends to keep us indoors and away from gardening projects. That can be a mistake if you have pruning to complete. Winter is the best time to prune a variety of species, but choosing to trim the wrong ones might cause long-term damage to the plant.

Here’s a guide on what to prune in the winter for the best success for your garden come springtime and beyond.

Why Prune in the Winter?

There are plenty of reasons to prune plants in late winter. The biggest benefit of pruning in the winter is that you can take advantage of plants’ natural growth cycles. Cold weather and shorter days put many plants in a state of dormancy where they stop actively growing until they experience warmer temperatures.

This leads to less stress on the plant for faster recovery times and prevents the trimming from triggering new growth that would die in the chilly weather.

You also lower the risk of spreading disease from one plant to another in the winter because insects won’t be flocking the fresh pruning wounds and contaminating them.

Likewise, winter pruning makes it easier to take in the whole structure of your plant at once. Without leaves in the way, you’ll better notice dead and diseased limbs that need to be removed and get a better sense of the pruning cuts necessary to achieve specific shapes.

When is Late Winter?

The definition of “late winter” will vary based on which growing zone you live in. Generally, it’s considered the last four to six weeks before temperatures thaw in the spring. Determine your date by counting back from the average last frost date for your plant hardiness zone.

What Plants Are Best Pruned in the Winter?

Not all plant varieties do well with winter pruning. Here’s an overview of what to prune and what to avoid.

Annuals

Avoid pruning all annuals. Most will die as soon as they experience a heavy frost, so you’re better served leaving them in place or tossing them in the compost pile.

Perennials

Perennial flowers and grasses can be cut back in the fall, but that’s essentially a matter of personal preference. Pruning keeps things tidy and helps prevent the spread of disease, but it’s usually not a problem to leave the plants as-is.

Don’t cut too close to the roots, as you don’t want to overexpose them to the colder weather. If pruning away diseased plant material, make sure to remove and discard it (don’t compost it!) so you don’t spread the problem once spring returns.

Hold off on pruning plants susceptible to freeze damage, such as roses. A better trimming time is March or later when the risk of hard frost is essentially over.

Note: You may want to leave some perennials intact, especially if they contain seeds, as they provide food and habitat space for wildlife.

Deciduous Trees

The most common pruning that takes place in the winter is for trees. It’s possible to trim trees and shrubs as soon as the plants enter dormancy and until the leaf and flower buds begin to plump up in the spring.

Note that some deciduous trees tend to drip lots of sap when pruned in the winter. While this won’t affect the tree’s health, it might leave a sticky mess on your hands and tools. If this is a dealbreaker for you, consider pruning sap-heavy trees like maples, elms, birches, dogwoods, and walnuts in the summer instead.

Evergreens

Evergreens are a bit different. It’s best to prune these trees and shrubs during their summer growing season, as they never become genuinely dormant in the winter. This means that pruning in the cold might trigger regrowth and cause the plants to dehydrate and suffer tip burn where the needles turn brown and fall off.

Berries and Brambles

Cane fruits like raspberries and other brambles can be pruned in the late winter. You want to remove the older canes while keeping those a year old and younger, as they will produce this coming season’s fruit.

Fruit Trees

Winter is the ideal time to prune fruit trees if you’re looking to maximize fruit production. It’s the best time of year to get a sense of their branching structure so you can remove suckers and open up heavy canopies to boost light and air circulation. Make sure you start pruning early enough in the season that you don’t snip off developing buds.

What About Spring-Flowering Trees?

Knowing when to prune plants that bloom in the spring can be tricky. Start too late, and you’ll trim off the developing buds and lose all the blooms for the year.

Generally, it’s best to wait to prune early spring-flowering plants in the summer after the blossoms have fallen off. However, exceptions include butterfly bushes and tulip trees.

Six Steps for Successful Winter Pruning

Not sure how to begin the winter pruning process? Here are the steps for starting out.

1. Have a Clear Goal

It’s never smart to approach a plant without a plan. Take some time before grabbing the pruners to determine what you want to achieve with trimming, whether it’s removing deadwood, improving the structure, or preparing the plant for winter conditions.

2. Know Whether You’re Up for the Job

Some pruning projects are beyond the skill set of the average gardener. If you’re looking to trim large trees or maximize production from your apple orchard, it may be worth calling in an expert.

3. Remove Dead, Diseased, and Damaged Wood

As you begin to prune, start by removing all the dead, damaged, and diseased wood. Look for signs of insect infestations, such as egg masses left by caterpillars or old chrysalises left by moths. Disease may show up as unusual swellings, darkened areas, or open lesions. Remove now, and you’ll deal with fewer problems in the spring.

4. Prune for Structure

Once you’ve removed the problem spots, it’s time to trim away any branches that crowd the tree, blocking sunlight or airflow to the branches below.

Remove overlapping branches and ones growing in the wrong direction, always taking care to prune back to a bud or branch, so you don’t leave large open wounds.

5. Remove Suckers and Smaller Pieces

Finally, do a final cleanup by removing any suckers and smaller limbs that are less than ideal on your plant. This is the time to tidy things up to improve the tree’s overall appearance. Make sure you disinfect your tools after finishing, and you’re ready to move on to the next plant!

Prune in Winter for Long-Term Success

Winter pruning may mean you’re braving the elements, but it’s well worth the effort to establish healthy plants. So, track the weather so you can determine the best time to trim your trees and other plants for better growth long term.

How to Recycle Your Christmas Tree

How to Recycle Your Christmas Tree

There are few holiday symbols more magical than a well-decorated and lit Christmas tree. While some people prefer the ease of an artificial Christmas tree, real trees continue to be a popular choice, with an estimated 25 million to 30 million real Christmas trees sold in the U.S. alone each year. Real Christmas trees provide the unmistakable pine smell that many people associate with the holidays, plus the feeling of having a true piece of the natural world inside the home.

So which is more sustainable, a real Christmas tree or an artificial one? Well, obviously you can use an artificial tree year after year. However, at the end of its lifespan, it will end up in a landfill. Artificial trees create high emissions during manufacturing and transportation and are generally made from a type of PVC that is nearly impossible to recycle.

Real trees, on the other hand, are produced on farms, and a new tree will usually be planted for every one that’s harvested. Farmed trees offer the same advantages as trees in the wild, such as cleaning the air and stabilizing soil.

More importantly, though, real Christmas trees can be recycled at the end of the season. That makes them the more sustainable choice in the long run.

What is Christmas Tree Recycling?

There are several ways to recycle or reuse a Christmas tree after the season is over. The most important thing is to keep them out of landfills. Although an evergreen tree will break down over time in a landfill, the process is slow because of the lack of oxygen. It is much more eco-friendly to recycle or reuse the tree instead.
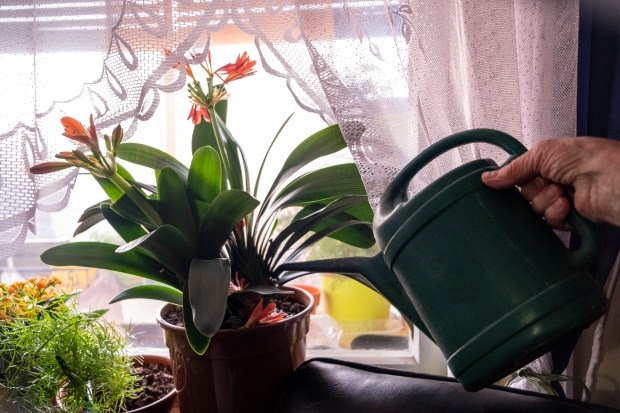

Some Christmas tree recycling options are arranged by charity or environmental groups, while others are managed by local municipalities. These usually have specific time limitations and conditions, so be sure to check out the details in your area.

The most common type of Christmas tree recycling processes the trees into mulch that can be used for gardening. In some places, this mulch is also available to residents to use in their own yards and gardens. Evergreen mulch adds nutrients to the soil as it breaks down, while also suppressing weed growth and conserving moisture.

Old Christmas trees also can be used to prevent soil erosion and create fish habitats in bodies of water. They are placed into the water along coastlines, held in place by fencing. Their branches collect sediment and filter the water, while also providing a safe place for smaller fish to live.

Likewise, discarded Christmas trees have been used to stabilize sand dunes along windy beaches. However, this doesn’t mean you can just dump your old tree in the ocean or at the beach. Be sure that this is part of an organized program arranged by experts who know how the trees will affect the environment.

If these options are not available through your local government, check to see if local charities have arranged any tree pickups in exchange for a small donation. Tree removal services are also available in many areas, but, of course, they charge to take away your tree.

Other Ways to Recycle Your Christmas Tree

There are more creative ways to recycle your old Christmas tree as well. Some of these require ample space or special tools, so it will depend on your individual situation which ones work best for you.

Firewood: If you have the space to dry the wood for at least a few months, you can use your Christmas tree for firewood. Since evergreens have quick-burning sap that can build up and start a fire in your fireplace, it is only recommended to burn your Christmas tree in an outdoor fire.

Compost or mulch: As mentioned before, the most common method of recycling a Christmas tree is to have it turned into mulch. Of course, if you have the right tools and space, you can do this yourself. If you don’t have your own wood chipper, you can rent or borrow one. Then you can use the wood chips directly to mulch your plants, or you can incorporate them into your compost pile.

Landscaping: Evergreen logs can be incorporated into your landscape as fencing or edging, or to hold a birdhouse. The trunk can be cut into disks and used as natural pavers. You could also create a brush pile that would serve as a habitat for birds and other wildlife in your yard.

Goat food: Goats love to eat evergreen trees! If you have a goat farm nearby (or own goats yourself), see if they are interested in taking your old tree off your hands.

Potted Christmas trees: This isn’t precisely a recycling idea, but it’s one of the most sustainable choices you can make. Instead of purchasing a cut tree, consider getting a potted Christmas tree instead. These are simply live trees that, like a houseplant, live in a container in your home. Once the holiday season is over, the tree can be planted in your yard.

Preparing a Christmas Tree for Recycling

Regardless of which method you use for recycling your Christmas tree, you need to be sure that the tree is totally free of all decorations. Certain types of decoration such as tinsel and artificial snow can be difficult or impossible to remove, so they are best avoided if possible.

Very large trees may fall outside of the size guidelines for recycling programs. Be sure to check before placing your tree out for collection, and cut down the tree to the appropriate size if needed.

Also, be cognizant of what types of chemicals have been used on your Christmas tree. Many trees are sprayed with pesticides and flame-retardant sprays before you purchase them. These can be harmful to your family while the tree is in your home, but can also hinder your attempts to recycle the tree. For example, you would not want to introduce pesticides or other chemicals into your compost pile or feed them to goats.

So, if you are concerned about having a truly sustainable Christmas, ask your supplier about how the trees are treated. You can also find organic Christmas tree farms where you can be sure there are no chemicals used.

How to Care for Houseplants in the Winter

How to Care for Houseplants in the Winter

Winter indoor plant care can be confusing, but making the right modifications will help your plant to thrive. Follow these guidelines to ensure your potted plants look good for years to come.

Dealing with houseplants in the winter is an entirely different situation than summer care. It’s easy to assume that indoor plants won’t experience changes in the seasons like their outdoor counterparts, but, in reality, the cooler temperatures, dryer air, and lessened light exposure of winter months can make a big difference in growth rates and vitality.

Here’s what you need to know about winter care for your houseplants to ensure you keep them at their healthiest, no matter the time of year.

In the Winter, Less is (Usually) More

Many houseplants enter a stage of dormancy in the winter. This means that the plant stops putting energy into new growth and instead hunkers down to conserve energy levels for the following year.

Entering dormancy means that a plant needs less of everything: less water, sunlight, and nutrients. In fact, providing plants with too much of any of the three can lead to problems. Overwatering houseplants in the winter can lead to weak growth or root rot when the plant fails to draw it all in — stunting or even killing it in the long run.

The actual amount of water needed will vary by species. Some, like tropicals, will require similar amounts all year long. Others, such as drought-tolerant cacti and hardy succulents, won’t need any water for weeks at a time.

In order to meet your plant’s specific needs, you must research its growing habits so you can modify your care plan to meet its requirements.

How to Care for Houseplants in the Winter

While the care instructions for your houseplant will vary based on variety, some standard rules apply to most. Here are eight steps you can take to keep them in top condition until the weather warms again.

1. Monitor the Soil

When it comes to caring for houseplants, most people err on the side of giving them too much water in the winter. In reality, you only need to water when the top few inches of soil are dry to the touch. Stick your finger up to your first knuckle down into the pot and feel for moisture. If any is present, wait a few more days before watering.

2. Stick with Warm Water

One of the worst ways to shock indoor plants in the winter is by watering them with cold water. A better option is to use room temperature or slightly warmer water so you avoid shocking the roots. Tap water gets cold fast in the winter, so feel it with your fingers to gauge the temperature before using it on a plant.

3. Pay Attention to Humidity

Indoor heat in the winter often leads to dry air, with humidity levels dropping 20 percent or more. Your skin will suffer from it, but the problem is far worse for houseplants, which prefer humidity levels closer to 50 percent.

Consider moving your plants to a steamy bathroom or putting them in a room with a humidifier. It’s also smart to cluster potted plants together. They will naturally release water through their leaves in a process called transpiring, which keeps the relative humidity higher when near each other.

Another option is to place plants on or near trays of water with pebbles placed in the bottom. This raises the relative humidity without leading to root rot.

4. Mist Regularly

While plants pull up water through their roots, they also appreciate some moisture on their leaves. Misting indoor plants offers many benefits. Not only does it keep plants hydrated, but it helps control dust and deters pests.

For best results, use a spray bottle and mist multiple times a day. Indoor air will cause the water droplets to evaporate quickly. Refrain from misting as much in the spring and summer as the humid conditions could lead to fungal problems.

5. Pay Attention to Temperature

Temperature fluctuations tend to get more extreme in the winter. Plants situated by a sunny window might get scorched during the day but suffer from near-freezing temperatures once evening arrives.

Protect indoor plants by keeping them away from cold drafts (doorways, windows) and sources of heat (ovens, fireplaces, electronics). They will do better when the temperature stays consistent all day long.

6. Consider Sunlight Exposure

Sun-loving plants often struggle in the winter, even when situated near a south-facing window. That’s because winter sunlight tends to be weaker and hit a lower angle in the sky, meaning that the rays that hit the plant are less powerful.

You may need to supplement your potted plants with artificial grow lights to keep them vibrant. Consider also cleaning your windows to ensure they let in as much light as possible.

7. Clean the Leaves

Sometimes, a gentle misting isn’t enough to keep plants clean, and you need to go deeper. Many indoor plants accumulate dust in their crevices that leave them looking dingy. Wipe them down with a damp cloth, or place the pot in a shower running lukewarm water to spruce things up.

8. Limit Fertilizer Use

Because many indoor plants enter dormancy in the winter, they aren’t as heavy feeders as usual. This means you should pull back on your fertilizer use to lessen the risk of upsetting their natural growing cycle. Wait until you see signs of new growth or greening before adding any plant food to the pot.

Note: Tropical plants often grow year-round and may require fertilizer in the winter.

Winter Indoor Plant Care is Well Worth It

Caring for potted plants in the winter can be a challenge, but it’s not as tricky as many people think. By understanding the needs of your specific varieties, and knowing whether they will grow or enter dormancy in the winter, you can take steps to adjust your treatment strategy to best meet their needs.

So, slow down on watering, lay off the fertilizer, and keep things warm and humid to ensure your potted plants will thrive.

Don’t Rush to Shovel Snow: 8 Benefits for Your Garden

Don’t Rush to Shovel Snow: 8 Benefits for Your Garden

Snow might seem like an inconvenience or danger to the garden, but it actually offers many benefits for your growing space. Here are eight ways it can help your garden (and two potential drawbacks).

Winter weather brings many challenges for the home gardener — not the least of which is snow. When you see a thick blanket covering your plants, it may be tempting to pull out the snowblower and remove it.

However, doing so would be a disservice to your garden. It turns out that nature’s blanket has many benefits for your garden. Here’s why you may want to leave that icy precipitation in place.

8 Benefits of Snow in the Garden

There’s a lot to like about snow in the garden. Let’s look closer at the benefits for your growing space.

1. Natural Insulation

The phrase “blanket” of snow isn’t a misnomer: Snow really works to warm the world around it. Feel under a snowbank, and you’ll see the temperature is warmer than the air. That’s due to the air pockets trapped within the ice crystals that cause it to act as a fluffy quilt.

This natural insulation makes a big difference for plants when the temperature plummets. Prolonged freezes can damage plant cells and cause stems and leaves to turn black and die. In this way, a layer of snow protects plants from the freeze-thaw cycle that comes throughout late winter.

It takes more than an inch or two to provide these benefits for your plants. If you’re lacking the deep, fluffy downfall that offers the most protection, consider shoveling some snow from elsewhere in your yard onto the most vulnerable sections of your garden.

2. Acts as a Windbreak

Not only does snow prevent plants from dealing with cold, it also protects against wind. Cold ground without snow cover can expose plant roots to harsh winds that dry them out, causing long-term damage by spring.

3. Protects Pots

If you tend to leave your potted plants outdoors in the winter, then snow is a necessary protection for them. A cocooning layer of snow can keep fragile clay pots from cracking and ensure the plants inside survive until spring.

4. Provides Moisture

Winter tends to be a drying time in the garden. Freezing winds can suck the moisture out of the ground and leave plants depleted. Not only does snow protect against these chilling blasts, but it prevents roots from drying out and provides much-needed moisture to the soil once it melts.

5. Triggers Spring Growth

Many plants require snow to get a sense of the seasons. A thick layer of snow works to keep many spring bulbs in dormancy, and the warmer temperatures that start melting the snow in the spring trigger them to break their dormancy and begin to bloom.

Without the snow as an indicator, they might begin to bloom too early and then die back when the temperature drops again.

6. Water and Nitrogen Source

Snow has earned the nickname “poor man’s fertilizer” for a reason. This form of frozen particles isn’t pure water. Rather, it contains significant amounts of nitrogen and other trace minerals that actively improve the soil. As it falls through the atmosphere, snow crystals pick up these compounds from the air and then deliver them into your ground by springtime.

The amount is far from insignificant: By some estimates, your soil receives between 2-20 lbs (1-9kg) of nitrogen per acre through snow and rain each year.

7. Protects Winter Vegetables

There’s no reason to harvest the whole vegetable garden once the first frost occurs. Some plants, like greens and root vegetables, often taste sweetest when they’ve spent some time in below-freezing weather.

However, temperature extremes and hard freezes can dry them out and ruin their flavor. A thick layer of snow over the top helps preserve those carrots and parsnips and ensures they’re ready to eat whenever you dig them up.

8. Helps Propagate Seeds

Snow on your garden beds creates the perfect nursery for seeds to germinate. It provides a naturally moist environment and protects the seeds from temperature extremes that could kill them off. Many varieties require wintry conditions to sprout at all, and you’d have to mimic this through stratification indoors if the weather doesn’t comply.

Drawbacks of Snow

Snow offers an abundance of benefits for your garden, but it has some drawbacks as well. Here are two reasons why you may want to consider removing it from your growing space after all.

Heavy Weight

Thick, wet snow carries a ton of weight, and it can cause damage to fragile structures and plants. You might find branches torn from trees after a snowfall, and they might be destructive on the way down.

For this reason, it’s wise to take down any fragile greenhouses or other garden structures before winter starts and to trim any precarious branches at risk of snapping.

Protects Pests

Snow’s insulating properties are well known to many garden pests like slugs, voles, and mice, who often spend the winter living in snow tunnels. A thick layer in your garden throughout the winter might become the nesting ground for a population explosion by springtime, leading you to spend much of the growing season attempting to get it under control.

Likewise, lots of heavily packed snow can act as a “step stool” to make it easier for small animals like mice or rabbits to reach new growth on bushes and perennials that might otherwise be inaccessible. You may want to protect vulnerable plants with cages made from chicken wire or dig out the snow along the bottom to keep them from getting easy access.

Appreciate Snow in the Garden This Winter

Once you take time to look at its benefits, there’s a lot to like about snow in the garden. From protecting plants from temperature extremes to giving them a dose of much-needed moisture and nutrients, consider keeping it in place to reap all the benefits nature provides for your growing space.