General articles-Writing Guide
Explore Writing Guide
- Garden use
- Houseplant care
- Trends
- Useful Tips
- Landscape
General Structure:
- A short summary that less than 40 words
- A cover image link from Istock that based on the article
- The cover image should be horizontal——-Garden use; Houseplant care; Trends; Landscapes
- The cover image should be verticle——–Useful Tips
- the cover image should be attractive, beautiful, acceptable
- without people, hands, legs; isn’t black or white ackground
- Content: 750-1000 word with 7-10 pictures( from https://www.istockphoto.com/)
- The pictures in content should be horizontal, attractive, we won’t accept the “Editorial use only” pictures. (sometimes you can insert one vertical image if there is no another better choice)

- Please don not put the picture link in the starting or ending of the content
- Provide two attractive titles about the article. We just provide the topic or theme to you, the writer should think about their titles.
Flower of the week: Writing Guide
Title
General Structure:
- About 700-900 words
- Three parts: brief intro, interesting facts, care guide
- Interesting facts should be the main part of the article
Brief Intro (Part I):
In this part, the basic information of the plant should be introduced, e. g.: the garden usage, the best season, the flower color variations, the origin of the plant, the most outstanding character of the flower etc.
The introduction is not restricted to the exact species, some closely related species/cultivars (especially which share a same common name) can be introduced together.
About one sixth length of the whole article. (If there’s some point is complex and interesting, consider move it to part II)
Interesting Facts (Part II):
This is the predominant part of the article. You could separate this part into 2 to 4 sections, each section is a quick fact or short story of this plant. Every section should have its own title. The ideal section should be a decent “social token”, which an audience would like to share to his/her friends.
If possible, there should be a logical red line embedded between the sections.
Some suggested (but not necessary) quick facts:
- Place of Interest: The most popular places in the world to enjoy this plant.
- Culture Significance: The flower’s meaning in certain cultures.
- Popular Culture: Usage of this flower in movies, TV series, comics etc.
- Breeding history: How the horticulturalists breed this plant.
- Culinary usage: If it is non-toxic and used as popular food in certain cultures.
- Cultivar Recommendation: Some most attractive cultivars.
Not suggested quick facts:
- Medical usage, especially alternative medicine. (for the safety consideration)
This is the most flexible part of the article. Construct your structure, find the best way to share the interesting points of this plant!
Care Guide (Part III):
A basic care guide for the beginners. The difficulty and the maintenance level should be better described at the very beginning of this part. An overly detailed care guide is not necessary, and a general direction is sufficient. One or two quick tips which will improve the growing condition can be added.
This part’s length should be no more than one fourth of the whole article. (If there’s something really interesting in growing this plant, make it a section in part II)
Then, quick facts for gardening is the final part of the article, which includes:
- Size: ?m(?ft) in height / spread
- Hardiness: USDA Hardiness Zone ?-?
- Sunlight: Full Sun / Partial Sun / Full Shade
- Soil: Sandy / Rich / Loam, Draining, Acid/Basic
- Blooming time: Season
Note:
- Plagiarism is prohibited
- List the citation if necessary (for further confirmation of the facts)
- Sample pieces in different styles attached
- The copyright of the article belong to PictureThis
Plant Science Article-Writing Guide
Plant Science
Writing Guide
- 500-750 words (include a short summary that less than 40 words)
- 3-5 pictures insert into the article (horizontal)
- If the article is between 600-1000 words, please insert 5-8 pictures.
- Please choose an attractive cover image for the article.
- The first paragraph is the conclusion of the title or article’s question.
- An attractive cover image (Don’t download the pictures, just copy the image link )
- The first sentence of a paragraph is the center of the paragraph.
- Avoid controversial topics and arguments
- Please search for enough professional information to ensure your opinion is correct. In fact, the topic we provide is not necessarily correct, it may just represent that we have chosen a hot topic.
8 Steps for Starting a Perfect Flower Bed
8 Steps for Starting a Perfect Flower Bed
A perfect flower bed adds a lot of appeal to your yard. It takes some effort to get one established, but once you see the results, you’ll know the effort was well worth it.
When it comes to setting up your garden space, flower beds deserve most of the praise. The right bed of blooms draws attention to the entire garden and adds a cheery pop of color to your growing space.
However, establishing the perfect flower bed doesn’t happen by chance. It takes time and attention to correctly set one up, but doing it right will reward you for years to come.
Here’s what you need to know to establish and enjoy perfect garden beds in your growing space.
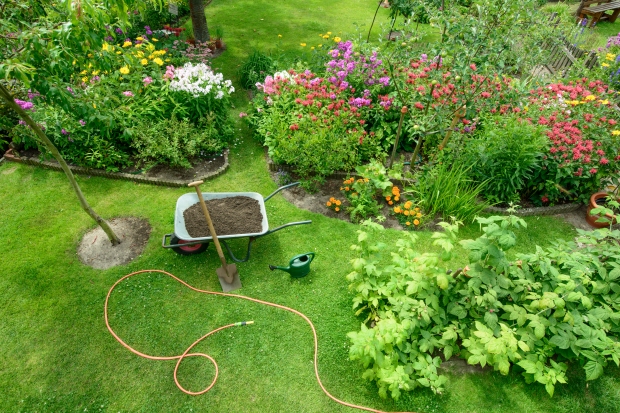
How to Establish a Perfect Flower Bed
It’s a multi-step process to establish great flower beds. Follow these eight tips to get started.
1. Choose the Right Location
Where you place your flower bed is an important consideration. Take time to stroll throughout your yard to consider possible growing spaces. In each potential spot, pay attention to the available light, proximity to buildings, and water sources. Will the bed look isolated in the space, or will it complement the rest of your landscaping?

Ideally, you want a spot that’s easy to access so you are motivated to maintain it, with enough sun exposure to support bloom formation for the flowers you plant. For most varieties, that’s at least six hours of sunlight a day.
2. Create a Plan
Planting a flower bed without a plan is a recipe for doing the same work twice. So, take the time to do it correctly the first time by planning precisely what you want to plant.
Get a notebook and draw out the bed, placing each potential plant within it. Do you want the bed to have a symmetrical layout, or would you prefer a more random assortment? Will there be any garden sculptures or other focal points within it?

One common beginning-gardener mistake is committing to more than you can maintain. This first year, start with a smaller garden bed. It’s always possible to expand it for future growing seasons.
Here are two primary considerations when planning out the bed: ensure there are new blooms all season long, and plan coordinating colors.
When it comes to choosing flower varieties, blooming time should be a top consideration. Ideally, you want a variety of species that will give the bed color from one end of the growing season to another.

This might mean a mix of perennials interspersed with spring bulbs and heat-loving annuals that thrive at the height of summer. Research what grows well in your growing zone when making your choices.
It’s also best to consider the heights of different varieties to plan to put the tallest plants near the back.
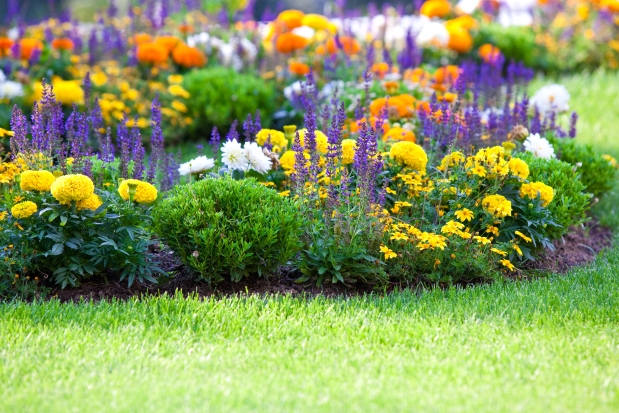
Even the most well-planned flower bed can look bad if the colors clash. Try to stick to a smaller color palette to ensure everything coordinates. Take time to ensure that the flower bed fits in with the larger landscape rather than sticking out in unattractive ways.
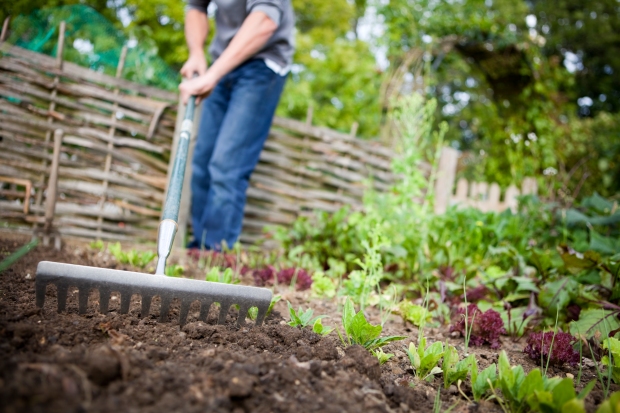
3. Prep Existing Beds
If you’re not starting from scratch but instead want to rehab an existing flower bed, it’s time to do some work to get it back in shape. First, dig up and remove any dead or unwanted plant material. You can add most of it to a compost pile, but be sure to throw away anything that looks diseased or shows insect damage.
Trim around any perennials and gently roughen up the soil throughout the bed. Add a thin layer of organic material like compost to the bed.
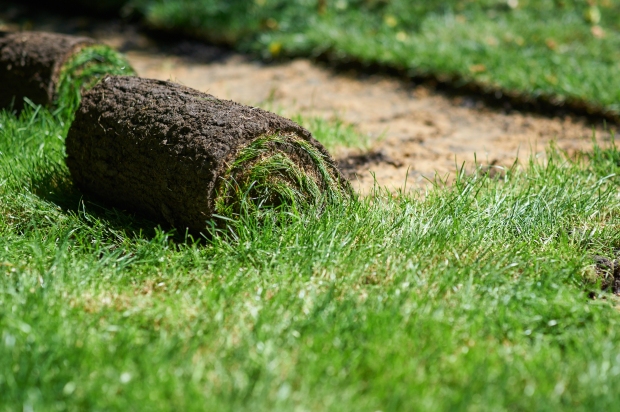
4. Thoroughly Strip Sod for a New Bed
When the plan is to build a brand-new garden bed, your first step needs to be stripping off the existing sod. Sod cutters are perfect for larger spaces, but you can get by with a regular spade for a small bed. Strive to pull up at least an inch and a half of soil and roots (four centimeters) to ensure you don’t leave any behind to resprout.
5. Pay Attention to Soil Quality
Once the sod has been removed from the new growing space, it’s time to amend the soil to prep it for planting. Digging through the ground with a tiller or even a hand spade will turn it over and aerate it while dislodging weedy roots you missed with the first pass. Go down up to 12 inches (30 cm) when the soil is hard and compact.

If you’re prepping the bed in the fall, you can conduct a soil test to determine what amendments are necessary for growth in the spring. Otherwise, a generous serving of organic material such as compost, aged manure, or decayed leaves will get things on track. Avoid extra-fine compost, as it usually breaks down too quickly. Chunky amendments tend to be best.
6. Add a Border
Part of what keeps a flower bed appealing is that it’s well-defined in a larger landscape. In order to create a sense of separate space (and prevent encroaching weeds), it’s best to establish a border around the bed.
Garden supply stores offer many options for border materials. You can also create a rustic look with stones, small stumps, or other natural materials.
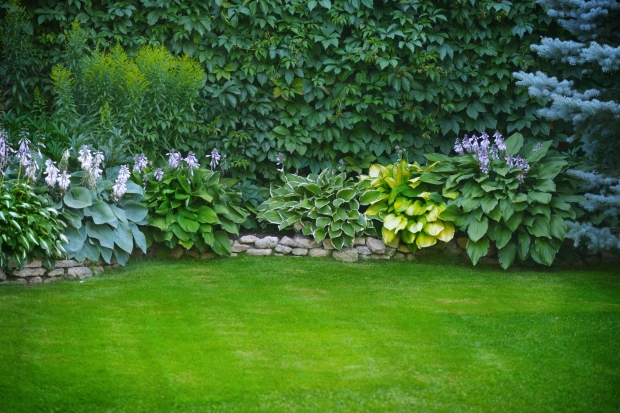
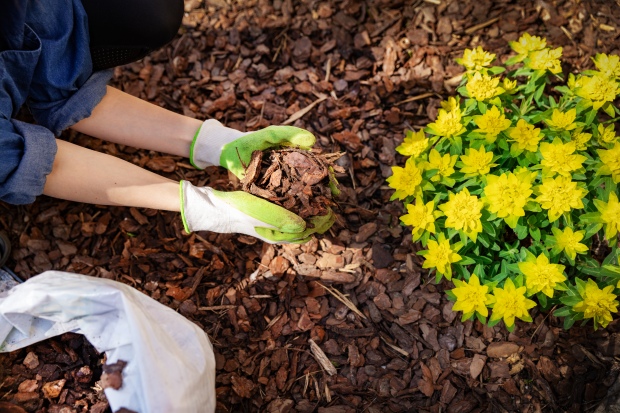
7. Choose Complementary Mulch
Permanent flower beds will look nice longer and support healthier plants when you apply mulch. Wood chips tend to work best because they suppress weed growth, keep moisture in the soil, and break down into dirt over time. You can also use shredded leaves or pea gravel in certain climates.
Keep the mulch to 2-4 inches (5-10 cm) to ensure the roots don’t become suffocated or oversaturated. Natural mulches will break down and need to be replaced every few years.
8. Stay on Top of Weeding
The fastest way to make a flower bed look drab is to let it become overrun with weeds. So, take time every week to get in the bed and hand pull any weeds that get established. A few minutes of work will keep the bed looking perfect and save you hours in the long run.

Establishing a perfect garden bed takes some initial prep work, but the results speak for themselves. Get planning now, and your yard will look gorgeous for years to come!
How to Plant a Tree
How to Plant a Tree
Tree planting is easy, but there is a right and a wrong way to do it. Keep these tips in mind for successful plantings.
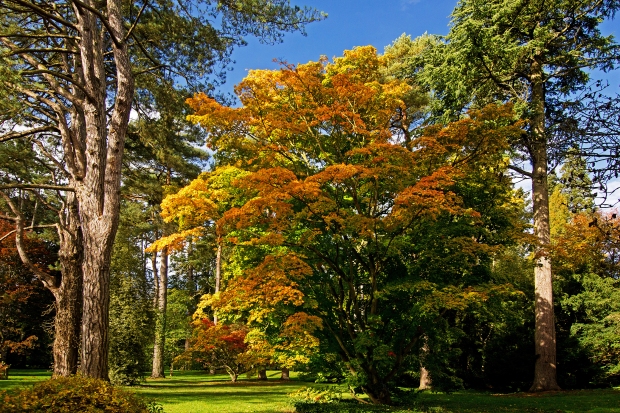
There is a popular saying about planting trees: The best time to plant a tree was 20 years ago. The second best time is now. Planting a tree today is an investment in the future. Mature trees are the heroes of any landscape: They add shade, lend character, and beautify a landscape. But they take a long time to mature. Tree planting is easy, but there is definitely a right and a wrong way to do it. Keep reading for eight easy-to-follow steps on how to plant a tree so that your planting project is successful.

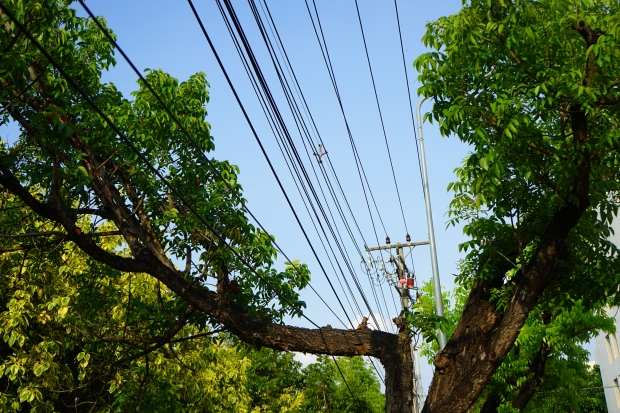
1. Find the right planting location
The first step in tree planting is finding the right place for your tree. Make sure there are no utility wires overhead, and no underground utilities below — especially sewer or gas lines — close to your planting area. For shading your home, find a spot between 15 and 20 feet from the house. Smaller ornamental trees can be planted less than 15 feet, but large trees need to be at least 20 feet away.
2. Choose a tree species
A little research will go a long way when it comes to choosing the right type of tree for your yard. A few factors to take into consideration:
- Soil type. Heavy, clay soil doesn’t drain as well as looser, sandy soil. Some trees will suffer without good drainage, and others do just fine with “wet feet.”
- Distance from home. The closer your planting location is to the house, the smaller a tree you should plant. Use the mature height/width dimensions when calculating.
- Tree features and maintenance requirements. Do you want beautiful autumn foliage or a stunning floral display in spring? How much clean-up is acceptable? Trees that shed a lot of leaves or messy fruit can be a lot of work in fall or summer. Find a tree that fits with your wants and needs.
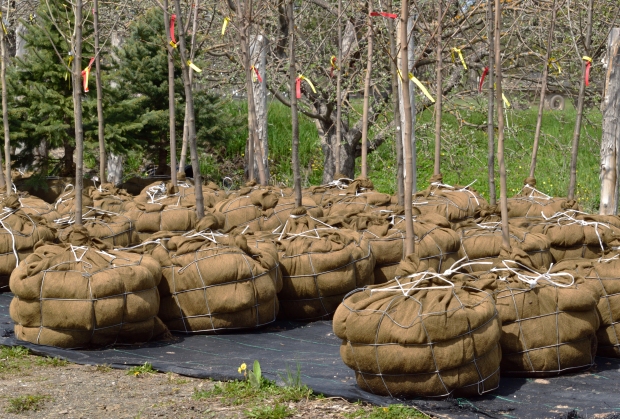
- Budget. Sapling trees come in many different price points and configurations. Balled and burlapped trees are heavier and more expensive, but will reach maturity the fastest. Bare root trees are lighter and less expensive, but are usually dormant and must be planted in winter or early spring. Container trees can be a good value, but need a little extra care if rootbound.
3. Dig a hole
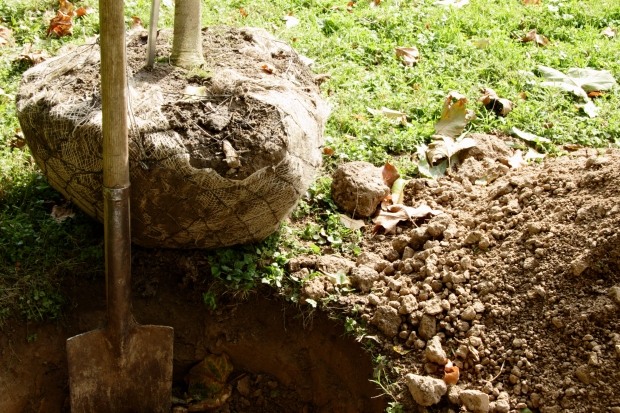
The dimensions of the hole you dig are important. Ideally, the hole should be broad but shallow, with sides that slope like a bowl. A general rule is to dig a hole only as deep as the root ball, but at least two to three times wider. With containerized trees, you can dig a hole three to four times wider than the container. If you are planting a bare root tree, use the existing roots as a guide for depth and then dig much wider than you think is necessary.
4. Place the tree
When moving a tree with a root ball, lift and carry it from the roots, instead of using the trunk as a handle, which can pull the root ball away from the trunk. For burlapped trees, place the wrapped root ball into the hole and then remove all of the material containing the roots. For containerized trees, if the roots have formed the shape of the container, use a utility knife to cut them. Cut an X across the base and then make several vertical cuts around the circumference of the root ball. For bare root trees, spread the roots out and have one person hold the tree in place while another fills in soil around the roots until it stands on its own.
5. Fill in the hole
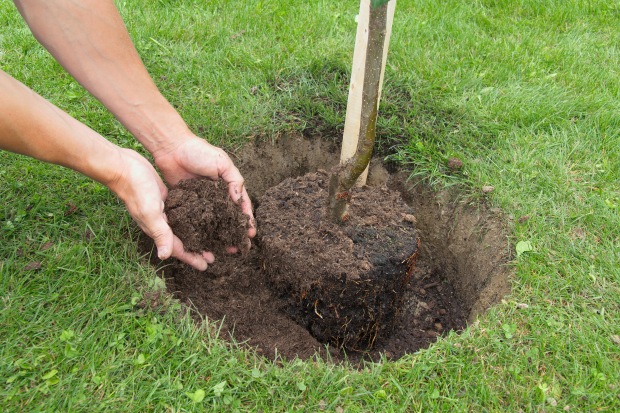
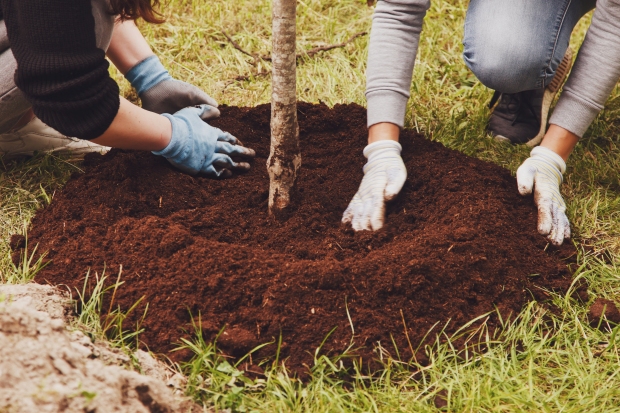
The most important part of this step is making sure that the root flare — where the tree gets wider at the base — is just above the soil, not below. Planting a tree too deep will set it up for failure. Add soil to the hole carefully, packing soil first around the root ball (starting with the base) to stabilize it. Check from every angle to ensure that the tree is straight before filling the hole in completely — it’s easiest to straighten it out now, not later. Eliminate air pockets by filling the soil in firmly, and tamping the soil down lightly with the flat of a shovel or the bottom of your boot.
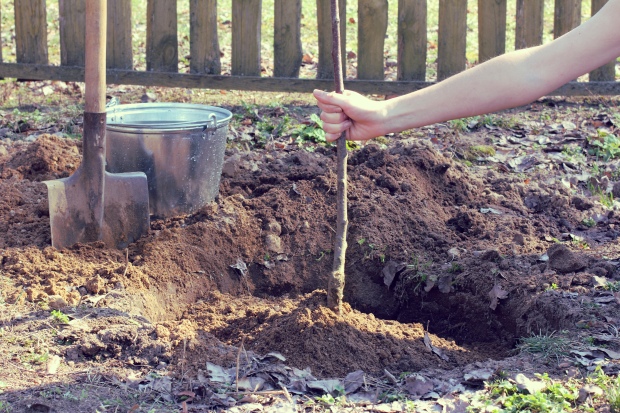
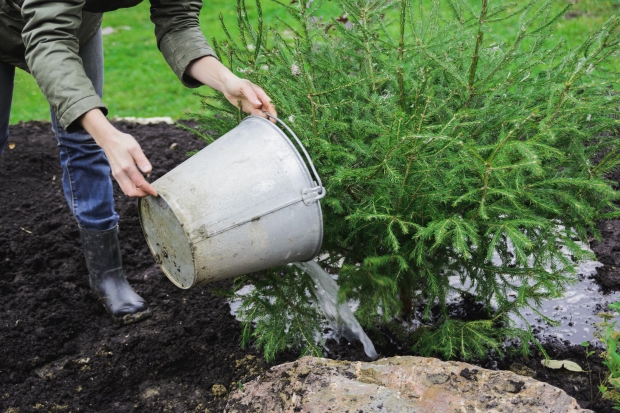
6. Create a basin, water the tree, and add mulch
As you fill in the last of the hole, make a slight depression around the tree, with the outer edge of the hole forming a lip. Water the tree heavily, allowing the water to fill the basin and then to drain completely. Once the tree is well watered-in, add a layer of mulch several inches deep, taking care that it is not touching the trunk.
7. Add support or protection, if needed
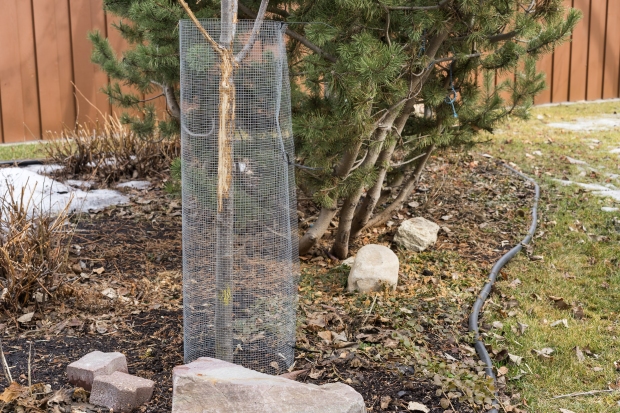
Newly planted saplings sometimes need a little extra support. If the planting location is exposed to high winds, it may be necessary to stake it to keep it perfectly straight and stable. Using three stakes and special webbing or rubber tubing designed not to damage the bark is optimal. Staking should be removed after the first year in the ground.
In areas with a lot of deer or rabbits, you may want to consider installing a plastic or metal mesh cage to protect the young tree. Hungry wildlife can destroy a newly-planted tree overnight, especially in the winter when their normal food supply isn’t available.
8. Water regularly
When the weather is dry, water your tree at least once every 7 to 10 days. The soil around it should be moist but not soggy. Do not fertilize the tree for the first year, but feel free to top off the planting area with a couple inches of compost in the spring.
If you follow all of these steps faithfully, you should be able to watch your baby tree grow steadily. Once a sapling takes off, you’ll be amazed at how quickly they grow. Plant trees today and you will be grateful later. A beautiful mature tree will enrich the landscape for a lifetime or longer.
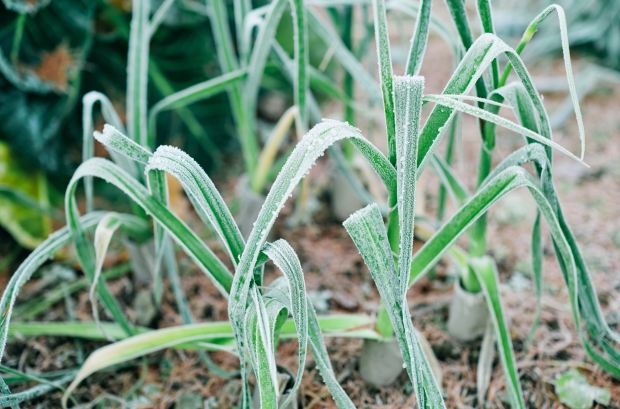
How to Grow Cool-Season Vegetables
How to Grow Cool-Season Vegetables
Growing cool-season vegetables in the fall or spring is a satisfying way to maximize your gardening season and enjoy fresh produce throughout the year. Here’s a handy guide for success this spring.
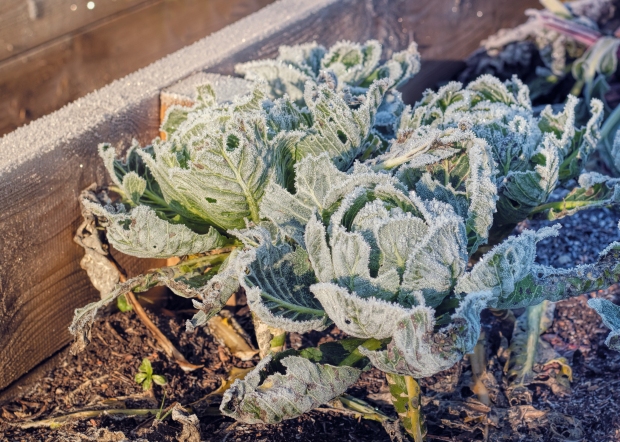
Are you itching to start gardening again, despite the cold weather? Consider growing cool-season vegetables. These hardy varieties can withstand frosts and freezes, ensuring you have the opportunity to enjoy fresh produce early in the growing season.
Your growing strategy needs to change slightly compared to summer to master cool-season vegetables. Success depends on choosing the right varieties and watching the weather so you can plant at the best opportunity.
Here’s how to get started.
What is a Cool-Season Vegetable?
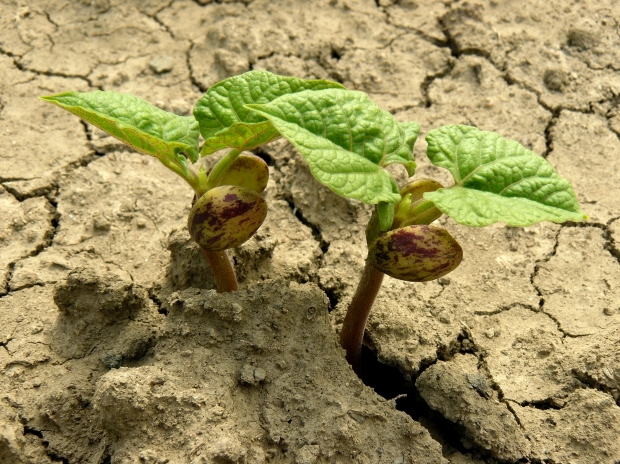
Cool-season vegetables are varieties that will tolerate colder weather. They can be planted early in the spring, long before the soil has warmed enough for tomatoes, peppers, and other garden staples.
Most will mature while the weather is cold, meaning that they tend to be the first produce you can pull from the garden. In fact, hot temperatures often cause these crops to “bolt” by going to seed and becoming too bitter to eat.
Your growing zone will have the most significant impact on what cool-season vegetables will thrive in your garden. Determine which zone you are in by using an online lookup tool, and research the average first and last frost dates for your location.
Most cool-season crops can be planted outdoors once the soil and air temperature stay consistently above 40 degrees F (4 degrees C). In comparison, warm-season vegetables like tomatoes and eggplants need temperatures above 70 degrees F (21 degrees C) to thrive.
Cold-Hardy vs. Semi-Hardy Vegetables
Cool-season vegetables are split into two categories: cold-hardy and semi-hardy.
Cold-hardy vegetables handle extreme temperatures the best. Seeds germinate well in cool soil, and young plants can withstand a heavy frost. You can direct-seed or transplant them up to three weeks before the last frost date of spring for a reasonable chance of success.
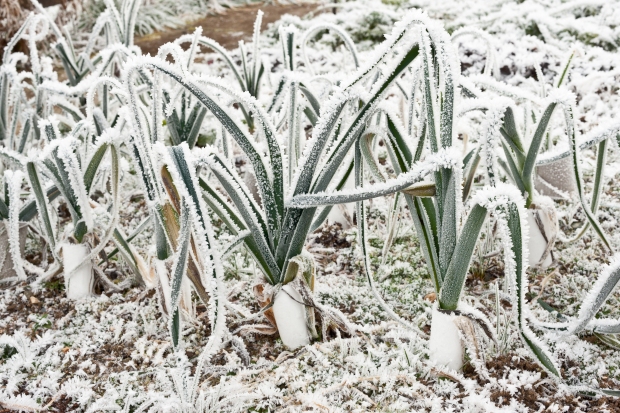
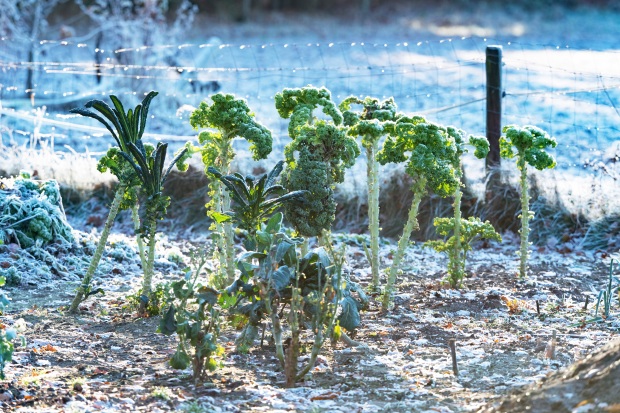
Examples include broccoli, Brussels sprouts, cabbage, collards, kale, leeks, onions, spinach, and kohlrabi.
Semi-hardy vegetables are slightly more delicate. They can withstand light frosts but don’t do well in sustained temperatures below 40 to 50 degrees F (4-10 degrees C). You can sow them up to two weeks before the average last frost date, but waiting a little longer may lead to bigger harvests.
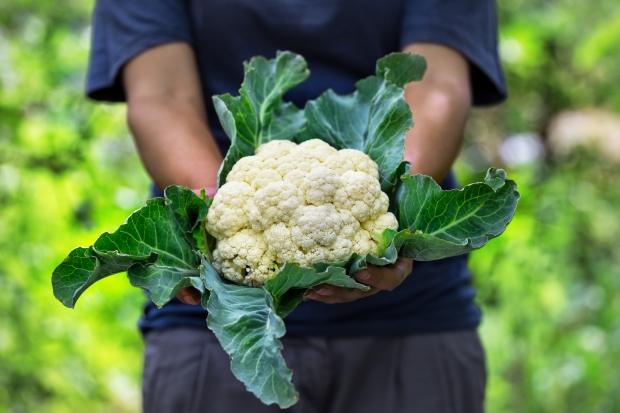
Examples include beets, carrots, lettuce, Chinese cabbage, cauliflower, parsley, and peas.
Can You Plant Cool-Season Vegetables in the Fall?
It’s also possible to plant many cool-season crops in the fall. Many — such as spinach, lettuce greens, and radishes — require short growing seasons. This means you can plant them in late summer to harvest before winter.
Late-summer gardening also gives you the advantage of harvesting your produce after most insects have died or entered winter dormancy. You may need to deal with them while things are sprouting, but few will be left as winter approaches. The same principle applies to weeds — most will slow down or stop growing by harvest time.
Note that the growth rates of fall crops will be the opposite of those grown in the spring. You’ll start with fast growth that will slow down exponentially as the days get shorter and the temperatures drop.
Make sure you read seed packets carefully before fall planting to ensure there are enough days left in your growing season for the plant to reach maturity. After all, there’s nothing worse than a cold snap killing your snap peas before you can harvest them.
Tips for Success with Cool-Season Crops
Here are some final tips for growing cool-season crops successfully.
Measure the Soil Temperature Before Planting
When it comes to early spring planting, outdoor temperatures can be deceiving.
Your region might go through a heat wave that warms the air without making much impact on soil temperatures. Go only by how it feels outside, and you might plant your seeds in soil too cold for them to germinate in.
It’s better to use a soil thermometer (available in most garden shops) to gauge the temperature before putting seeds or seedlings in the ground. In a pinch, you can use any thermometer that goes down to freezing.

Keep Your Expectations Realistic
Late- or early-season planting is always a risk. You might accidentally put seeds in soil so cold they never sprout, or deal with an unexpected heat wave that makes everything bolt prematurely. You’ll do better mentally if you accept that there are risks with every growing season and understand that you probably won’t harvest everything you plant.
Monitor the Weather for Heat Waves
One of the worst fates to befall cool-season crops is unseasonably warm weather. Consider harvesting your greens and other vulnerable crops early if a heat wave is in the forecast, so you don’t lose your harvest to bolting.
Utilize Weather Protection
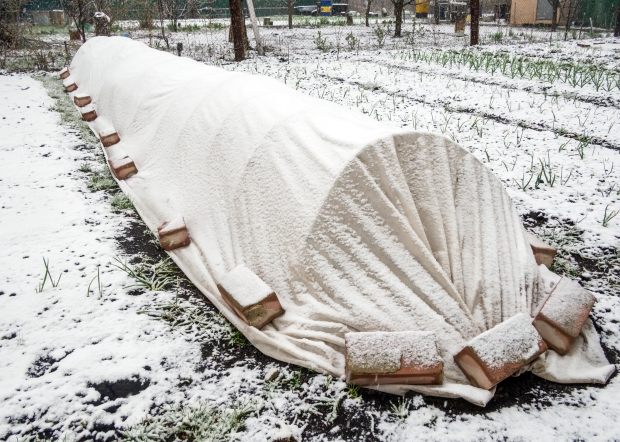
The weather tends to be most unpredictable in the spring and fall. Keep supplies on hand to protect cool-season crops from wind, rain, and other conditions. You can also utilize low tunnels covered in greenhouse plastic or floating row cover to keep plants safe from the elements and a few degrees warmer than the outside temperatures.
Stagger Your Plantings
There’s no way to predict ahead of time how your cool-season crops will do. You can improve your chance of having successful harvests by staggering plantings by a week or more.
This way, if cold weather or a heat wave kills off one generation of vegetables, you’ll have some planted of the same variety that may have been large or small enough to survive.
Grow Cool-Season Crops for a Longer Harvest Season

Growing cool-season vegetables is a lesson in patience, but the results can be well worth the effort. Take time to set up a planting strategy, and you may be enjoying fresh garden produce when everyone else is relying on the grocery store.
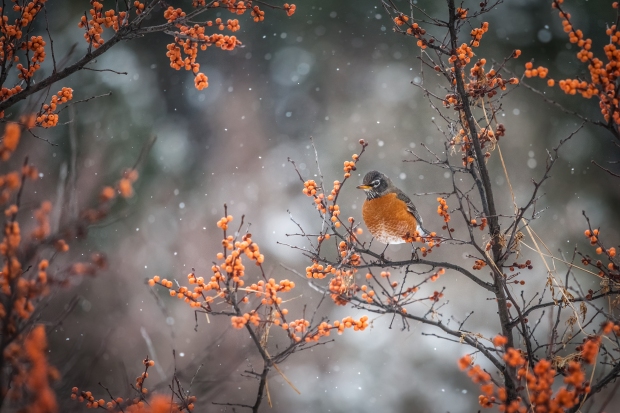
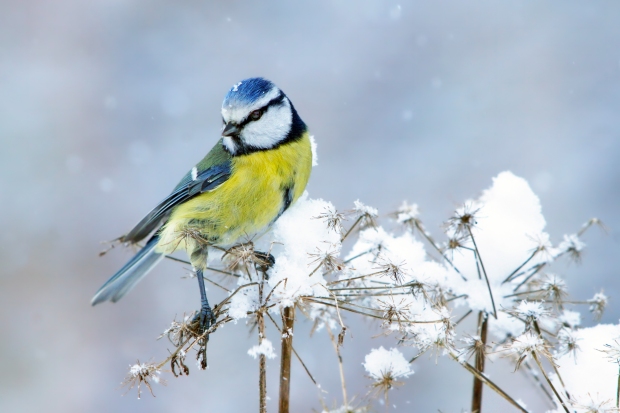
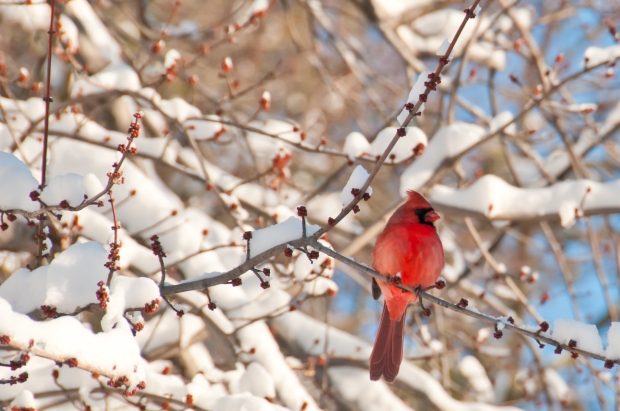
How to Attract More Birds to Your Garden in Late Winter
How to Attract More Birds to Your Garden in Late Winter
Winter birds are a delight in the garden, and with the proper prep work, you can ensure your space offers them a sanctuary to thrive until spring. Here’s how to get started.
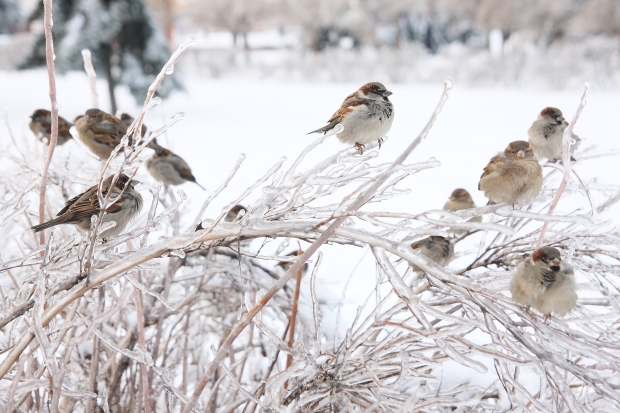
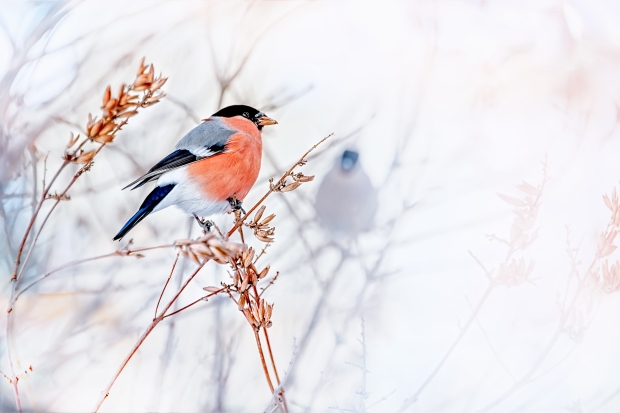
Nothing adds more visual interest to a drab winter backyard than a flock of birds. Gardeners love attracting these feathered friends to their growing space at any time of year, but birds benefit the most from some attention in the winter.
While many bird populations migrate to warmer weather in the spring, others stay up in one location year-round and simply tough out bad weather. But, as food and shelter are often in short supply over the colder months, taking time to make them accessible will go a long way toward helping birds thrive until spring.
Here’s how to turn your garden into a winter paradise for birds to ensure they prioritize your yard as a pit stop during their migration process.
How are Birds Beneficial to the Garden?
Attracting birds to your garden is about more than having something to watch from the window. They offer real benefits for your growing space by keeping pest populations in check and eating weed seeds before they can germinate. Keep birds content in your yard, and there’s less reason to use toxic pesticides or herbicides.
Birds also improve biodiversity by creating habitat space for other animals by eating and expelling fruit seeds that grow into new trees and shrubs.
Eight Ways to Attract Birds to Your Garden
Putting out a bird feeder doesn’t go far enough for attracting winter birds to your garden. Follow these eight tips to ensure they want to spend time in your yard.
1. Think in Layers
When arranging your yard for the benefit of birds, it’s best to think in terms of layers. Birds love to flit between different heights for their food and shelter, so fill your space with tiers of plants. Think tall trees with brushy understory and vines or groundcover below. Your goal should be to mimic the diversity of nature. The greater the mix of vegetation, the more bird varieties you can attract.
2. Plant Shrubs to Attract Birds
Evergreen shrubs are a favorite winter shelter for birds. They offer protection from windy, wet weather and give them a space to hide from predators. If looking to attract birds, make sure you don’t prune your shrubs heavily before winter. This ensures they maintain many nooks and crannies for the birds to tuck themselves into.

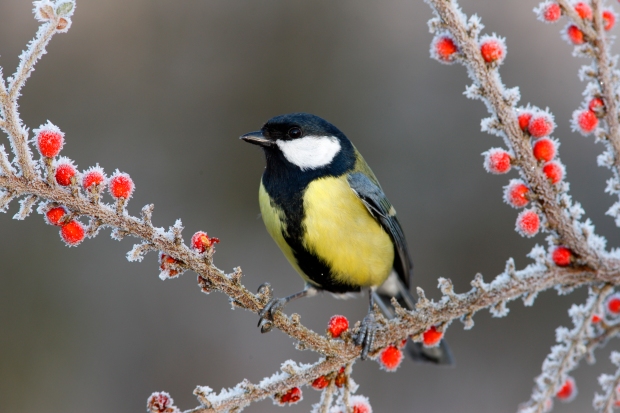
3. Keep Berries Available
Consider planting flowering shrubs that produce late-season berries to ensure the birds have a winter food supply. It’s best to seek out varieties that hold onto their fruit over the winter. In fact, many berry varieties don’t become tasty for birds until they’ve gotten sweet from going through several freeze and thaw phases.
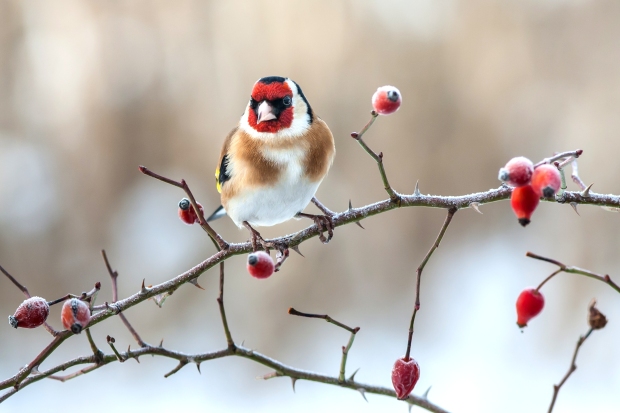
Popular backyard varieties include red chokeberry, blueberry viburnum, winterberry holly, bayberry, dogwood, crabapples, beautyberry, sumac, elderberry, and others. Native roses also work well, as they develop fleshy red fruit (the rose “hips”) for birds in the winter.
4. Plant Plenty of Seed- and Nut-Producing Trees
Birds require a lot of calories to sustain themselves through winter. Help them out with a yard filled with seeds and nuts. Think beyond the birdfeeder by planting evergreens, junipers, firs, or hemlocks throughout.
Each will produce a bounty of nutrient-rich pinecones that make for stellar winter snacks for grosbeaks, woodpeckers, chickadees, and more. The birds will enjoy nestling among the pine needles for wind protection against winter storms.
Birds will also appreciate it if your space contains a variety of nut-producing deciduous trees like oaks, walnuts, hickories, and hazelnuts for an additional food source.
5. Grow Grasses
This fall, skip the lawnmower and let the grasses in your yard go to seed. These seed heads provide an excellent food source for birds and are easy to snack on. (You can mow them back again in the spring.) Many bird species also make ground nests and will appreciate the coverage of grasses to keep them out of plain sight.
Consider planting native grasses throughout your landscape for greater ecological benefits. Varieties to consider include switchgrass, hair grass, and both big and little bluestem. These grasses also provide habitat space for insects, another favorite food source for winter birds.
6. Offer (Clean) Shelter and Birdseed
One of the easiest ways to provide for backyard birds this winter is by putting out birdseed and birdhouses for them. Make sure you thoroughly wash any birdhouse on your property before winter to ensure that it doesn’t spread pests and diseases to the birds that use them.
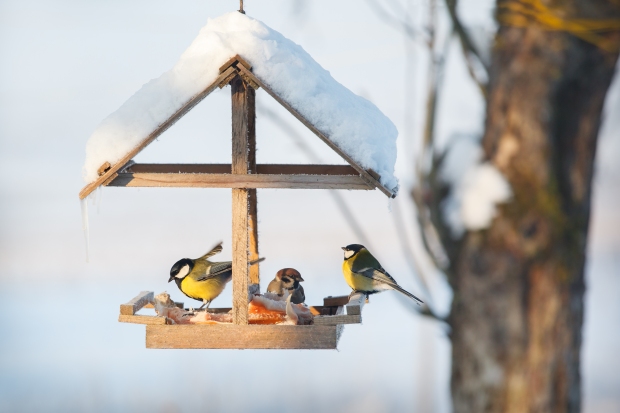
Different varieties will go after different seed types, but it’s generally good to fill the feeders with an assortment of black oil sunflower seeds, peanuts, and white millet. You can also buy blocks of suet, which contain fat with seeds and fruit mixed in.
Note: Stay consistent with keeping the feeders filled. Birds are creatures of habit, and they will soon start depending on your feeder as a food source and may become in trouble if the food runs out. Make sure you stock it up before leaving on a trip to ensure the birds won’t suffer in your absence.
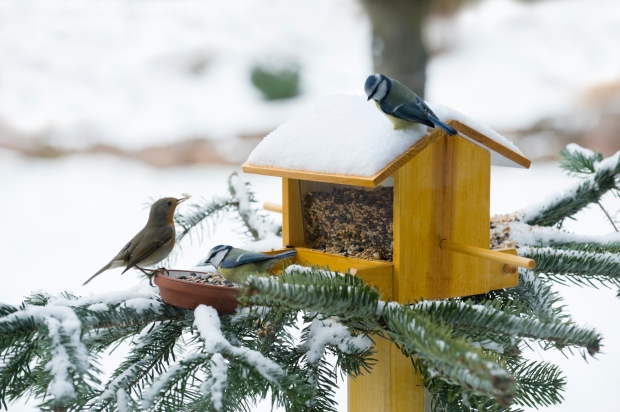
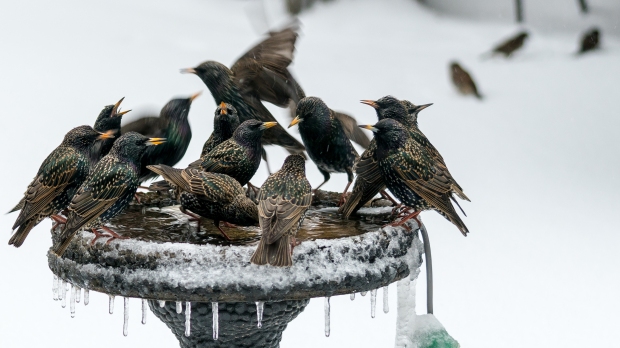
7. Have Water Accessible
You may not think of it, but birds often struggle to find enough clean water in winter weather. Ponds can freeze over, and people tend to stop filling their birdbaths as soon as temperatures drop. Instead, consider investing in a portable de-icer for your bird bath and keep it filled in the winter. You’ll be amazed how many bird varieties this simple step will attract to your yard.
8. Keep Things Wild
Tempting as it may be to tidy up your garden at the end of the fall, winter birds will prefer the space left a little rougher around the edges. Leave old garden plants in place, especially those with flowers or seed heads. An abundance of wild creatures will appreciate the extra food and habitat space.
Start Attracting Birds to Your Yard Today!
Winter birds are a delight in the garden. They add a pop of color to otherwise dreary landscapes and serve as a reminder that better weather is coming again. Follow these tips to attract them to your growing space, and you’ll enjoy their cheerful presence all season long.
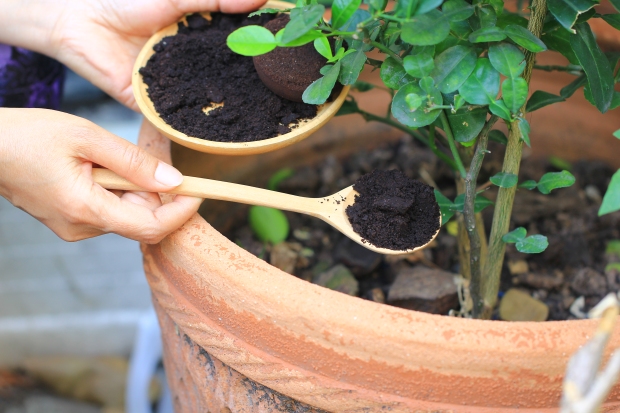
Find Out How and When to Fertilize Your Houseplants
Find Out How and When to Fertilize Your Houseplants
Adding fertilizer to indoor plants will give them nutrients to help start the growing season off right. However, too much too soon can cause more problems than going without any fertilizer at all. Here’s how to fertilize for the best results.
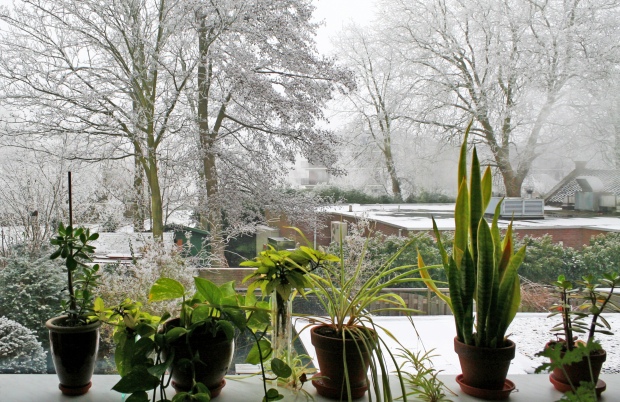
Once the weather begins to warm again, it’s time to transition back into gardening season. Even indoor plants are affected by the change of seasons, and the start of spring comes with special care requirements for houseplants.
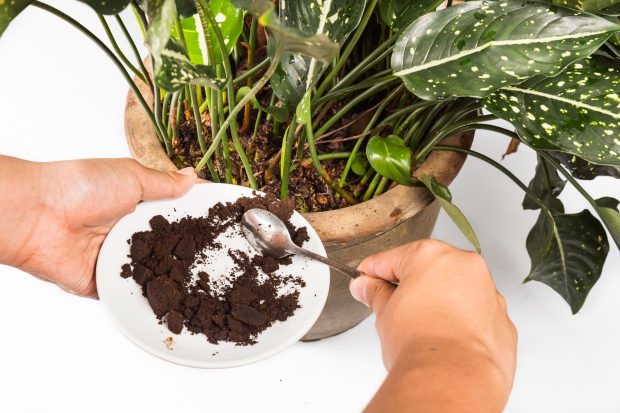
Fertilizer is critical for keeping houseplants healthy. Unlike outdoor plants, houseplants are limited to the nutrients provided in the pot they live in. Restricted space means that the nutrients within potting soil quickly get depleted and need to be replaced with fertilizer.
Here’s what you need to know about fertilizing your indoor plants to give them the best head start this spring.
What’s in Houseplant Fertilizer?
Most houseplant fertilizers contain a blend of macro and micronutrients your plants need to thrive. These include nitrogen, phosphorus, and potassium (labeled as N-P-K), along with dozens of minor nutrients like calcium, iron, zinc, magnesium, and more.
The ratio between these three macronutrients will vary based on what the fertilizer is formulated for. Some blends will prioritize leaf development while others improve bud and flower formation, so choose the formulas best-suited to your plants — you may need to keep several on hand.
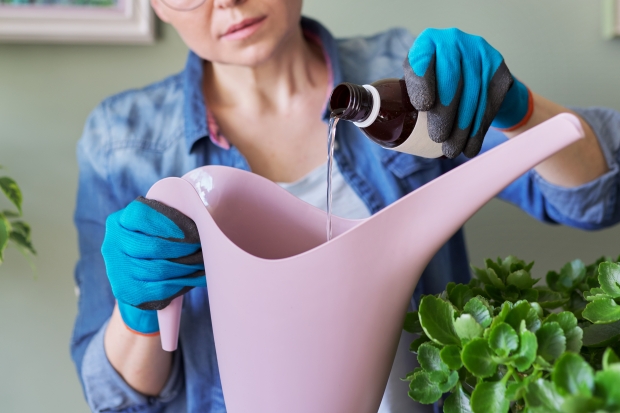
Types of Houseplant Fertilizer
In most cases, houseplant fertilizers come in three forms. Each has its advantages, so choose which style makes the most sense for your plants.
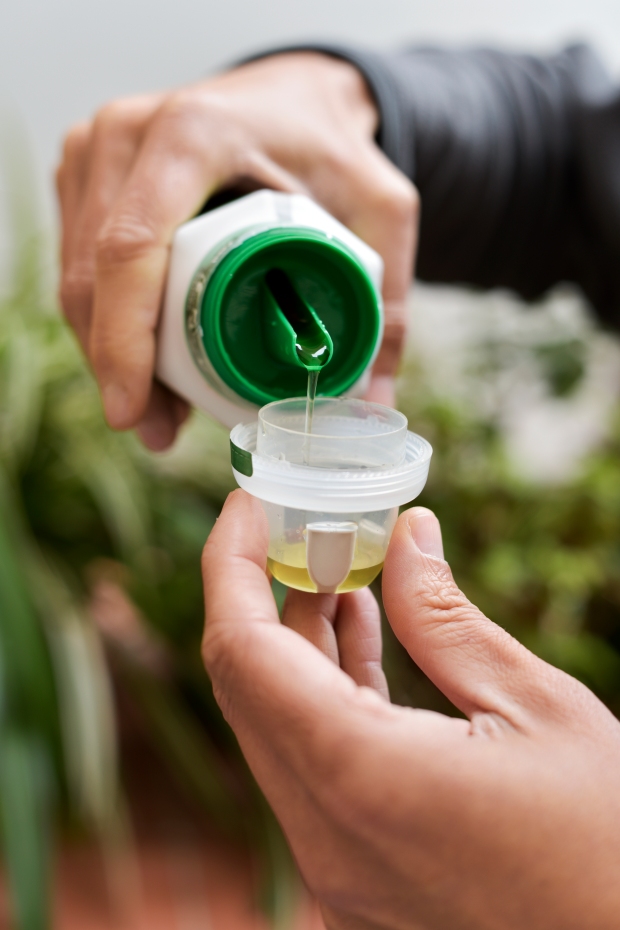
Liquid Houseplant Fertilizer: These fertilizers are easy to apply and come with a reduced risk of fertilizer burn. This means you can use them frequently without paying close attention to the dosage. However, they tend to soak into the soil quickly and potentially get out of reach of plant roots, which makes them less potent than other fertilizers.
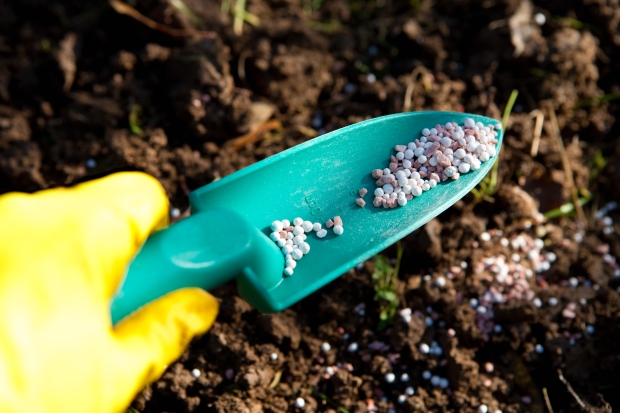
Granular Houseplant Fertilizer: This fertilizer type typically comes into two styles: loose, granular pellets or compressed “spikes.” You will either sprinkle them on the soil surface or press them down into it for closer contact with plant roots. Both styles make for easy measuring so you can add precise amounts to each pot.
Slow-Release Houseplant Fertilizers: Also known as timed-release fertilizers, this type of fertilizer comes as a liquid encapsulated in a coating designed to dissolve over a long period. This lets you fertilize once and let your plants reap the benefits for weeks or even months to come. One drawback is they tend to be made from synthetic ingredients that aren’t eco-friendly.
When to Fertilize Your Houseplants
Tempting as it might be to give your houseplants some extra love during the winter, it’s a mistake to feed them fertilizer during the colder months. Colder weather and shorter days cause many varieties to go dormant (even indoors), which means they are putting all their energy into maintenance rather than growing.
Adding fertilizer during this time may break the dormancy and lead to pale, weak growth that hurts the plant more than helps it. For this reason, it’s best to give plants a break from fertilizer throughout the winter.
But, as the days get longer and the weather begins to warm again, it’s time to start a fertilization routine again.
Exception: Plants grown under grow lights year-round can be fertilized throughout the winter because they won’t experience seasonal changes in lighting or temperature.
In many growing regions, you can plan to start fertilizing houseplants about eight weeks before the last expected frost date. This gives the plants enough time to slowly ramp up production before warmer weather returns.
You’ll know that houseplants are ready for fertilizer as soon as you see signs of active growth. It’s best to think of this supplemental nutrition as a reward for growing, not as a method for stimulating it to start.
General Tips for Applying Fertilizer to Houseplants
Make sure you introduce the fertilizer slowly to not overwhelm the plants. Too much too quickly will cause more harm than skipping it altogether. So, for the first few doses, consider diluting the fertilizer to half or even a quarter of its strength. You can gradually increase the concentration over the following weeks.
Likewise, it’s best to skip fertilizing for a few weeks after repotting indoor plants. The roots will already be stressed from the shock of transplanting, so they need some time to readjust before receiving a boost of nutrients that stimulates growth.
Finally, before applying any fertilizer, make sure you read the label carefully. Failing to follow instructions will leave your plants in worse shape than if you skipped fertilizing altogether. Research what type of fertilizer is best for your specific houseplants, and follow the manufacturer’s instructions for application.
Three Other Ways to Take Care of Houseplants Before Spring
Adding fertilizer is only part of the process of helping indoor plants acclimate to breaking dormancy in the spring. Here are other steps to give them a restart for the warmer weather.
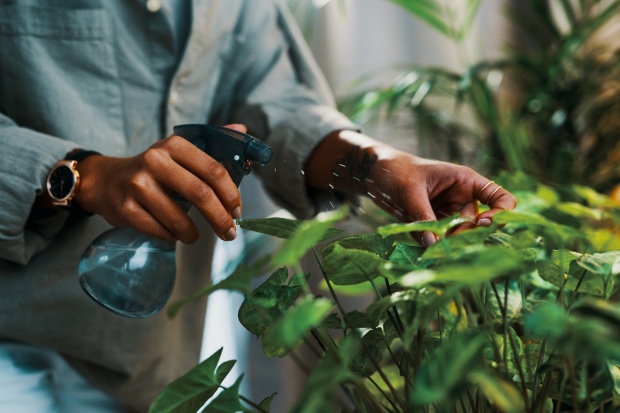
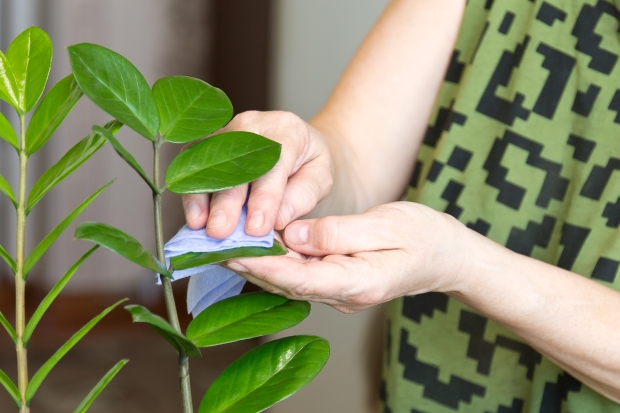
Dust and Wipe the Leaves
Houseplants can become incredibly dirty in the winter, thanks to all the time spent indoors with furnaces spreading dust through the air. Too much grime on the leaves can interfere with photosynthesis, so give the leaves the occasional wipe down with a wet rag or Q-tip to keep them clean.
This is also an excellent time to seek out signs of pests like spider mites, aphids, and mealybugs. Wipe any insects away and treat infected plants immediately with insecticidal soap to prevent infestations from spreading.
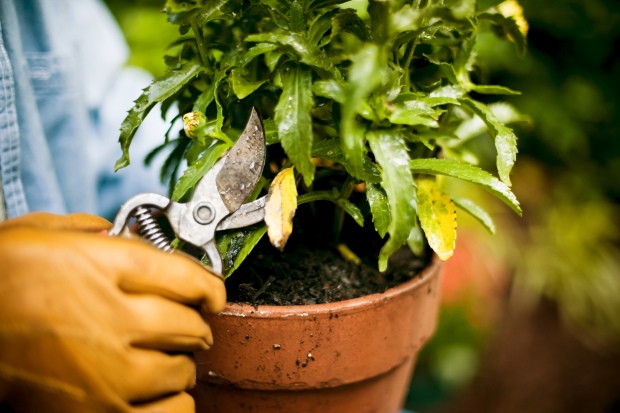
Trim and Prune
Winter dormancy makes for an ideal time to trim up indoor plants. Use pruning shears or your fingers to gently remove all dead or damaged leaves, and prune back the plant to your preferred shape. Remove any discarded plant material so it doesn’t rot in the pot and encourage mold growth or insect infestations.
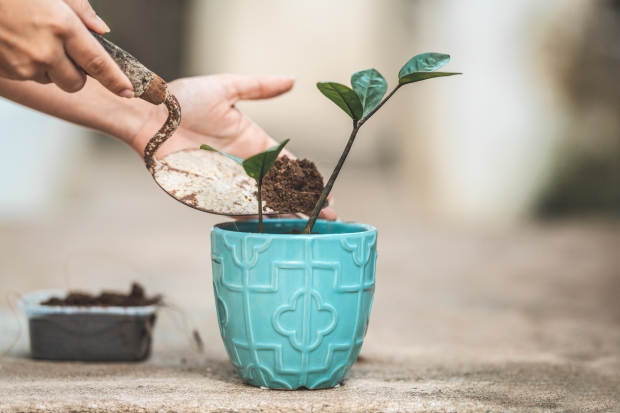
Consider Repotting
Use the end of winter as an opportunity to repot houseplants that need more growing space. Make sure the pot you choose is clean and allows for drainage, and aim to disturb the roots as little as possible during the transfer process.
Fertilizer is essential for houseplants to thrive. Time your applications with the seasons, and your plants will look their best all year long.
Nice and Light: Keep Houseplants Healthy With Perfect Lighting
Nice and Light: Keep Houseplants Healthy With Perfect Lighting
Getting the lighting requirements right for indoor plants is no easy task. Here’s how to tell whether yours need more or less time in the sunshine — and what to do about it.
Growing plants indoors can be a tricky proposition. Different varieties have unique requirements, especially when it comes to water and lighting needs. Understanding how to help each plant thrive within your indoor space comes down to knowing how to meet these needs.
Here’s a guide for how to care for light-sensitive plants in your home.
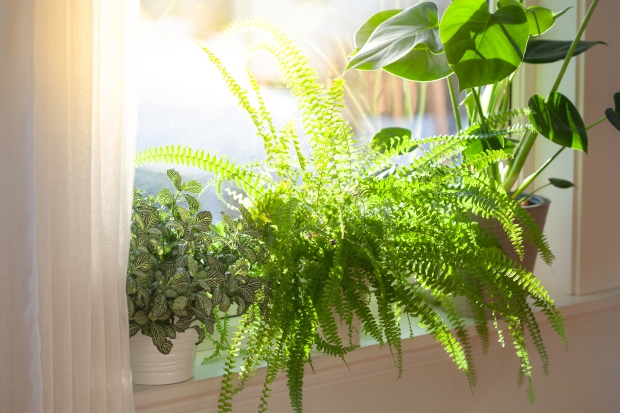
What is a Light-Sensitive Plant?
It’s a mistake to assume that all plants need as much light as possible. In truth, many varieties thrive with limited exposure.
Many tropical plants, which tend to make excellent houseplants, evolved in dark, shady spots under leafy canopies. Too much light will make them stressed and lead to stunted growth and leaf damage.
A few popular light-sensitive houseplants include devil’s ivy, creeping fig, elephant’s ear, weeping fig, Chinese money plant, and rattlesnake plant, among many others.
These low-light-loving plants do well in dark corners of your home. They thrive next to north-facing windows or even in spaces with minimal natural light altogether. Learn which plants can handle these conditions, and you can fill even dark corners of your space with plant life.
Eight Signs Your Plants Need More Light
Not all plants thrive in low-light conditions. Here are the signs your plant might be better off in a different location.
1. Sparse or Leggy Growth
You’ll know your plant is struggling to get enough light when you start to see long stems with lots of space between the leaves. Plants that look thin and straggly are reaching for as much light as possible, leading to this stretched-out appearance. Provide them with more, and you’ll soon see thicker, lusher growth.

2. No New Growth
Does your plant seem to be dormant? Is it going months on end with minimal changes? A lack of new growth might signify it’s not getting the light necessary for photosynthesis and is instead putting its limited energy toward maintenance.
Note that it’s normal for plants to enter dormancy in the winter — even when kept indoors. The problem occurs when this lack of new growth lasts for more than a few months.
3. Leaning Toward the Light Source
Are your houseplants starting to grow in particular directions? If you find their new leaves and stems are also angled toward the light source, this might be a sign that it’s a little too scarce. Rotating the plant every time you water can help even out this angled growth, and so can moving the pot to a brighter spot.
4. Producing Small Leaves
When an indoor plant seems only capable of producing small, stunted leaves, you may want to reevaluate its light exposure. Minimal growth is a sign the plant isn’t getting enough energy to put out new, full-sized foliage and instead is committing to the bare minimum to survive.
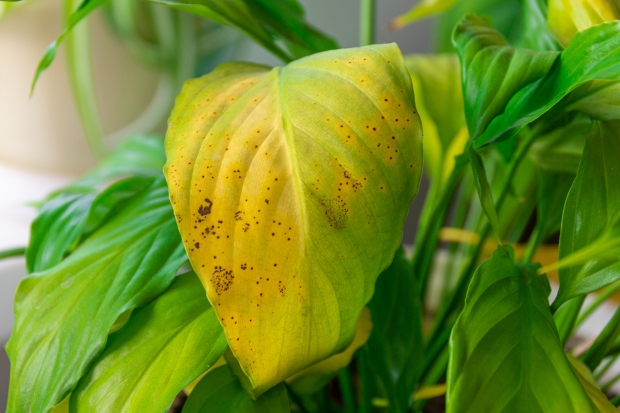
5. Browning Leaves & Tips
One clear sign that plants aren’t getting enough light is the development of browning leaves and tips. However, leaves can become discolored for various reasons, including overwatering (or underwatering!), nutrient deficiencies, pest damage, and more.
Consider ruling out these other factors one at a time, so you don’t inadvertently stress the plant by making too many changes at once.
6. Soil Stays Wet for Weeks
If you feel like you never need to water your indoor plants, this may be a sign that lighting might not be adequate. Potting soil dries out because the plant’s roots draw it out and use it to stimulate new growth. Too much water sitting in the pot can signify that the plant isn’t in a growth phase.
Move the plant to a location with more light, and you will likely notice that the potting soil dries much faster than before.

Note: Keep in mind that getting watering right for indoor plants is a balancing act. Water too often, and the plant will deal with “wet feet” that leave it susceptible to rot and mold problems. Make sure you research the specific watering requirements for each variety to ensure you can meet their needs.
7. The Plant Was Brought Indoors for the Winter
If your growing zone deals with freezing winter weather, then it’s common to bring potted plants indoors once the weather starts to turn. The shift from being outdoors to sitting on a windowsill can be stressful for plants accustomed to unlimited natural light.
You can ease this transition by bringing plants indoors gradually — a few hours a day for a week or two — so they have time to acclimate to the change in lighting.

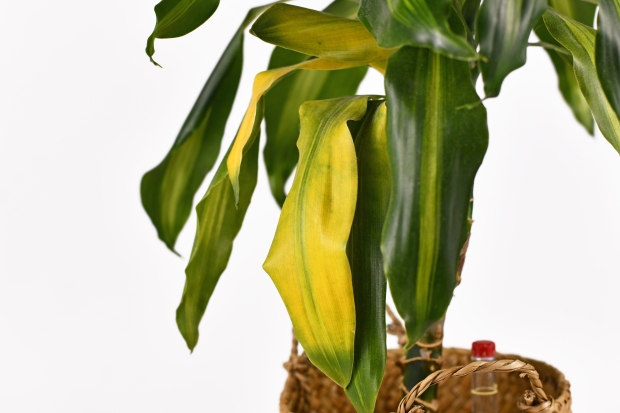
8. Leaves are Developing Dull Colors
If you have houseplants known for their vibrant leaves that seem to be turning dull, a lack of light may be to blame. When healthy, variegated houseplants will have a mix of colors throughout their leaves. However, too little light will make the leaves “revert” to green without those prized pops of color.
That’s because green leaves are the most efficient for photosynthesizing, and a plant starved of light will do everything possible to maximize the opportunity to capture it. Improve the plant’s access to light, and its bright colors should soon return.
Four Signs Plants Need Less Light
Sometimes, indoor plants experience the opposite problems and struggle because of too much light exposure. Here are the most common signs that your plant would do better in lower light conditions:
- The leaf edges are scorched or bleached
- The plant sucks down water daily
- There are brown, dry patches on the leaves
- Leaves are turning pale or yellowing
How to Improve Lighting Conditions for Indoor Plants
Here’s the good news: It’s a simple fix to improve the lighting conditions for your indoor plants. Whether they require more or less of it, a few small changes can ensure they stay at their healthiest. These tips are designed for increasing light exposure.
- Move Them Closer to a Window: Most indoor plants do best when placed a few feet from a sunny window so they can utilize the natural light. Make sure the space isn’t drafty, so the plants don’t deal with temperature extremes.
- Keep Them in South-Facing Rooms: Southern-oriented rooms receive the best lighting for most houseplants. In contrast, north-facing rooms receive the weakest light, especially in winter.
- Use a Grow Light: Sometimes, it’s best to supplement the natural lighting in your home with specialized grow lights. Prop one over your potted plants, and you can break them out of dormancy. Make sure you set the light on a timer to ensure the plants receive time in the dark as well.

Dealing with light-sensitive plants isn’t difficult, but it does require some attention. If you follow the suggestions outlined here, it should ensure you’re giving your plants the right conditions to thrive.