How to Use Stones in Your Landscape
No landscaping material is more versatile or durable than rock. From structures to walkways, natural stone materials can elevate a landscape design from “excellent” to “extraordinary.” But knowing how to use rocks in your landscaping can be tricky. Read on for a range of ideas.
Whether you have a large or small space to landscape, incorporating natural stone materials can make it more aesthetically pleasing — if done correctly. Here are 11 tips for adding rocks, stones, gravel, and more to your landscape.
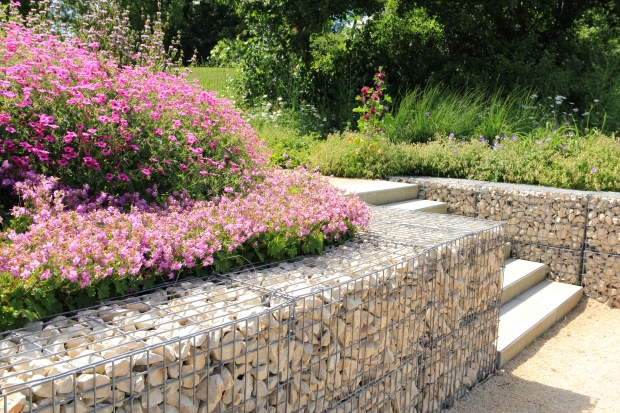
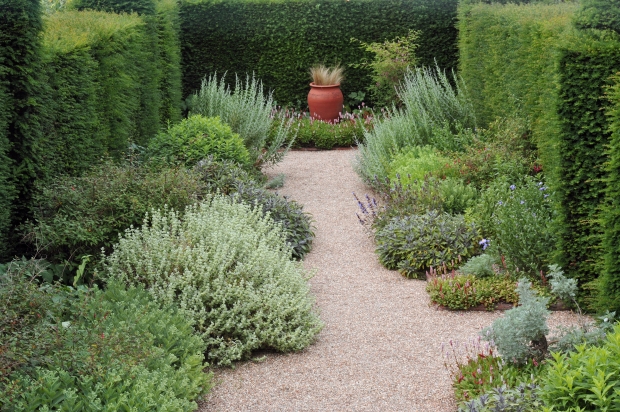
There are few uses of rocks in landscaping more sensible than retaining walls. Wooden retaining walls can’t compete with the resilience of rock, and concrete retaining walls lack the natural look and feel of stone. From dry-stacked natural limestone to precision-cut bluestone, the aesthetic of rock can be made to suit almost any garden. For a modern style, loose stones enclosed in constructed metal cages — known as gabions — offer a chic twist on traditional rock retaining walls.
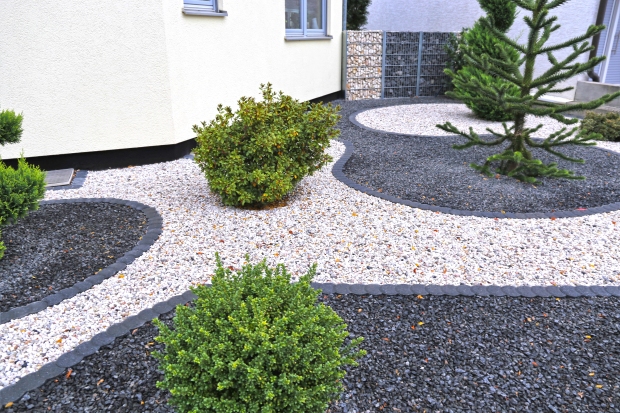
Mulch helps to retain the moisture in planting beds and keeps gardens looking manicured and tidy. However, wood mulch breaks down and must be replaced annually, plus it can be washed away in a heavy rain. Using gravel or river rock as a mulch is longer-lasting and gives a clean, modern look.
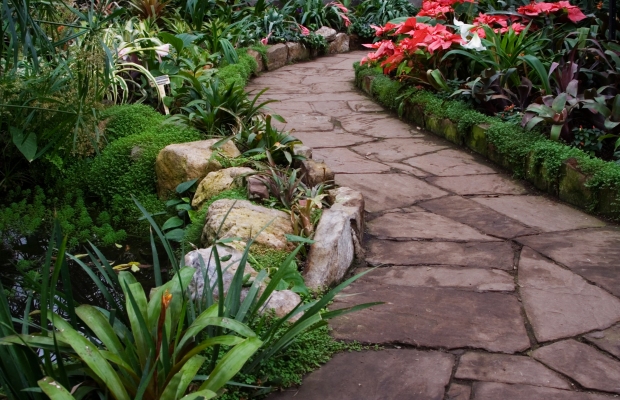
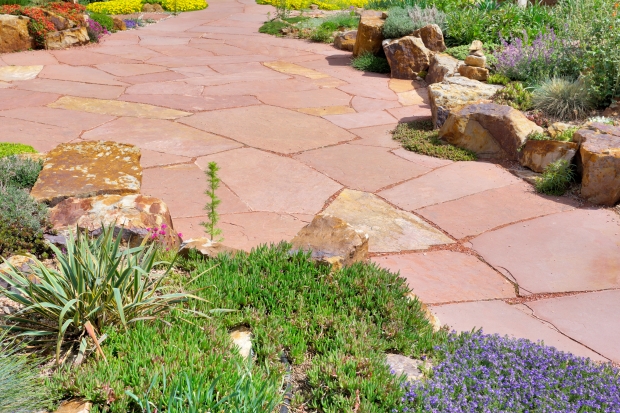
Stepping stones are a quintessential part of any cottage garden landscape, but there are many other ways to use rocks in a path. Flagstones can be used to make a beautiful, continuous walkway — they come in a wide variety of textures, colors, and sizes. Crushed stone or gravel are also commonly used as walking surfaces in landscapes.
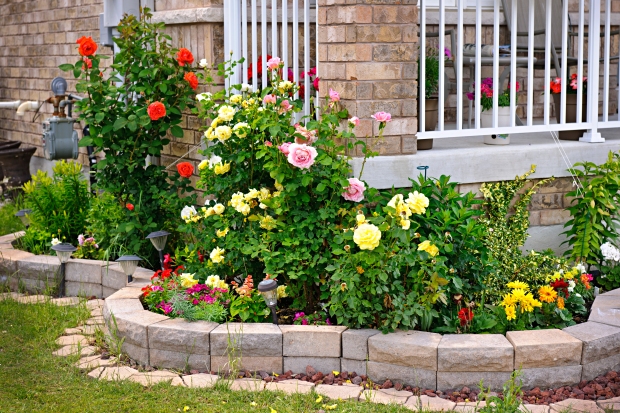
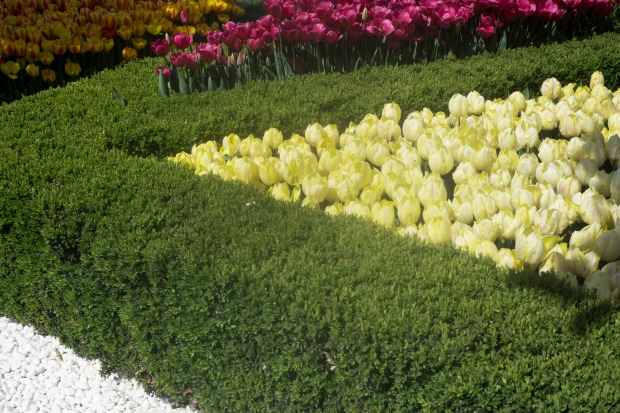
One of the most traditional ways rocks are used in landscaping is to form planting-bed borders. Like any of the other applications for rocks in the garden, border rocks come in many different forms. Whether natural or geometric, large or small — different types of rock will create entirely different looks, working with styles from rustic to modern.
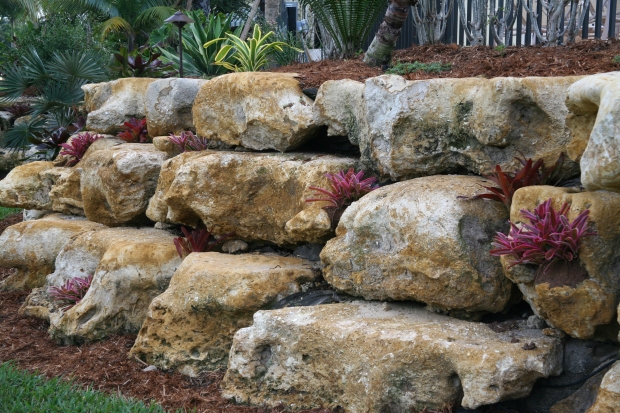
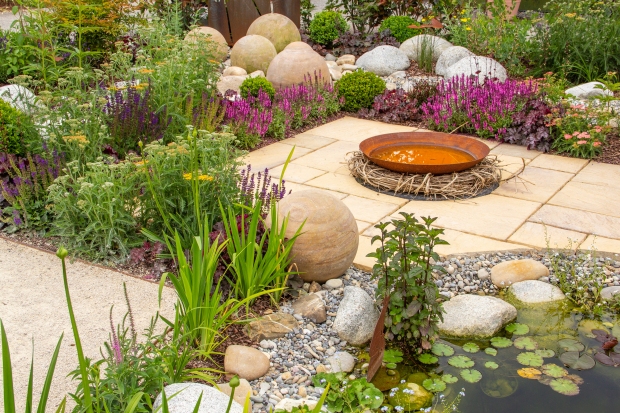
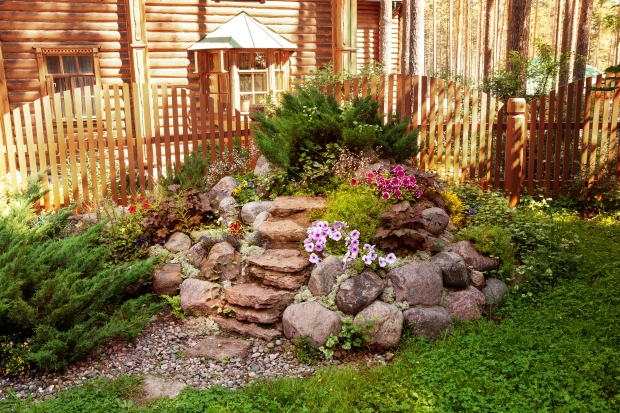
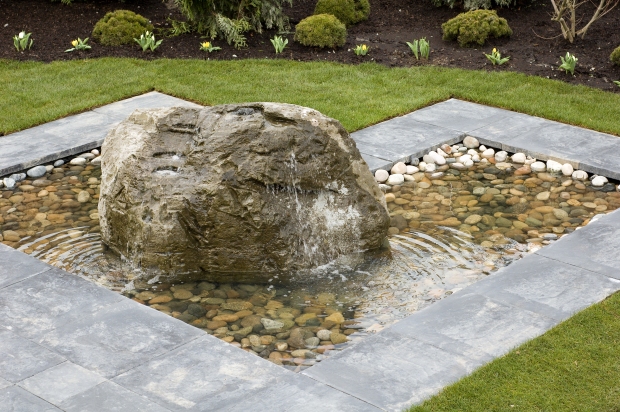
Boulders are visually arresting natural elements that work well as focal points or features in your landscape. A well-placed boulder can be used to hide an unsightly irrigation system access point, or it can be a central part of a water feature. Boulders can be artfully arranged as a border/retaining wall in a planting bed to increase its visual impact in the landscape or to give it a naturalistic look and feel.
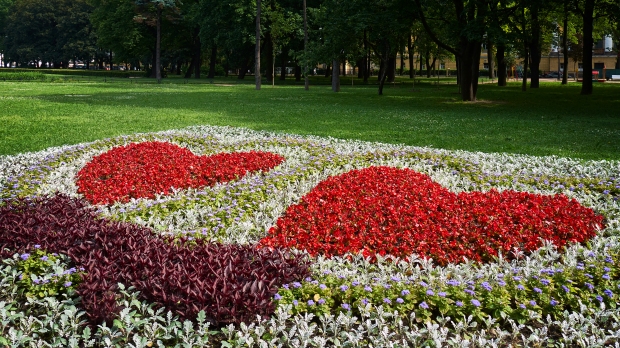
Ambitious, creative gardeners can lay underfoot mosaics using rocks of varying sizes and colors. River stones turned on their sides make wonderful textures, lending a unique effect in the landscape. Gravel or crushed rock in contrasting colors can be used to make stunning ground-level motifs for more whimsical or artistic landscapes.
Stacked boulders offer the benefit of looking as if they are naturally occuring. Savvy designers can use this characteristic to their advantage in relatively flat spaces, breaking the plane to create elevated planting areas that complement the existing landscape. The effect is especially well-suited for prairie and desert landscapes.
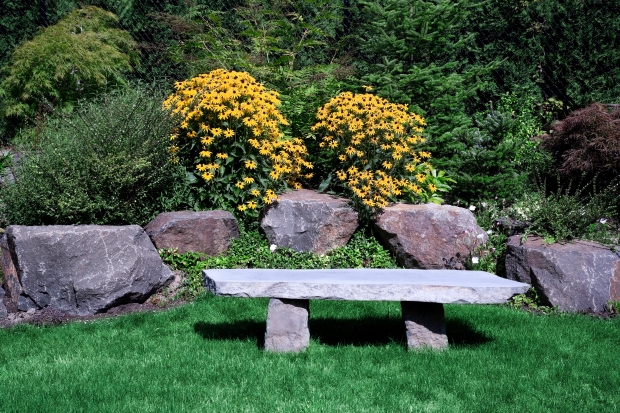
Boulders are already nature’s perfect seating. Kids clamber all over them, and people walking through a garden are drawn to them when they wish to carve out a quiet moment in nature. Well-placed boulders in a designed landscape are no different. But rocks can also be used to create built furniture, from rustic benches to elegant tables. Never underestimate the power a slab of rock has to invite a picnic or an inspired bout of cloud-watching.
No water feature is complete without stone elements. In fact, most water features rely heavily on cut stone borders, stacked-rock waterfalls, or a river stone lining. Stone basins are a mainstay of Zen gardens. And why not? Rock is one of the only materials that stands up to the tests of time, is non-corrosive, and doesn’t leach out chemicals that can poison fish in a koi pond.
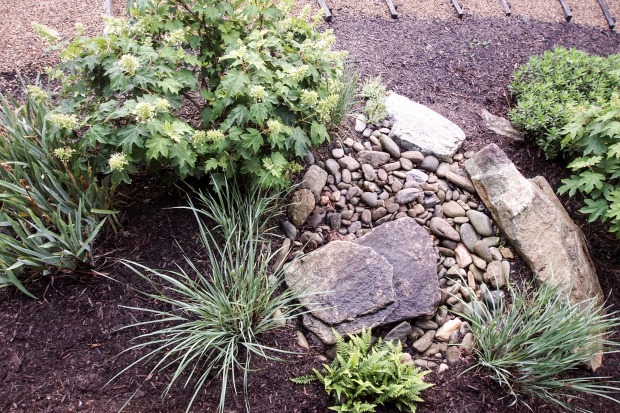
Most landscapes are carefully graded so that water moves away from living structures and garden beds. A rain garden does the opposite, working like a magnet to attract water from a heavy rain and hold it in the soil, allowing it to be absorbed slowly over time. Stone is critical to the success of a rain garden — from the gravel or river rock that encourages rainwater to flow into the garden to the rocks on the surface that prevent soil erosion during a downpour.
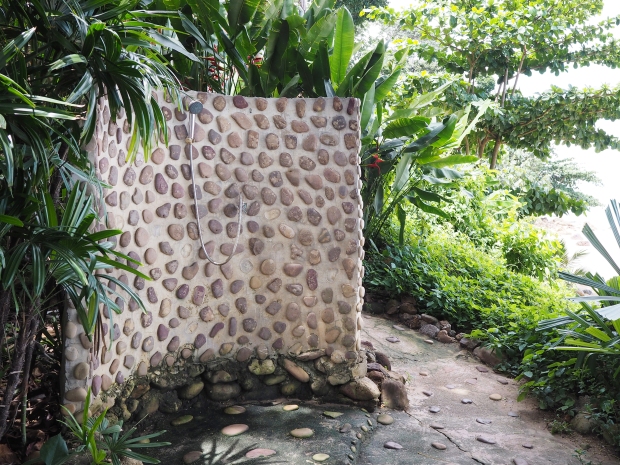
Ranging from out-of-this-world luxury to simple and utilitarian, one thing that most outdoor showers have in common is a rock element. Because stone holds up to water so well and channels drainage so effectively, it is an ideal material in outdoor shower construction.
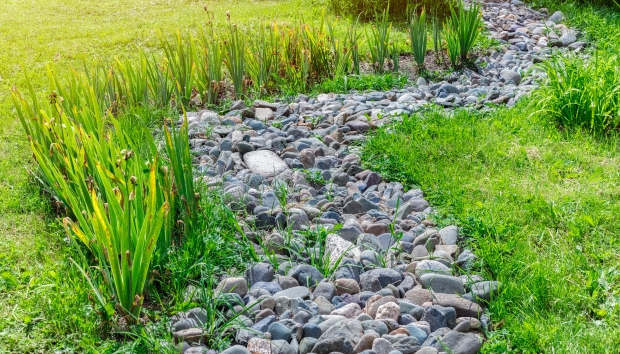
Properties at the bottom of a hill or located on a low point in a neighborhood often have trouble with flooding during heavy storms. French drains — sub-surface channels lined with rock — are a very common landscape drainage solution. But for a creative, naturalistic alternative, some designers instead choose to create swales. A swale is a rock-filled channel that is engineered to divert rainwater, but offers the outward appearance of a dry creek bed. Unlike other drainage solutions, a swale can become a beautiful part of a landscape.
As you can see, the number of ways that you can use rock in your landscape are limited only by your imagination. From high-end design elements to whimsical or rustic flourishes, stone is a beautiful, expressive landscape material that will outlast the best of us.
Why the EPCOT International Flower and Garden Festival Is a Can’t-Miss Event
The Epcot International Flower and Garden Festival is an annual event held at Epcot Park at Walt Disney World that is focused on plants, sustainability, and nature. Visitors can enjoy unique garden displays, international foods, and themed activities.
The Epcot International Flower and Garden Festival is held at Epcot in Orlando, Florida, every spring. Epcot is one of the four amusement parks that make up the Walt Disney World Resort. In addition to the normal rides and attractions at this park, Epcot also holds several themed festivals throughout the year. The International Flower and Garden Festival is the longest-running of Epcot’s festivals, dating to 1994.
During this festival, visitors to the park can expect to find blooming-bed flower displays around every corner, including themed gardens in many of the global areas at Epcot. The festival is also educational, giving guests many ways to learn about sustainability and the natural world.
Among the must-see elements of the Epcot International Flower and Garden Festival are the character topiary displays. Guests can see carefully crafted topiaries of famous Disney characters such as Elsa and Anna from Frozen, Buzz Lightyear, Snow White, and of course Mickey and Minnie Mouse. Each topiary scene is set against a backdrop of color-coordinated annual flowers. While the same topiaries return each year, there are usually a few new characters added for each festival.
Garden displays focus on the international aspect of Epcot as well as educating guests about nature. Global Gardens in past years have included a Bamboo Garden at the China Pavilion, Tropical Rainforest Garden and Extraordinary Orchids at the Mexico Pavilion, English Tea Garden at the United Kingdom Pavilion, and Alpine Miniature Garden at the Germany Pavilion. Other favorites are the floating gardens in Epcot’s Future World, where ponds and fountains are transformed with over 200 containers of miniature blooming gardens that appear to float on the surface of the water.
Flower quilts are displayed around Future World as well. These are colorful flower beds, planted with hundreds of blooms such as petunias, daisies, and geraniums, that create designs and pictures.
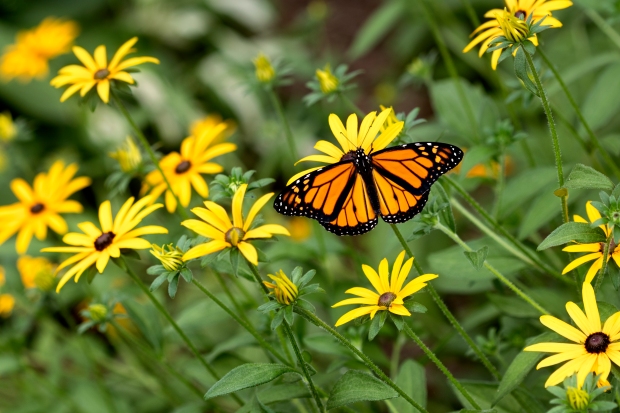
Both children and adults will enjoy a trip to the Goodness Garden Butterfly House. Located in Future World West, the Butterfly House is a huge temporary structure housing hundreds of butterflies and plenty of the plants that those butterflies like best. Aside from enjoying the sight of these colorful insects, visitors can also learn about butterfly habitats and life cycles. There is even the opportunity to watch a butterfly emerge from its chrysalis in one of their nurseries, if the timing is right.
There are many things to do at the Epcot International Flower and Garden Festival so it may be difficult to narrow it down. Here are some of the top recommendations.


All around the World Showcase are Outdoor Kitchens offering menus of international food and drinks. Many of the menu items tie into the festival’s theme by using fresh vegetables and herbs. The menus are published by Disney ahead of the festival opening, so it’s a good idea to decide on what food and drinks you definitely want to try before you go.

For those with dietary restrictions, the Outdoor Kitchens also offer menu items that are vegan, vegetarian, or gluten-free. Plant-based options are featured throughout the festival. Most of the menu items are served as small plates, so visitors can sample many different dishes. Almost all of the Outdoor Kitchens serve several signature alcoholic and non-alcoholic beverages.

Menu choices roughly correspond to the eleven countries represented in the World Showcase. The Outdoor Kitchens offer the opportunity to try global foods all in one location, so approach it with an open mind and a sense of adventure. Nearby, guests will find raised beds and in-ground vegetable gardens showcasing some of the produce used in the recipes.
Entrance to the Epcot International Flower and Garden Festival is included with the price of admission, but certain events may cost extra. You may also want to budget for food, drinks, and souvenirs.
While the festival dates vary slightly from year to year, this event usually begins in early March and runs through June or July. Note that some activities may not be held for the entirety of the festival, so check the schedule before planning your visit if there is something you particularly want to do.

Guests receive a Garden Passport upon entry. This passport is a valuable way to get info on what’s happening at the festival, and it also allows you to track all the amazing food you ate at the Outdoor Kitchens. Visitors who collect stamps in their Garden Passport for trying certain menu items can receive a free gift.

Certain festival merchandise is only available for purchase to Walt Disney World Annual Passholders, who also get 20% off most purchases. For guests on Disney Dining Plans, snack credits can be used to purchase some items from the festival’s Outdoor Kitchens.
Remember that you still are free to take advantage of all the other attractions in the park while you’re there. It’s a good idea to plan for at least one full day to explore Epcot.
The Epcot International Flower & Garden Festival is one of several festivals held at Epcot annually, and makes a trip to this park even more exciting. It will be most exciting for those who have an interest in gardening and nature, but has plenty that can appeal to any visitor.
Green Ideas for Gardening on St. Patrick’s Day
Observed every March 17, Saint Patrick’s Day is the perfect holiday to green up your home or garden. Show your Irish pride using cut flower arrangements, or grow your own plants from some of these suggestions.
When you think of St. Patrick’s Day, what pops into your mind? For a lot of people, St. Patrick’s Day is a day to hang out with friends and knock back some beers. Since its inception centuries ago, St. Patrick’s Day has evolved into a day to celebrate luck. However, that’s not what the holiday is about. So before getting into some great plant ideas for St. Patrick’s Day, let’s go over a bit of history first.

As the name might suggest, St. Patrick’s Day is rooted in Christianity. Celebrated on March 17, the holiday commemorates Saint Patrick and the arrival of Christianity in Ireland while also celebrating the heritage and culture of Ireland. In Ireland, St. Patrick’s Day was being celebrated as early as the 9th and 10th centuries, but it didn’t officially become a public holiday in Ireland until 1903. The celebration reached America in the 1840s as more Irish people immigrated to the U.S. to escape the potato famine. Since then, Americans have embraced the holiday, although it has become less about the saint and more about celebrating Irish traditions, culture, and history.

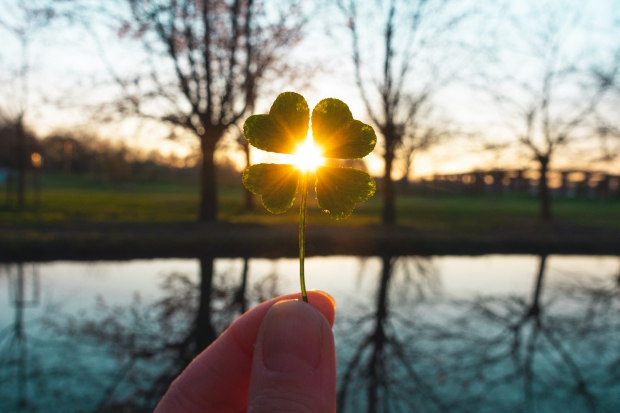
One thing that hasn’t changed over the years is the use of the color green. While many think the green is a reference to Ireland’s rolling hills, it actually stems from the shamrock. According to legend, St. Patrick used three-leaf clovers to illustrate Christianity’s Holy Trinity of the Father, Son, and Holy Ghost. Initially, people wore shamrocks on their clothes which evolved to wearing green.
While St. Patrick’s Day might last one day, you can keep the spirit alive by decorating your house with traditionally Irish plants or your garden with lovely native Irish plants. Even if your home doesn’t have the same blend of moderate sunlight, rain, and rich soil that makes plants thrive in Ireland, most of the varieties listed below are hardy enough to grow wherever you plant them.

This should go without saying, but shamrocks are a must for St. Patrick’s Day. Not only is it the official plant of the holiday, it’s also closely associated with Ireland in general. If you’ve seen a shamrock, you might think that they are the same as clovers. While technically true, shamrocks are a more specific type of clover. Clovers refer to around 300 species of the Trifolium family of which shamrocks fall into. What is traditionally known as a shamrock is most likely either the white clover or suckling clover.

The most important aspect of the shamrock is that it must have three leaves. Anything more or less is not considered a shamrock. Of course, if you’re growing clovers, you might not be able to control exactly how many leaflets a plant has. Some mutations might lead to two leaves while others lead to four or more! (Speaking of four leaves, the original use of a four-leafed clover was as a good luck charm against evil spirits.)
Shamrocks are easy to grow and maintain, making them a perfect addition to your garden. If you don’t have a garden, you can always create paper shamrocks with some green construction paper. There are multiple tutorials online ranging from simple to more complex.
Until the 1900s, green carnations were a popular choice for St. Patrick’s Day so why not bring the tradition back? Carnations have been cultivated for over 2,000 years because of their spicy fragrance and showy petals. While carnations traditionally symbolize love, there are many variations, depending on color. Green carnations during St. Patrick’s Day not only represent the shamrock, but also health, resilience, and good fortune.
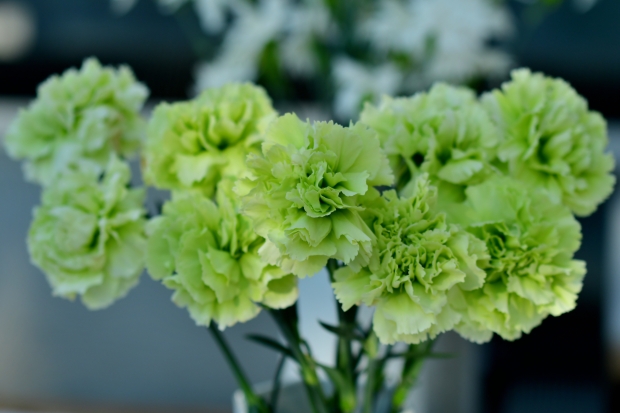
While it might be hard to find a shamrock bouquet, you can easily make a lovely arrangement of green carnations for your home. There are natural green carnations, but you can also make your own green flowers by dyeing them. Pour some water in a vase and add a couple drops of green food coloring. Then take a white carnation, cut the bottom of the stem at an angle, and place it in the vase. It might take a few hours, but eventually the flower will absorb the water and dye the petals a light green.
Decorate your house with lovely green carnations during the holiday and send some vases or baskets to friends and family. It’s an elegant and subtle way to celebrate the holiday. Plus, the cut flowers will also brighten up the house for at least a week.
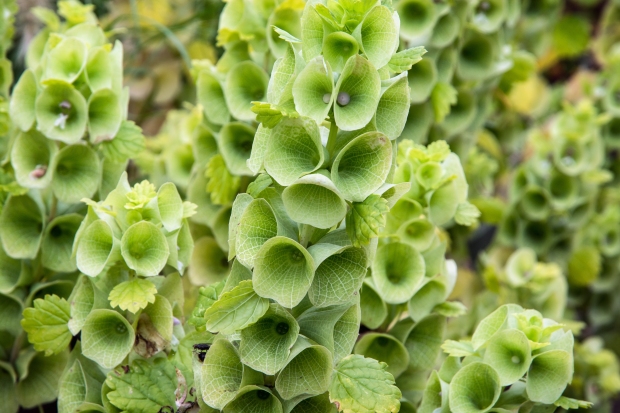
Commonly known as “shell flowers,” these are popular in bridal arrangements and St. Patrick’s day bouquets. These annual flowering plants have been in cultivation since the 1500s. The flowers are a symbol of good luck. Despite the name, these are native to western Asia, but their stunning green color, availability, and longevity have made them a favorite among florists worldwide.
While you can include these gorgeous flowers in your floral arrangement, they are also great to add to your garden. With that said, you won’t be seeing these flowers in bloom during St. Patrick’s Day. It takes around a month for the seeds to germinate and another two months for them to bloom. Still, Bells of Ireland are an excellent addition to your spring garden as they’re easy to grow, do well in containers, and can be used in the border or cutting bed. Maintenance requirements are low, and they are generally trouble-free plants as attacks by pests and disease are rare. While you might not need to prune the flowers, if you live in a particularly windy area, you might need to stake them.
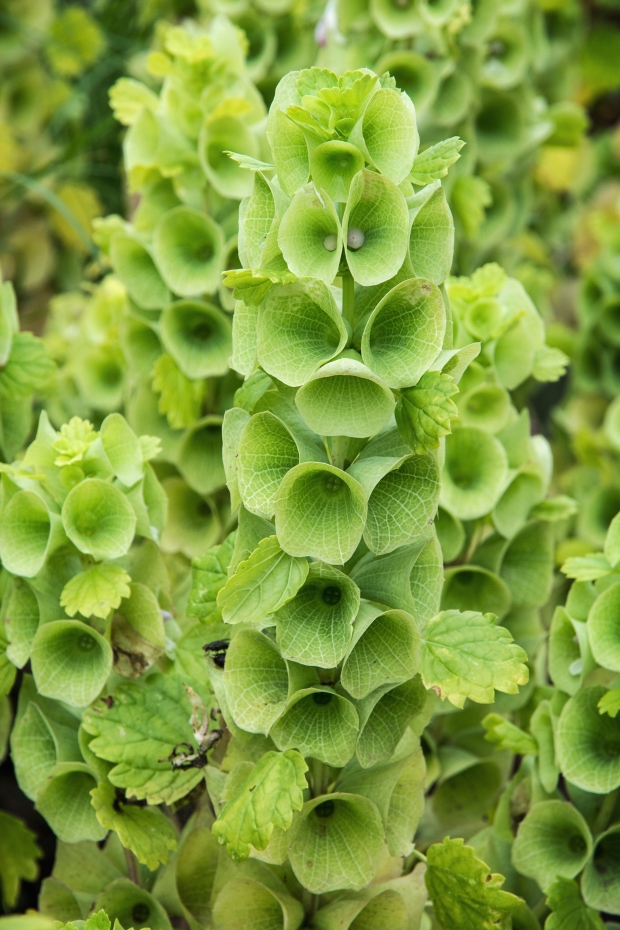
Bells of Ireland work great for either fresh or dry flower arrangements. If you do dry them, be forewarned that they will take on a pale beige hue. To dry, pick the stems when the flowers are fully open, then hang them upside-down in small bunches in a dry, airy place. It should take a few weeks to fully dry.
Adding green to your St. Patrick’s Day celebration is more than just wearing green clothes. You can also include actual greenery to your garden and home! Of course, you don’t have to stick with the plants listed above. Any greenery is a great option, especially inside the house as the plants can help relieve stress and improve air quality. So whether you’re going for cut flowers in your house, potted plants inside and out, or an extra bit of green in your garden, you can make your place feel more festive this St. Patrick’s Day and beyond.
Don’t Wait ’Til Spring: Start These Gardening Tasks After Daylight Savings Time
This year, get an early start on the gardening season with these outdoor tasks that you can start as soon as daylight savings time arrives.
Once daylight savings arrives, it feels like spring is just around the corner. Longer days and more sunshine make it hard to resist getting in the garden. Thankfully, you don’t have to. It’s possible to start many gardening projects as soon as the days begin to get longer, giving you ample time to enjoy some color by springtime.

The original purpose of daylight savings time was to give farmers more time in their fields, so it’s only fitting that you utilize the extra time to work outdoors. Here are the projects you should prioritize after daylight savings time to give yourself the best garden going forward.
There are many planting projects you can begin as soon as the calendar turns toward spring. What’s possible for you will depend on your specific growing zone, so use these tips as guidance, and do your own research for your region.
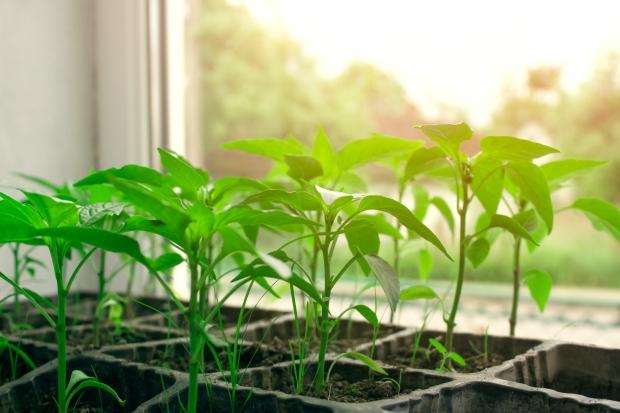
Early spring is the perfect time to start your seeds for the summer vegetable garden. Take advantage of the longer days by placing your seeds near a south-facing window to maximize sunlight exposure.
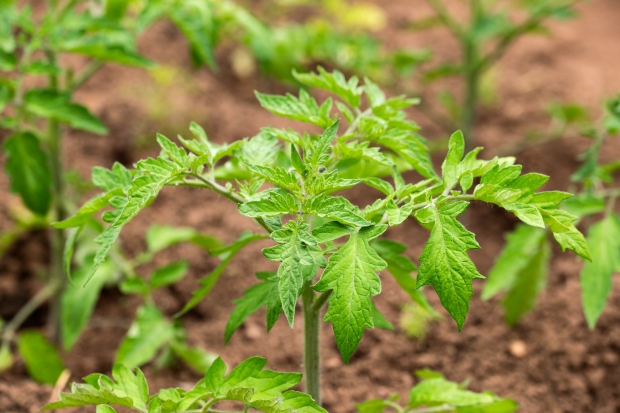
Focus on heat-tolerant, long-season producers like tomatoes, peppers, eggplant, melons, and squash. If you have room, consider starting salad greens indoors as well.
There are plenty of cold-tolerant plants that do well outdoors in the early spring. The weeks after daylight savings might be the right time to get your arugula, asparagus, beans, beets, sweet peas, carrots, cucumbers, leeks, onions, radishes, and all matter of greens outdoors.
Since early spring weather is temperamental, you may need to cover them with plastic under low tunnels when the temperature drops to eliminate any shock on the coldest days.

Early spring weather won’t stress most herbs, so this is a good time to get them in the ground. Pay close attention to the planting instructions so you know what varieties do better when started indoors. Generally, cilantro, parsley, thyme, and rosemary are cold hardy enough for early season planting.
Nothing feels better than seeing the first flowers of spring. Get yours going early this year by planting seeds such as alyssum, cornflower, carnation, cosmos, marigold, petunias, hollyhock, impatiens, and dozens more. Some varieties, such as sweet pea, can be sown as early as Valentine’s Day.
Spring makes a stellar time to plant perennials, as it allows them to get established before the stress of summer heat. If you want spring flowers the following year, plant some columbine, brachycome, armeria, true geraniums, and similar varieties.
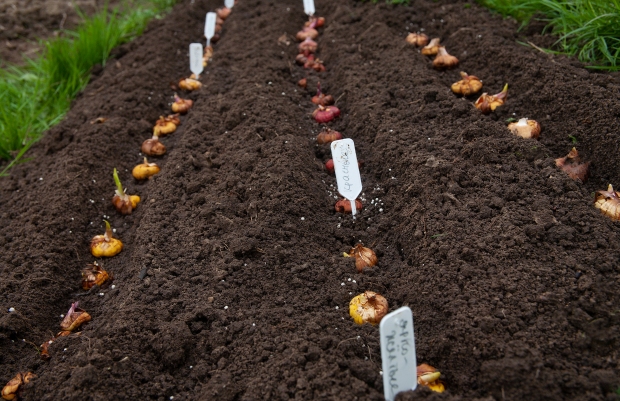
Bulbing plants like irises, tulips, and daffodils tend to give the earliest blooms of the spring. These do best when planted in the fall, and the bulbs will split after every growing season to multiply the blooms in each flower bed.
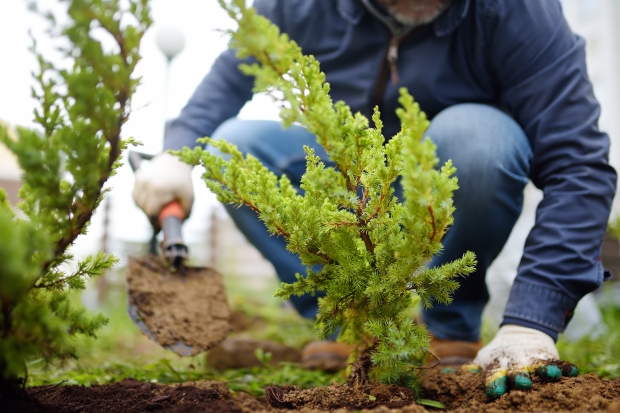
Early spring makes for the optimal time to get new trees and shrubs in the ground. Planting bareroot varieties is best, as they will suffer the least transplant shock once they get in the ground. Pay close attention to the planting instructions for each type to ensure you prepare the soil appropriately beforehand.
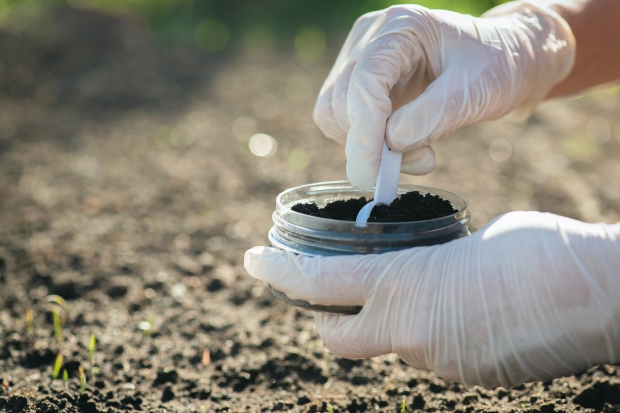
Before planting a new space, it’s always wise to get a soil test. This will gauge your ground’s pH level and let you know what nutrients the growing space is deficient in. That way, you can amend the soil beforehand to give every plant the best chance of success.
It’s unnecessary to perform a soil test every year, but you’ll be well-served to do so at least once every three years.
There’s a lot you can do in the early spring to set up your garden for success. Here are the seasonally appropriate tasks that will make a big difference for your space if you do them right.
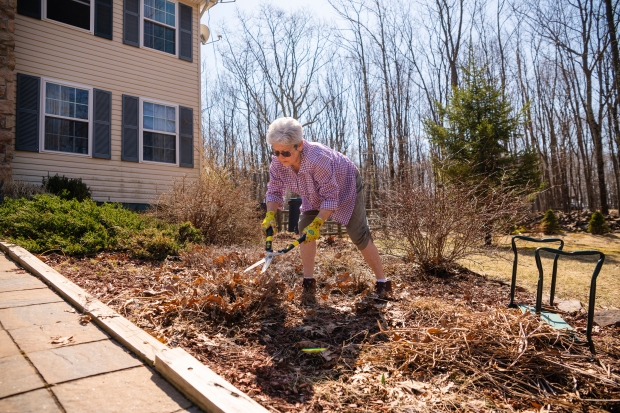
Depending on how crazy the fall growing season went, your garden might have been left in disarray. No matter! Spring gives you ample opportunity to perform a reset and get things back in shape. This is the time to remove old plant stalks, rake the mulch back into beds, re-form garden trails, and more.
This is also the time to look through your garden beds for signs of damage. Did any perennials get dug out by creatures or otherwise become damaged in the winter? Make an inventory of what needs to be replaced, so you can have a strategy for the spring.
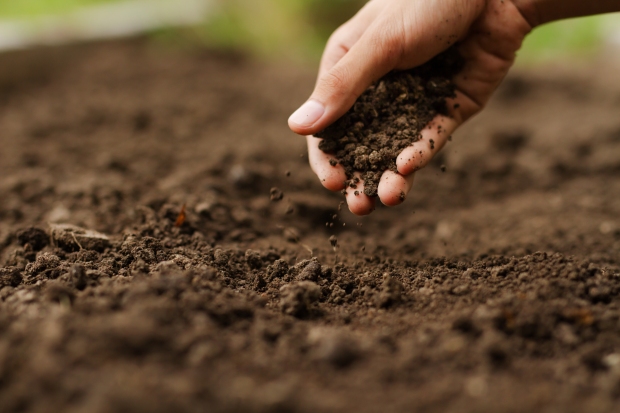
Depending on where you live, late winter can be a wet time of year. Whether you’re dealing with melting snow or torrential rain showers, the odds are you’ll be dealing with soggy ground. Seeds planted too soon in the muck may rot before they germinate, so wait for dryer conditions before putting them in the ground.
You can also give your houseplants a boost by bringing them outdoors in the spring. They will love the opportunity to enjoy some fresh rainwater.
One of the easiest ways to perk up your garden space this spring is to pull out your outdoor furniture from storage. The odds are good you’ll be using it on the first sunny day, so it’s smart to have it set up and ready to use.
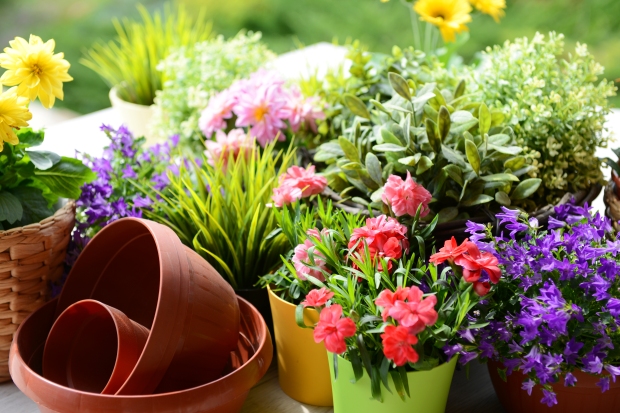
A little backyard décor can go a long way toward making your outdoor space feel like an extension of your home. Add an extra sense of spring to the space with planters filled with annuals to give you blooms earlier than you can grow them in your garden.
The wait is almost over — there’s plenty that you can do in your garden as soon as the days start to get longer. Take advantage of the longer days and balmier weather so you can begin enjoying homegrown flowers and vegetables in no time.
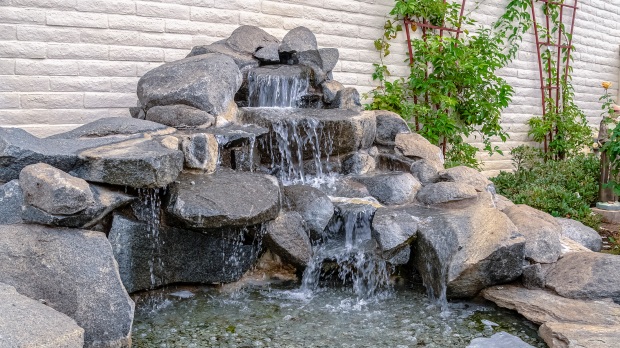
Build a DIY Stream to Meander Through Your Garden
Learn how to build a cascading stream in your garden, complete with a waterfall feature. Customize the design to fit your space and budget, including how to add more than one waterfall!
Have you ever thought about adding a water feature to your yard or garden but hesitated because you assumed you’d need to hire a professional? That’s not the case! If you’re willing to put in a couple of days (or maybe two or three weekends) of hard work, you can build a garden stream with a waterfall yourself.
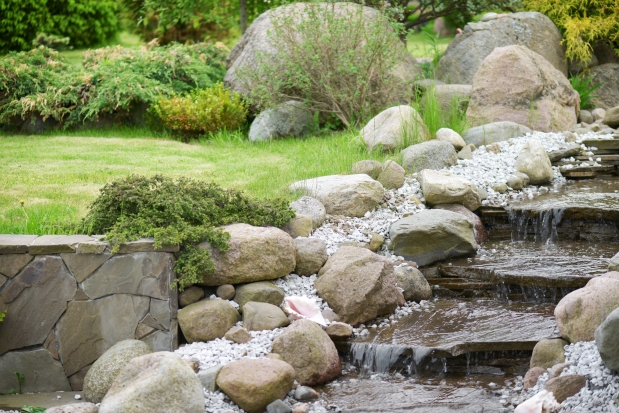
With these instructions, you can create a rock-lined rippling stream through your garden with one or multiple waterfalls customized to your space.
Before digging, call a local service (811 in most areas) to have the utilities located and marked to avoid hitting underground lines.
Lay out a rough outline of the design using a garden hose. Mark out the size and shape of the lower basin and upper pool, the waterfall location(s), and the outside edges of the streambed.
Once the design is established, use spray paint to mark the outline and remove the garden hose. At this time, you can also mark out where you’d like large, decorative boulders to go.
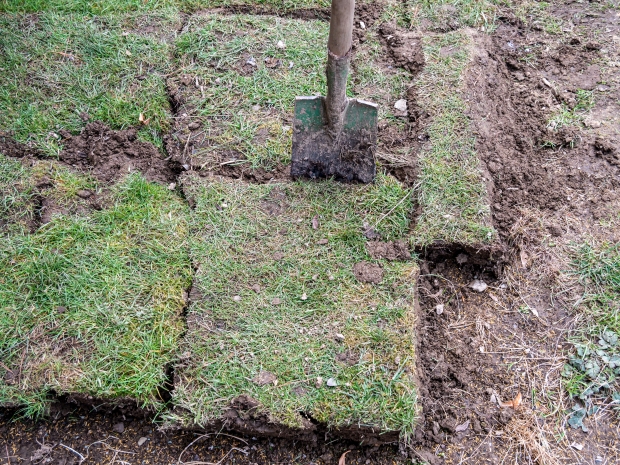
Remove any turfgrass inside the outline you painted on the grass. Pull out any large rocks or other debris.
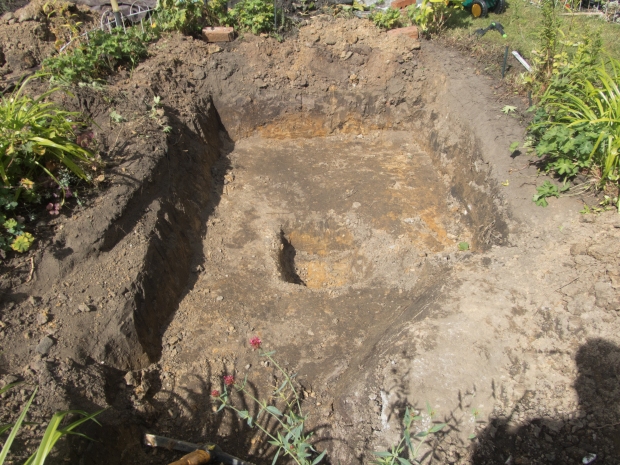
Dig out the spots intended for the lower basin and upper pool. The lower basin doesn’t need to be more than a few inches deep, but it should be at least a foot wider than the streambed.
In the lower basin, dig a hole at least six inches deeper than the height and two feet wider than the sump basin diameter. The sump basin will be set in this hole, surrounded by rocks.
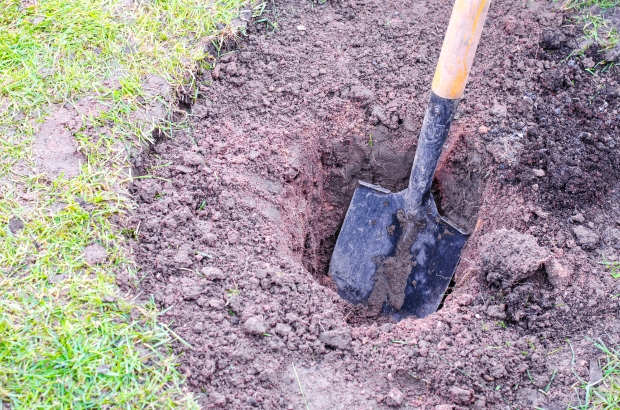
Once the upper pool and bottom gravel are dug, begin creating the sloped streambed, working in small sections. You can vary the streambed slope in spots but remember to leave a flat area where you’ll be building the waterfall(s). Dig pools under the waterfall(s) to slow water flow.
Make sure the edges of the streambed are raised enough to create adequate depth in the stream, and the sides are level.
Working your way through the entire feature, pack the dirt at the bottom of the upper pool, streambed, and bottom basin using the soil tamp. Compressing the ground keeps it from shifting under the water’s weight.
Use pressure-treated lumber to create a simple framework for the edges of the streambed, anchoring it with spikes. Framing it solidifies the form so the streambed stays level.
Lay underlayment across all of the exposed dirt and then cover everything with pond liner, making sure to get both layers tucked well into the corners.
The pond liner should extend about two feet past the perimeter on every side. You can tape the edges where pieces overlap, but it isn’t necessary if you overlap pieces by at least 18”.
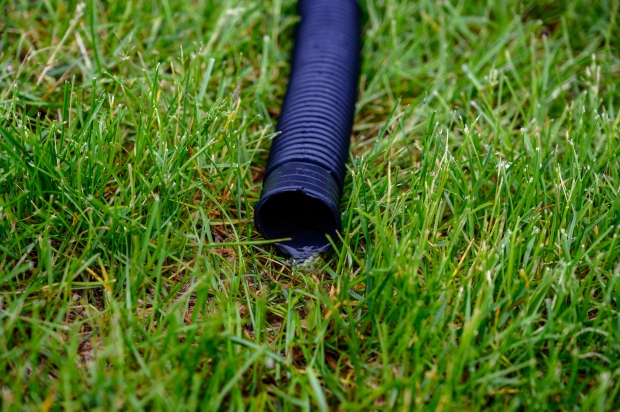
Use the hole saw bits and the drill bit to create holes in the sump basin to allow water to reach the pump.
Attach the hose adapter to the pump and place the pump in the bottom of the basin. Feed the hose through one of the holes, attaching it to the hose adapter.
Place the sump basin and pump in the deeper hole you dug and run the water hose out of the lower basin.
Put the lid on the sump basin and fill the space in the hole, around the sump basin, with medium-sized rocks up to the basin lid.
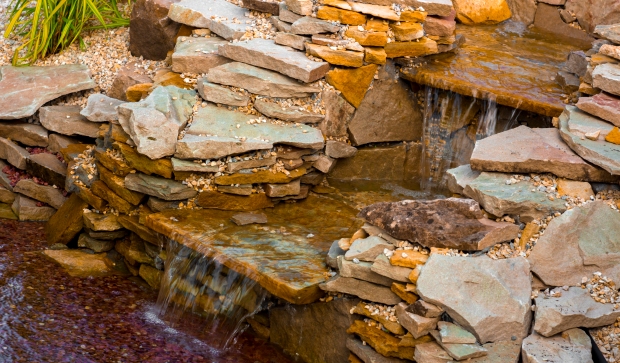
The waterfall rocks need to fit well together to force the water to go over the waterfall and create drops, so this step requires careful rock selection and planning. Dry-fit flat stones or large square rocks into place to form the waterfalls. Fill in the gaps with smaller stones.
Once the rocks are firmly in place, use foam sealant to adhere the stones to the pond liner and fill any cracks between rocks. After the foam is dried, run water over the waterfall to look for leaks underneath the spill stones. Fill leaks with foam, and repeat the process until all of the water goes over the waterfall.
Build an outer wall around the perimeter using the different rocks you purchased to create a berm. Mix and match large decorative boulders with smaller field rocks to create a natural look.
Intersperse larger rocks, river rocks, and gravel to cover the stream bed and fill the upper pool. Place bigger rocks where they would naturally fall if they cascaded down the stream.
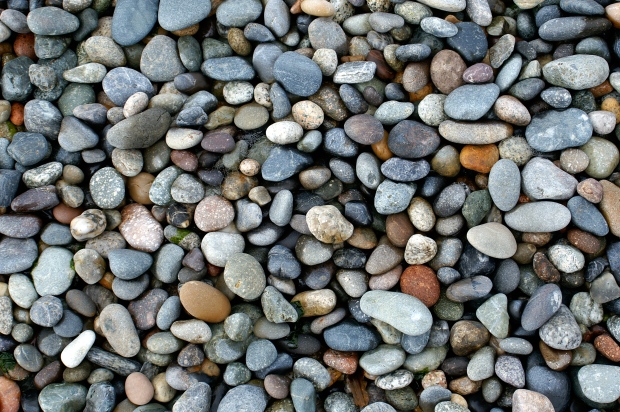
Lastly, fill the entire lower basin with a few inches of smaller gravel, covering the sump basin lid.
Starting at the top, spray all of the rocks with water and allow it to cascade down through the stream. When water starts collecting in the gravel basin, remove the pump hose from the upper pool and let the dirty water drain elsewhere. Continue running water through the stream until it runs clear.
Once the rocks are clean, securely tuck the water hose back into the upper pool and fill the stream.
With all of the construction completed, use your utility knife to trim the edges of the pond liner covering any liner that shows with gravel or smaller rocks.
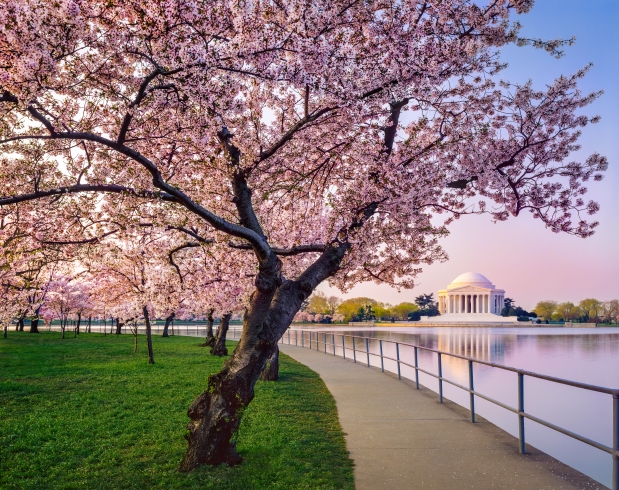
Visitor’s Guide to the National Cherry Blossom Festival in Washington, D.C.
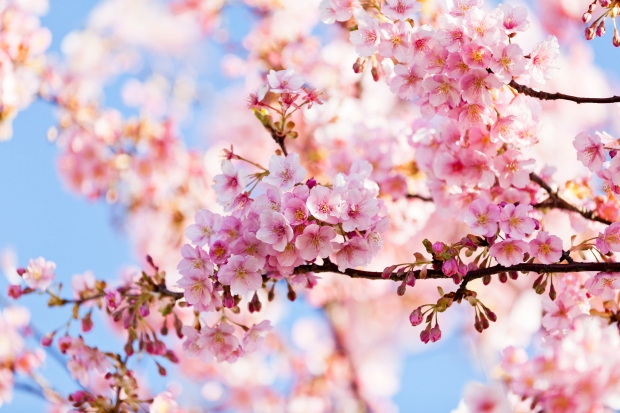
Cherry blossoms are a sure sign that spring has arrived, and there’s no better place to enjoy the beautiful sea of pink than the National Cherry Blossom Festival. Held every year in Washington, D.C, it is one of the most popular spring events in the country.
Spring is the time for revitalization and regrowth. Much like autumn, spring provides gorgeous colors, but this time a sea of pastel greens and pinks. Cherry blossoms are among spring’s best attractions, and one of the most spectacular places to check out the blooms is during the National Cherry Blossom Festival in Washington, D.C.

While the timing of the festival changes every year, over the years the schedule has extended to run across several weeks to increase chances that visitors will be able to see peak bloom. Peak bloom is defined as the day when 70% of the cherry blossom trees in the area have opened their buds. In general, the festival runs from mid-March through mid-April, though the organizers did make last-minute changes to the dates in 2017 and 2018 to accommodate an early bloom.
Of course, Washington isn’t the only place that has a cherry blossom festival, but it is the oldest and also the largest in the United States. Although the main event is definitely checking out the beautiful cherry blossoms, there’s much more to do over the three-week-long festival.
The effort to bring cherry trees to Washington started in 1885 with Eliza Ruhamah Scidmore, who had floated the idea to plant cherry trees along the Potomac River after her trip to Japan. Unfortunately, the initial idea was rebuffed, and it wasn’t until 1909 that Scidmore took matters into her own hands and raised money to buy cherry trees to donate to the District. She reached out to First Lady Helen Taft, informing her of her plans, who in turn agreed to the project.
At the same time, a Japanese chemist was also in Washington with Mr. Midzuno, the Japanese consul to New York City. When he learned of the plan to plant Japanese cherry trees along the speedway, he donated an additional 2,000 trees on behalf of Tokyo. Unfortunately, the original 2,000 trees had to be burned due to bug infestation. Luckily, Mayor Yukio Oazaki donated another 3,000 in 1912 to enhance the friendship between the U.S. and Japan. First Lady Helen Taft and Viscountess Iwa Chinda planted the first cherry trees on March 27, 1912.
Although the cherry trees were planted in 1912, the first Cherry Blossom Festival was held in late 1934, becoming an annual event in 1935. Since then, more events have been added to the festival to what is now a three-week cultural festival that more than 1.5 million people visit each year. The number of trees has grown to 3,750 over the years, featuring more than 16 varieties of cherry blossoms.

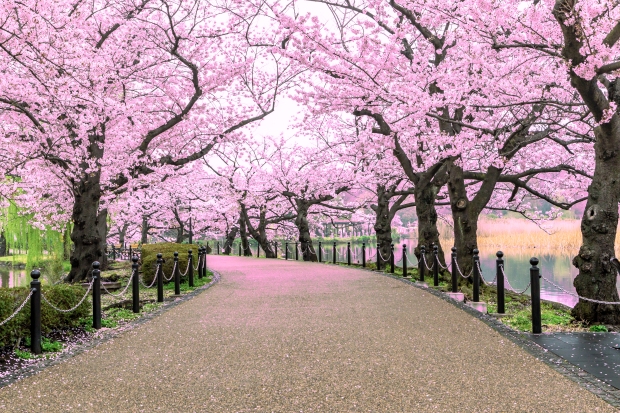
The highlight of the festival might be the cherry blossoms, but there’s a lot more to it than pretty flowers! The festival offers a variety of activities. Of course, if you want the best views of the cherry blossoms, there are a few key locations for some amazing pictures, many of which get very crowded. The most crowded place will be along Tidal Basin, so if you want to avoid the crowd, there are a few locations that are just as pretty and often have better views:

After you’ve had your fill of cherry blossoms, there’s still plenty to do at the festival. In fact, there are over 200 family-friendly events and performances. New ones are added to the itinerary every year, but there are a few events that happen consistently every year:

Maintaining all 3,000+ trees isn’t free and requires expert horticulturists and botanists to keep the trees healthy. More than 100 years of wear and tear, increasing foot traffic, and consistent flooding have taken their toll on these beautiful trees. In order to keep these trees healthy, the Trust for the National Mall started the Endow a Cherry Tree Campaign. If you have visited and enjoyed the Cherry Blossom Festival, or even if you haven’t attended yet, you can choose to adopt a cherry tree. Your donation will help support the care and nurturing of a tree all season long. The money is spent on pruning, mulching, fertilizing, and feeding the trees, which will preserve them for generations to come.

Even if you cannot adopt a tree at this moment, you can still make a one-time donation to support the effort. You can also start a fundraising team and collaborate with your peers to reach a goal to endow one or more trees. The goal of the endowment is to raise $3.7 million per year in order to care for all the trees on a yearly basis.

There’s no better way to celebrate spring than to enjoy all the beauty that comes with it. The National Cherry Blossom Festival provides one of the most spectacular displays of nature and culture in the United States. Once you’ve soaked up the beauty of the blossoms, there’s so much to do in Washington, D.C., proper that you can easily spend a full week exploring the nation’s capital and visiting some of the best museums, botanical gardens, and zoos in the country.
How to Decorate Your Garden With Personality
Making an outdoor space your own takes time and attention. Here are 12 ways to decorate your garden to make it stand out and reflect your personality.
Creating an outdoor space you love can be a challenge. Plants are part of the equation, but many other elements are involved in setting up a backyard hangout that is comfortable, inviting, and visually interesting.
Don’t feel limited by what your local garden supply store sells — here are 12 creative ideas to serve as inspiration for decorating your outdoor space.
There are endless ways to personalize your garden with creative décor elements. So long as you choose materials that can withstand rain, wind, and sun damage, you’re sure to enjoy the results for seasons to come.
Few garden elements add more whimsical appeal than a vintage rustic birdcage swinging in the wind. Set one up under the protection of a tree or beside an outdoor table to cultivate a sense of a living room while you sit outside.
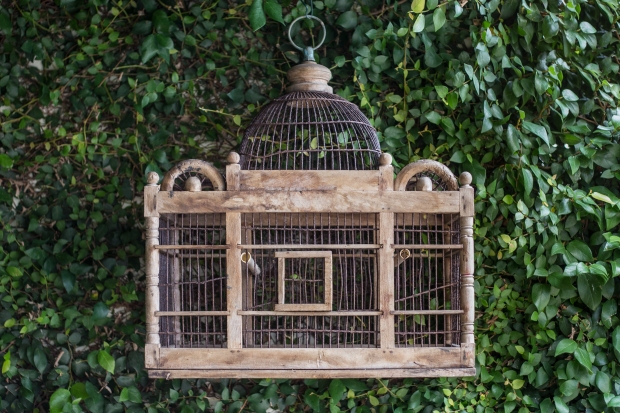
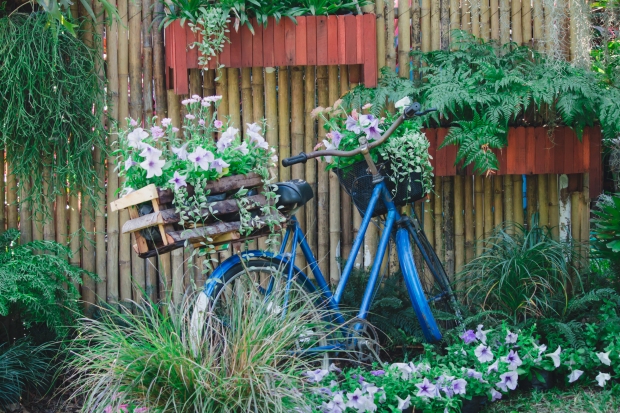
Birdcages not your thing? Consider setting up a vintage wheelbarrow or bicycle instead for an equally charming and quaint effect.
If your garden contains an arbor, pergola, gazebo, or other permanent structure, consider personalizing it with sheer drapes or gorgeous botanical prints or fabrics — just make sure they are weatherproof. Not only will they offer some privacy and weather protection while keeping the heat out, but they offer a cost-effective way to personalize your space.
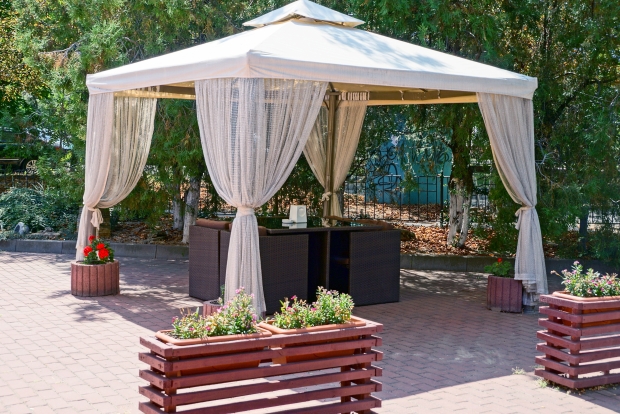
If you don’t want to purchase curtains pre-printed, consider decorating plain ones with painted imprints of leaves and other natural elements.
All gardens improve with a sense of structure. Create a path for guests to wander along with a flat stone paver pathway. Curved, unpredictable designs tend to be the most visually appealing. It’s also wise to think through what the garden visitor will see at every turn of the path, so consider adding small sculptures, fountains, or structures at certain focal points.
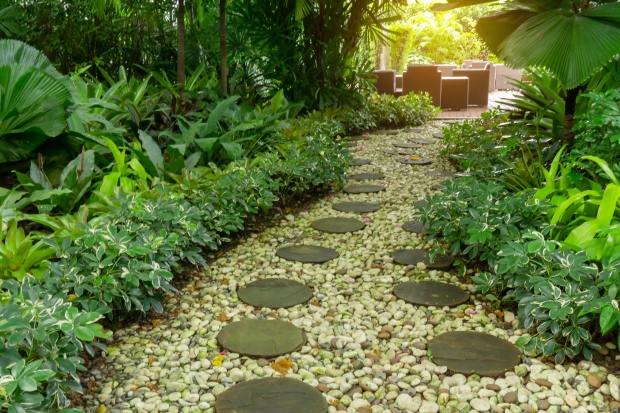
Tip: Make the stones even more unique by painting patterns on them first.
There’s no reason to stick with boring wooden furniture outdoors. Add some pizzazz with weatherproof paint. One easy method for those that are less artistic is to make paint imprints from leaves, ferns, and pine needles.

It’s also possible to purchase nature-inspired stencils for a more uniform look.
You take pride in your plant varieties, so show it off with customized seed packet décor. Laminate the packets for weatherproofing and place them around the growing space for a pop of color and a reminder of your hard work. They can even be used at the head of garden rows as a reminder of what is planted where.
One trait of delightful garden spaces is the presence of the unexpected. So, bring the indoors outside with a dishware set on a dining table. Beautiful botanical-themed plates are available at low cost at many thrift stores, meaning you can easily mix and match for a unique collection.
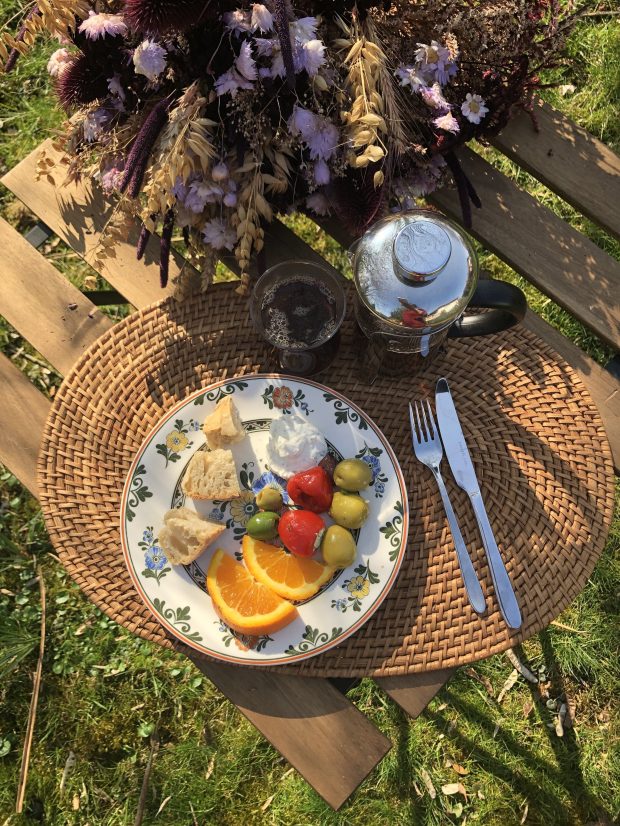
Consider gluing them to the table if you want them on permanent display, or keep them stored safely to be ready to use whenever you host a garden dinner party.
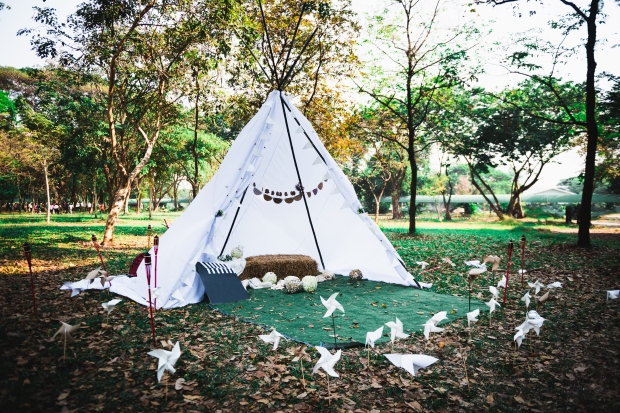
Create some cozy privacy in your yard with a backyard teepee, complete with pillows and blankets inside. It will quickly become a popular hangout spot for all ages to enjoy some time outdoors.
The garden party doesn’t need to end when the sun goes down. Keep your space cozy with solar lanterns or hanging lights over your outdoor structures. Choose ones that mimic real flames for an extra element of surprise.

Skip recycling those glass bottles and turn them into one-of-a-kind garden décor. It’s possible to purchase wire “trees” for mounting the bottles on limbs or get creative with your own display ideas. You can even shatter the bottles to use the pieces in wet concrete for glass collages.
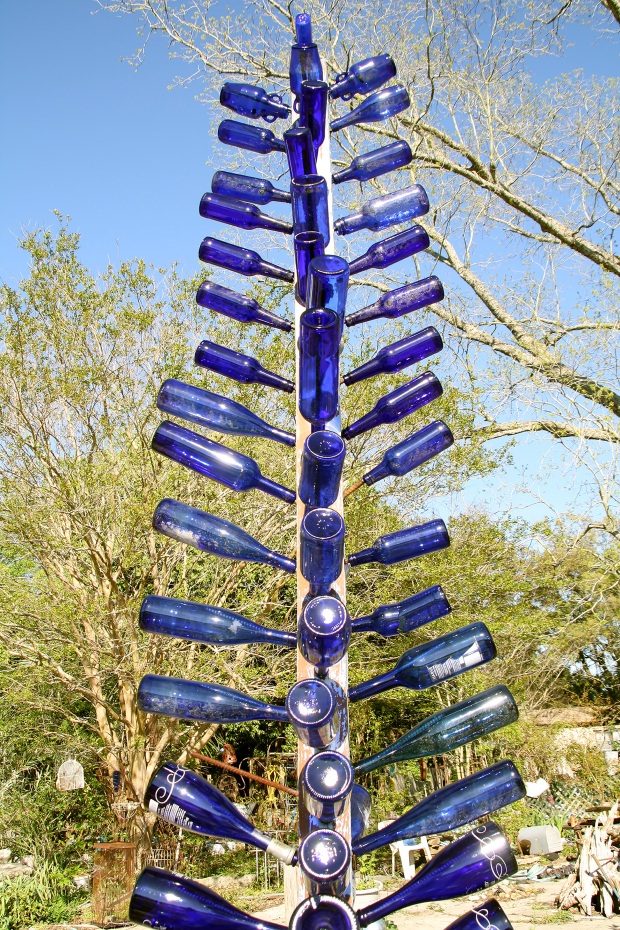
The greater variety of colors and sizes, the more visually interesting the result will be.
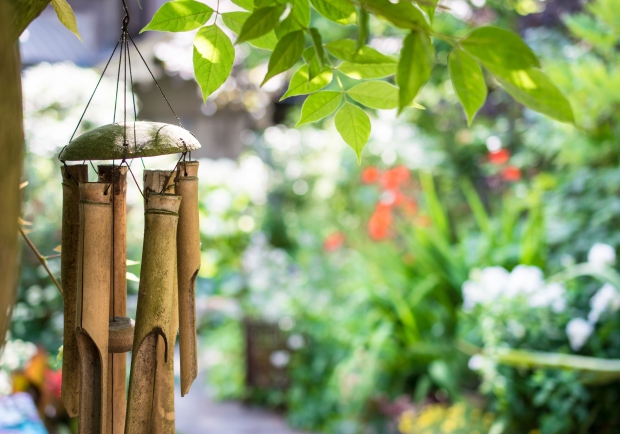
Block out sounds of the busy world by planning for more peaceful noises in your garden. Wind chimes and water fountains are beautiful to look at and create soothing sounds that will lull you into calm. Make your own wind chime from found materials, or purchase them premade from garden stores.
Add some character to a boring privacy fence with outdoor décor. One idea is to mount an old rake on the side, then use the prongs to hang planters and other décor elements.
You can also mount potted plants throughout it, or drape outdoor fabrics to cover any ugly spots. Another creative idea? Cut up fabrics to make banners or flags you can link together to hang along it.
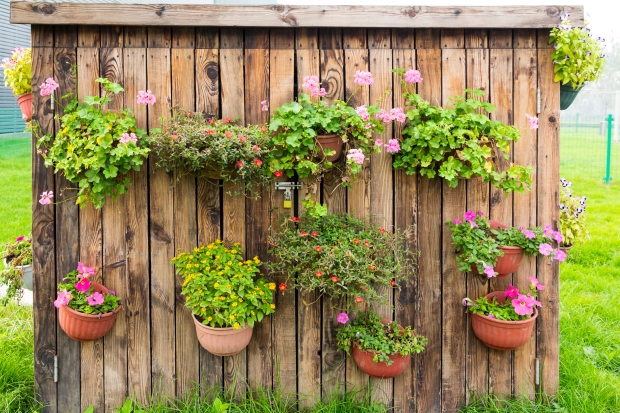
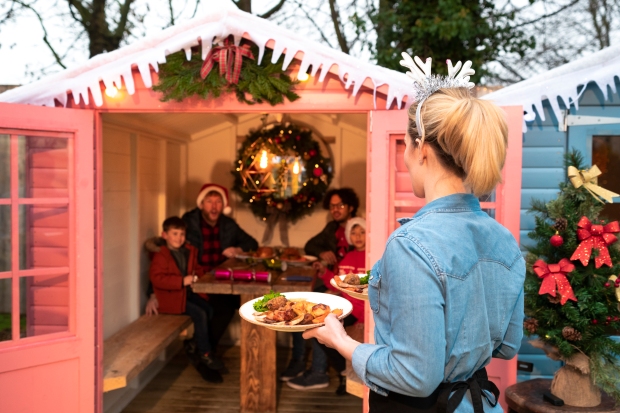
Is there an unused garden shed sitting on your property? Consider turning it into a three-season dining space by taking out some of the sides. Add a table and chairs inside, and there’s no limit to how you can personalize the space.
There’s nothing stopping you from making your backyard garden a personal retreat with charming décor. Let these tips inspire you to create an outdoor space that is worth spending time in.
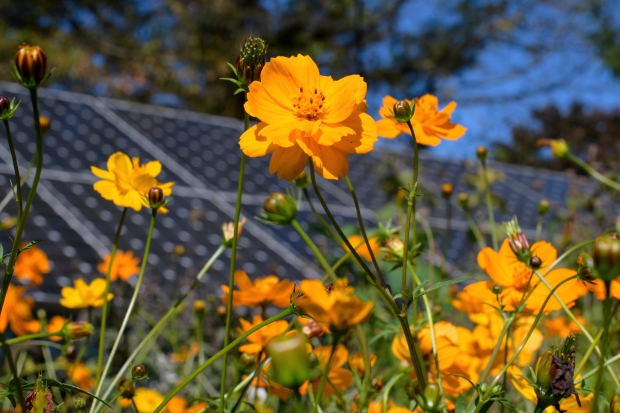
How to Create a Pollinator-Friendly Garden
Creating a pollinator-friendly garden not only helps you maintain a healthy ecosystem but also provides you with gorgeous views. In order to attract beneficial pollinators, you’ll need to include a variety of plants to draw in different insects and birds.
While gardening has always been a popular hobby, since the start of the COVID-19 pandemic in 2020 it has grown by leaps and bounds, with no signs of slowing. In fact, many seed companies, like Baker Creek Seeds, have seen a huge increase in demand, and many have had to shut down their sites because they simply cannot keep up with the volume of sales. Here are the top reasons many homeowners cite for starting a garden:

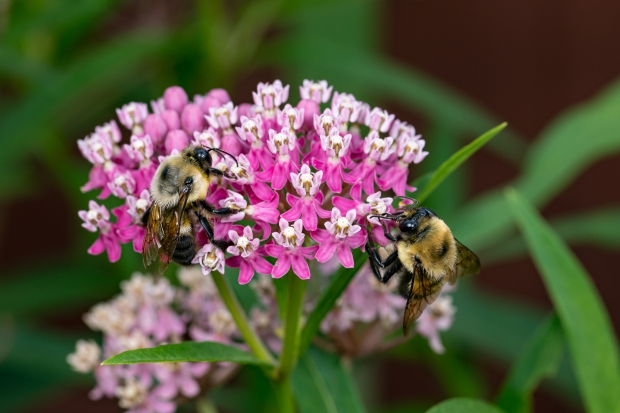
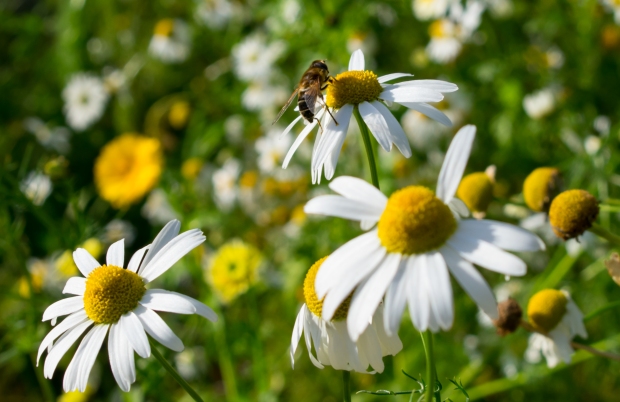
While fruits and vegetables are a popular choice among gardeners, growing flowers is the most popular gardening activity at nearly 73% of surveyed homeowners. However, many casual gardeners do not take pollinators into consideration when choosing their plants. Attracting wildlife such as butterflies, bees, and hummingbirds not only makes your garden more visually appealing, it also helps your garden and the local ecosystem. So whether you’re planning to update a current garden or you’re starting a brand new one, here are some tips on how to attract more pollinators. The best part is that these tips work great whether you have a lot of space or you’re growing on a balcony!
You probably learned in elementary school about pollinators and how they help plants reproduce, but they also serve as an important part of a balanced ecosystem. With adequate pollination, plants:
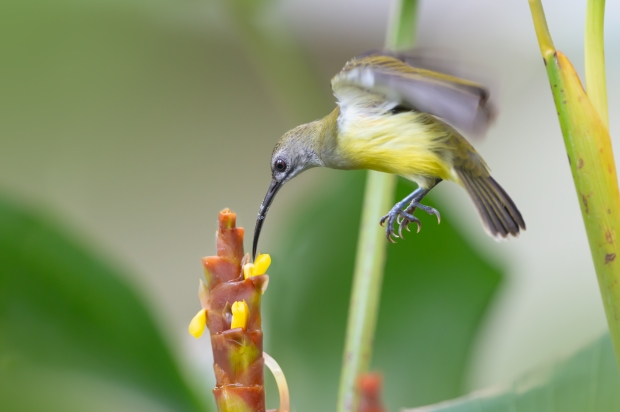
Somewhere between 75%-95% of all flowering plants on Earth need help with pollination. For that, they need pollinators. While the No. 1 pollinator is the native honey bee, other pollinators include:

Unfortunately, pollinator populations are declining due to pollution, misuse of chemicals, disease, and changes in climate patterns. Luckily, you can help the population by creating a garden that welcomes pollinators of all kinds!
Even if you already have started a garden, it might be time to give it another look to see if it is pollinator-friendly. While you don’t need to micromanage your garden, you should consider the following:
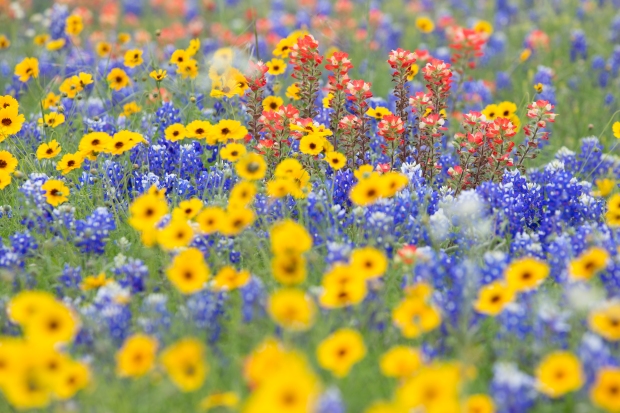
While it might be tempting to go for the plants that you personally find appealing, if you want to help out the pollinators, you’ll need to do a bit more research. In most cases, you’ll want to choose native plants over exotic ones as they tend to be heartier and they will attract native pollinators. Most native pollinators require very specific plants in order to grow and thrive. For example, larvae of Persius duskywing and frosted elfin butterflies only feed on wild lupine. Unfortunately, this plant has been supplanted by another, and as such these butterflies have become critically endangered.
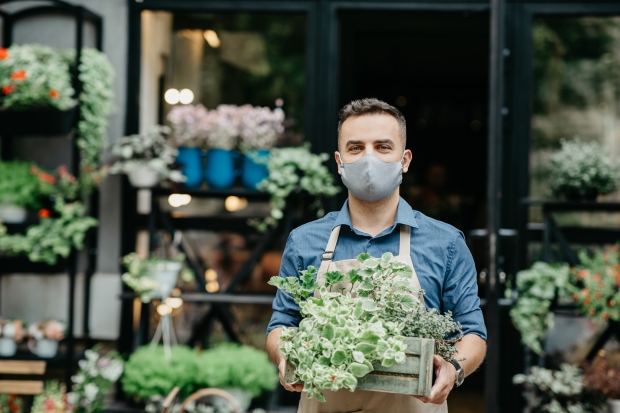
You’ll also want to think about where you buy your plants from. Many large garden centers treat their plants with pesticides and neonicotinoids to kill pests. Unfortunately, these chemicals can also kill or harm pollinators and can stay in the leaves and pollen of these plants for up to seven years!

Choosing what plants to grow might sound overwhelming, but your local native plant or botanical society will often sell native plants or can provide you with a list of native plants and where to buy them. They can even provide a list of plants that support native pollinators. It might cost you a bit more initially, but if you invest in perennials, you’ll only need to purchase them once as they will grow back year after year. More importantly, you’ll be able to collect seeds and plant some more for next year’s garden!
When it comes to choosing your plants, make sure to consider the following:
While it might take a bit more research and effort, creating a pollinator-friendly garden is well worth it. You’ll be helping out your local pollinator population and also benefiting from a beautiful garden. The most important tip, in general, is to be patient! Pollinators won’t come overnight. However, if you provide the appropriate care for your plants and choose the right plants, they will find you eventually. In the meantime, you’ll have a great view!
Why You Should Use Galvanized Planters in Your Home and Garden
Galvanized planters are versatile, long-lasting, and great for both indoor and outdoor use since they resist rust. These containers are available in a variety of shapes, sizes, and styles, so there is an option to suit almost any need.
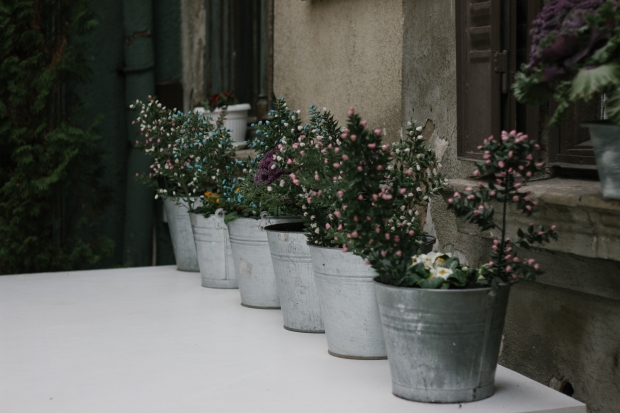
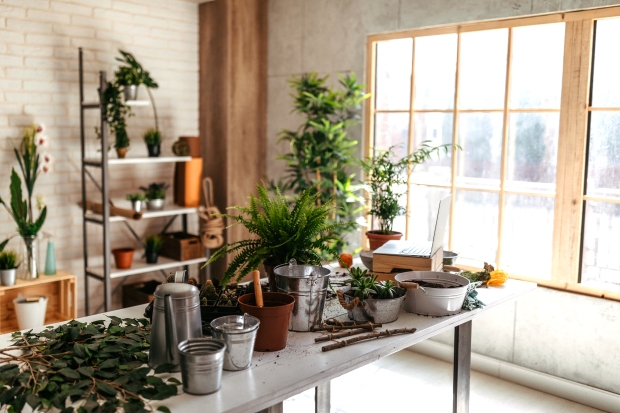
Galvanized planters are a great option for many types of container gardening. They can be used to complement a variety of decor styles, and also make a fantastic choice for raised beds or features in a flower garden.
Simply put, a galvanized planter is a container for plants that is made from galvanized metal. It might be intended to be a planter, or another type of container such as a bucket or trough that is repurposed to hold plants.
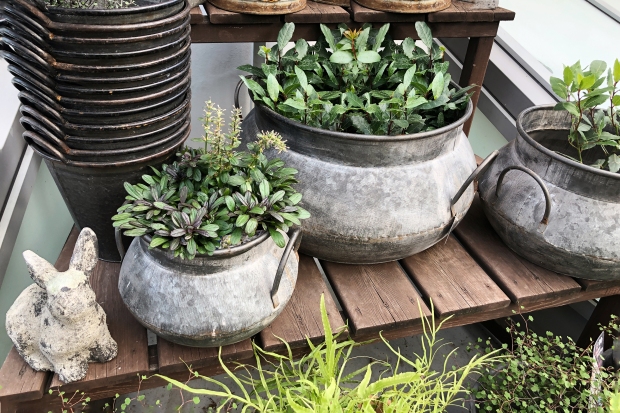
Galvanized metal is a popular material for a variety of uses because it is durable, strong, and rust-resistant. The process of galvanization simply means adding a coating of zinc on the base metal — iron or steel — to prevent rusting and offer protection against damage.
Galvanized planters offer several advantages that might make them the ideal choice for your home or garden. The main benefits of using galvanized planters include:
There are some disadvantages to using galvanized planters as well. If these are major concerns for you, another type of planter might be a better option:
Luckily, if you love the look of galvanized metal planters, there are fixes for each of these issues. Try a layer of insulating foam or mulch between the metal sides of the container and the potting soil to avoid overheating, or keep the planter in a place where temperatures don’t get too high.
For drainage, you can drill holes in the bottom of the planter using a standard drill bit. Another option is to add a drainage layer before putting soil into the container. This layer could be a variety of materials; the purpose is for excess water to be able to drain into the bottom of the container, allowing the soil to dry out between waterings. For a large container, try something lightweight such as plastic containers or styrofoam to keep the pot from getting too heavy. For a smaller planter, stones, chunky mulch, or pumice make good options.
Finally, if you are concerned that the non-porous galvanized metal will not allow enough air circulation around the roots of more sensitive plants, you can use the galvanized container as a cache pot. Simply place the plant into the desired container and then put the whole thing inside your galvanized planter.
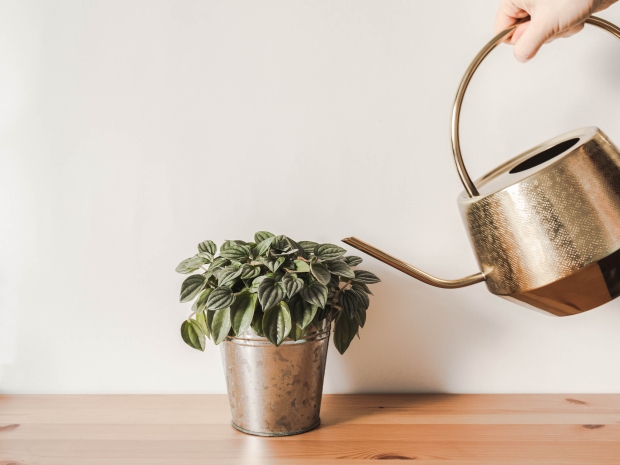
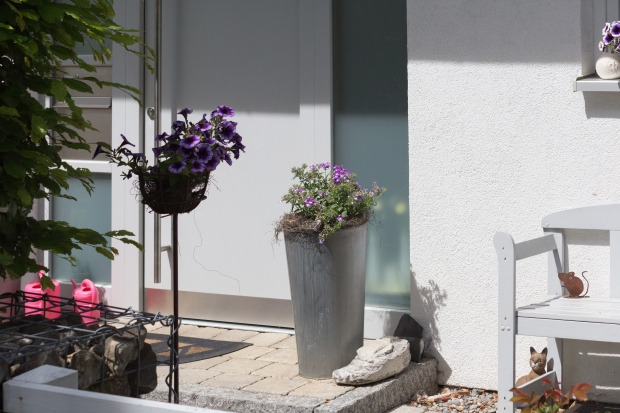
Galvanized metal planters can fit into a variety of decoration styles depending on the shape and condition of the container. While many people think of galvanized planters as being exclusively for outdoor use, they also look great inside the home, too.
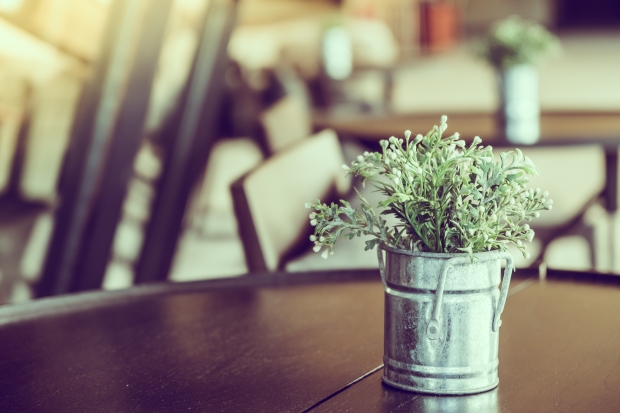
Farmhouse: Galvanized metal is a natural fit with farmhouse themes, which emphasizes a rustic, homey, and practical feeling. Using a galvanized planter in a farmhouse-style room brings to mind the actual farm equipment that is made from this material, like stock tanks.

Modern: Most any kind of metal will fit in with a modern decor, and galvanized metal is no exception. Shiny, new galvanized planters will suit a modern home more than weathered, antique-looking ones.
Industrial: Since galvanized metal is used extensively in industrial applications, it is a natural fit for a home or office with an industrial decor scheme.
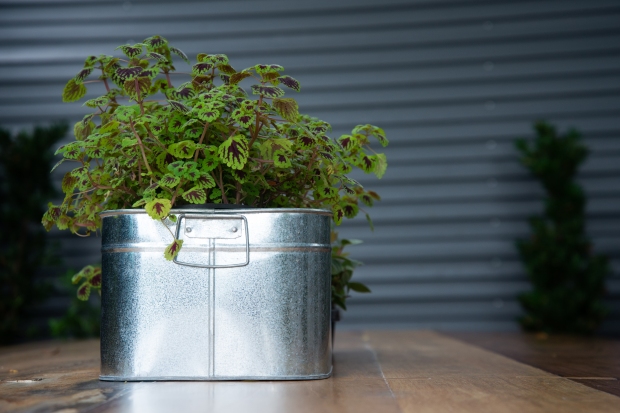
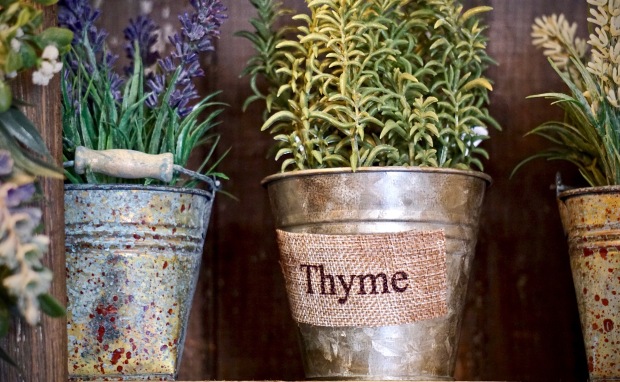
Shabby chic: Antique (or antique-looking) galvanized planters suit decoration styles that use distressed and worn pieces. Since actual antiques can be quite expensive, you can always purchase a new galvanized planter and give it an aged appearance. You could even create a vintage-looking label to complete the look.
The main considerations for selecting a galvanized planter fall into two categories: what you want and what’s best for your plants. However, with the wide variety of galvanized containers available, it should not be difficult to find the balance and choose a planter that covers all the bases.
For your plants, consider the size and shape of a galvanized planter that will work best. Is this a seasonal planting of annuals, or will you use the container long-term for the same plant? What kind of drainage do your plants need? How heavy will the planter be when it’s full? Be sure to get a galvanized planter that is not too big or too small for the plant you will be putting in it. If you find your plant is too small for the galvanized planter you like, you can always use the cache pot method instead of planting it directly.
Once you’ve determined what your plants will need, the factors of appearance and cost will determine which planter is the best choice. Remember that you do have options to change the appearance of a galvanized planter somewhat by painting it, aging it, or otherwise decorating it. Some people will not want to put in that kind of effort, but it could be an option for an almost-perfect planter.
Use a galvanized planter in the same way as you use other planters. It is fine to plant directly in the container, since the zinc coating should protect the metal against rusting or otherwise being damaged by contact with moisture and soil.
Depending on your plants, you may need to prepare the planter by drilling holes in the bottom or putting in a drainage layer before adding soil and plants. For larger containers, it is a good idea to prepare your planter in its ultimate location, since it may get heavy when it’s full of soil and plants.

Since galvanized metal lasts for years and years, you can reuse your planter in a variety of ways and locations as your needs and tastes change. A galvanized planter is a great investment because it is versatile and looks great whether it’s new or old!
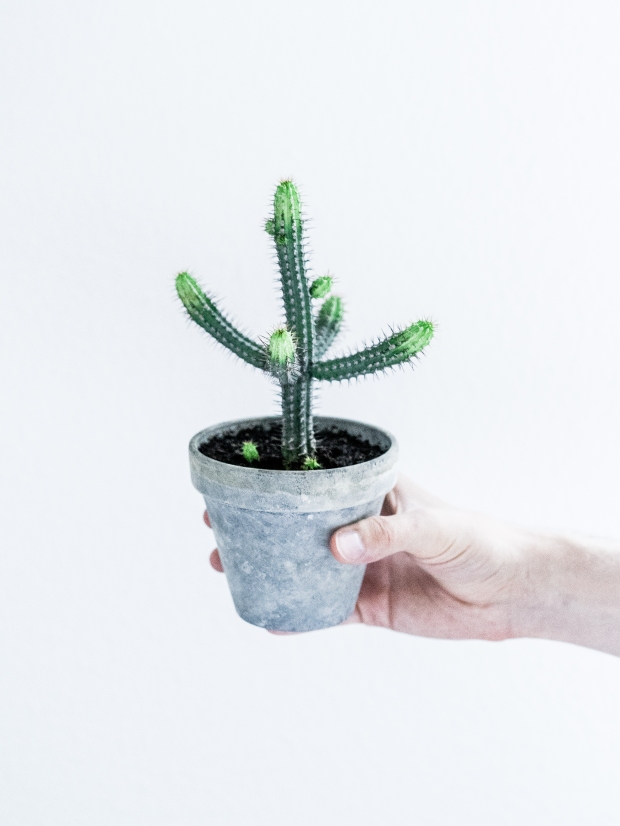
How to Select High-Quality Plants
When picking out plants, it’s critical to pick the highest-quality ones. When choosing a plant, consider its growth, the coloring, and scout for any problems.
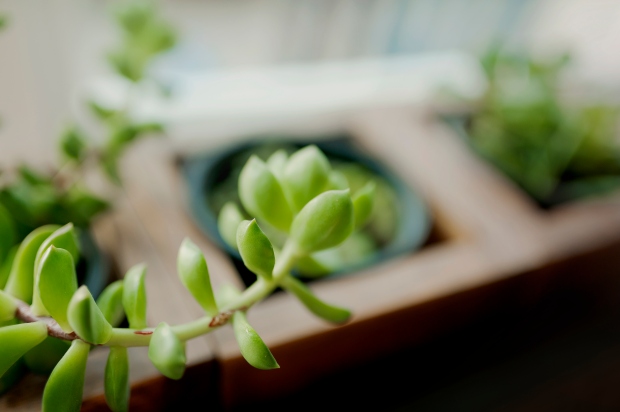
Picking out new plants, whether for the garden or to grow indoors, is fun for many people. They enjoy perusing through the rows and rows of gorgeous seedlings at the nursery or garden center. There’s no doubt that it is fun, but there also needs to be a serious side to it to ensure you pick the highest-quality plants to purchase.
Take a good look at the plant overall. Does it look healthy? Are the leaf colors standard for the plant type, and vibrant?
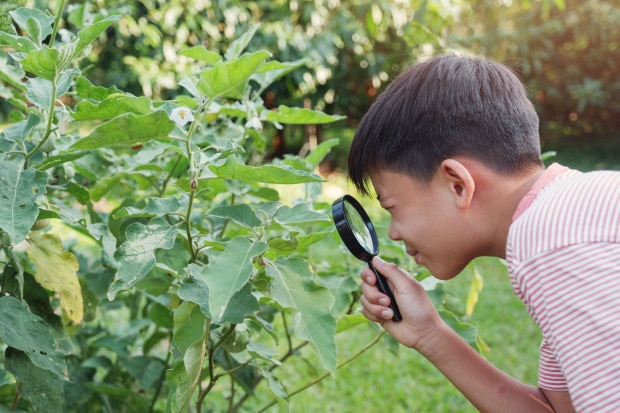
Beyond that, take time to look for the following issues, and avoid picking plants with any of these problems. While the situation itself may be easy to fix, you can’t undo any damage that has already occurred. The damage may not be clearly visible now but can show up later as reduced growth or lowered yield.
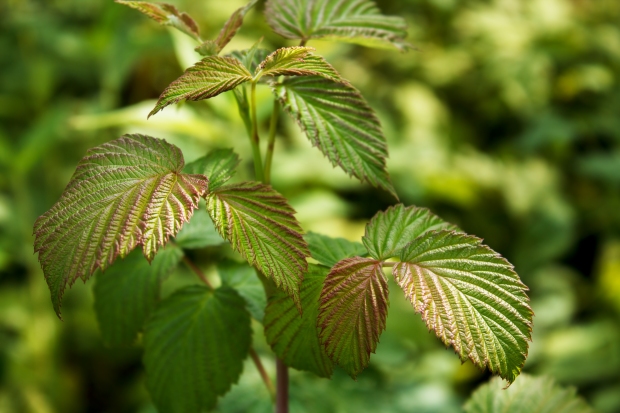
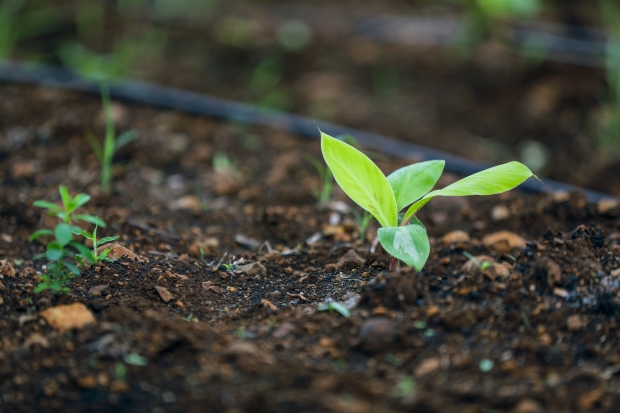
Leggy plants are tall and spindly, with elongated spaces between the leaf nodes and maybe a thin stem and pale yellow coloring. This signifies the plants aren’t getting enough light; the distances between the nodes should be compact. A plant’s growing tips are attracted to light, and when they aren’t getting enough, plant hormones elongate the stems to reach sunlight.
A reddish-purple hue on the plant leaves is a symptom of phosphorus deficiency. It is common in seedlings shortly after they germinate and use up the nutrient reserves in the seed. It is easy to fix with an application of fertilizer, but the deficiency may have already impacted the plant’s growth and yield.
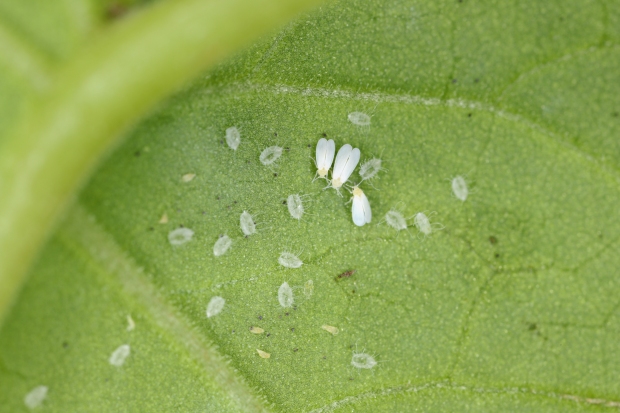
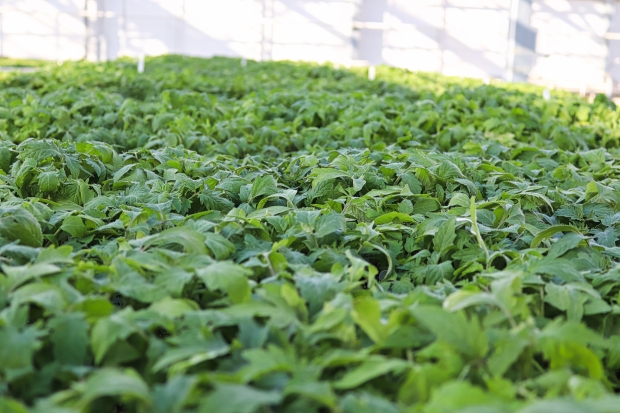
Aphids, fungus gnats, and spider mites are common problems in indoor plants, especially when plants are grown close together in a greenhouse and the humidity levels are high. Pests are problematic because they can suck nutrients from the plants and increase susceptibility to disease. Look at the foliage for any signs of pests, especially under the leaves and in the crooks of the stems.
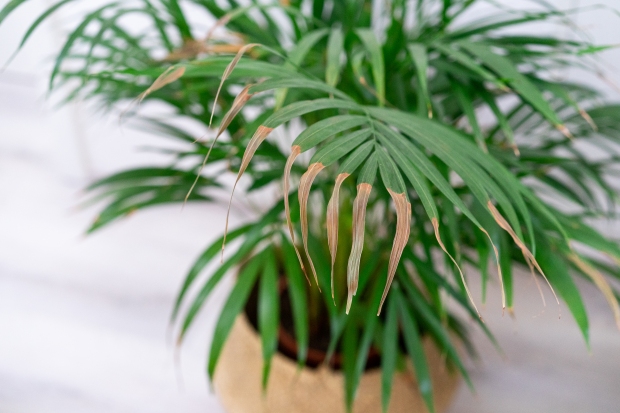
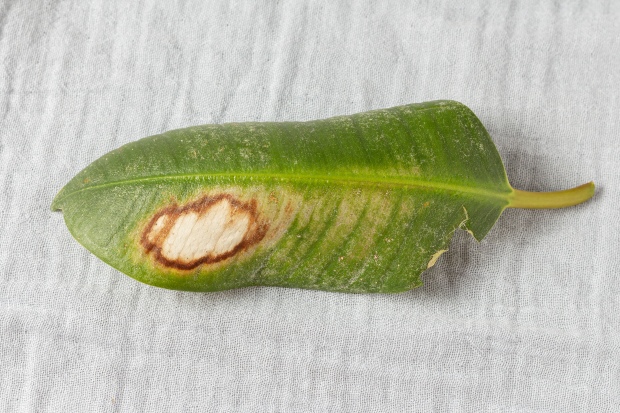
Dry, papery, brown leaf tips and margins are a sign of underwatering and a cause for concern. When plants don’t receive enough water, photosynthesis may slow down or halt. Photosynthesis is the process within plants where water and carbon dioxide produce glucose and oxygen. The glucose is then used by plants to fuel metabolic processes, including growth.
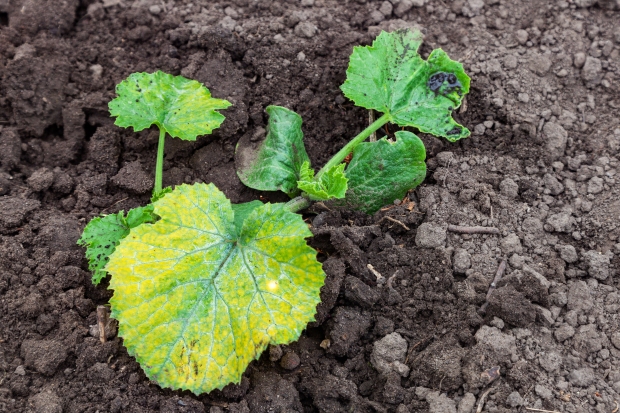
Chlorosis is a yellowing of leaves related to a lack of chlorophyll. Some possible causes of chlorosis include damaged or compacted roots, poor drainage, and nutrient deficiencies in the plant. Deficiencies of iron, manganese, and zinc are commonly associated with chlorosis because they are critical players in chlorophyll production.
White or really pale yellow leaves on a plant indicate sunscald, a problem similar to sunburn in humans. It occurs when plants are moved from filtered light conditions to an area where they are exposed to brighter sunshine or more UV rays. They aren’t prepared for this change in intensity, and the leaf tissues bleach out.
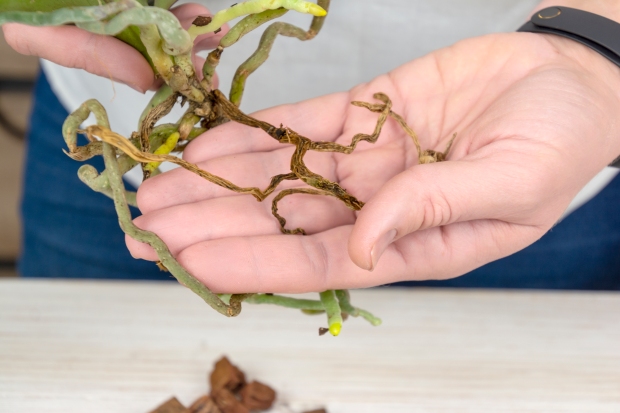
Mushy leaves or stems are related to overwatering and could be a symptom of root rot. When plants are overwatered, it causes a lack of oxygen in the growing substrate, and the roots suffocate and drown. The low oxygen environment also triggers the growth of naturally occurring soil fungi that infect the roots. Once the roots are infected or smother, they can’t take in water, oxygen, and nutrients, and the plant perishes.
The major problem with root rot is once symptoms are visible as mushy leaves, the problem may be past the point of fixing.
At first, it’s easy to assume that weeds aren’t a big problem, especially in a container plant. With the smaller pot, it’s easy to grab ahold of the weed and yank it out — problem fixed! But what isn’t fixable is that while the weed was growing alongside the seedling, it was pulling valuable resources like water and nutrients from the soil. Resources is needed fot the young plant’s optimum growth, battling against a competitor during its early stage of life, putting it at a disadvantage.
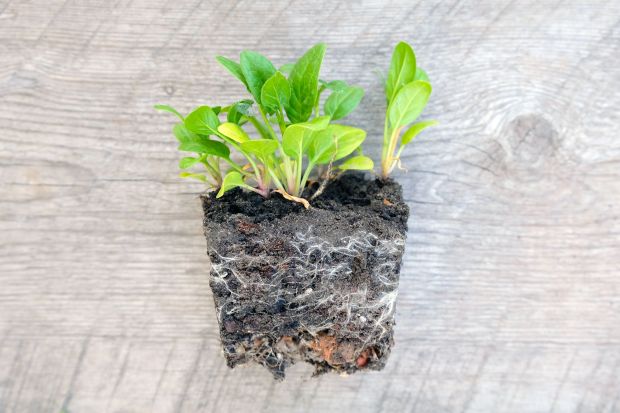
As container plants grow, they develop intricate root systems that can quickly fill the growing media. When they are left in the same container over an extended period, the roots tangle and clump together. When this happens, the plant is considered rootbound, and it cannot pull in enough water to meet its needs.
Fungal diseases are common in greenhouses where plants are watered from overhead — powdery mildew and botrytis especially. As the moisture sits on the leaves, fungi thrive because of warm air temperatures and a lack of air circulation if plants are grown close together.
Powdery mildew looks like a white powdery film on the leaves and stems of your plants, similar to a dusting of flour. It may darken to a gray color and move to the soil surface as it ages. Since it covers the leaf surface, it impairs photosynthesis because the plant doesn’t collect energy from sunlight. Over time it stunts plant growth.

Gray mold occurs when airborne Botrytis fungal spores land on the plant foliage and make their way inside the leaves through wounds or other disease spots. As it reproduces, it appears as dusty, gray mold spores on the soil surface or in the densest foliage areas.
Mold on the potting soil of container plants is common, especially when plants are grown indoors, as the air temperature and relative humidity act as a catalyst for mold growth. Depending upon the type of mold, it can be innocuous, but it also may be problematic.
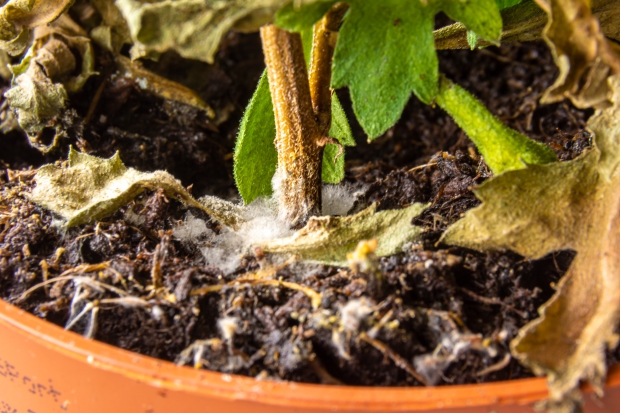
White mold shows up as fuzzy growth on the soil’s surface with a downy appearance, looking cottony. This type of mold is typically a saprophytic fungus, which means it poses little harm to plants or the people in proximity.

Sooty mold is the one to be concerned about. It appears as black, sooty-looking patches on the plant and the soil surface. When you see sooty mold, it’s likely the plant is infected with a sap-sucking insect that secretes a substance known as honeydew. So the underlying problem is insect pests. This type of mold doesn’t harm the plant directly but can inhibit photosynthesis.