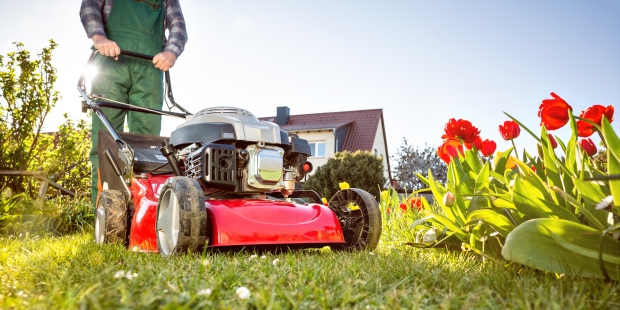


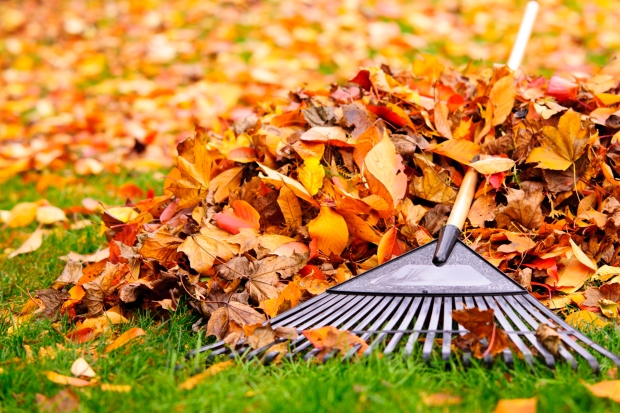
Most people know that mowing is one of the most important maintenance tasks for any lawn. However, it does not need to take place during all parts of the year. In fact, if you start mowing your lawn too early in the season, you can cause damage that can harm new growth and cause bare patches. If you want to avoid those problems, use the advice below to ensure you don’t start mowing too soon in the season.
You should not mow your lawn if there is a high chance it will experience a frost soon after. When temperatures are cold, your grass won’t recover from your mowing and may begin to die. In most cases, you should wait at least two weeks until the last frost of the winter before you start mowing your lawn.
The weather should be relatively warm before you mow your lawn for the first time during the growing season. Cool air temperatures can have the same harmful effect on recently mowed grass as a frost can. Wait until the outdoor temperature has remained at 40 degrees Fahrenheit or above for more than one week before you take to start your mower.
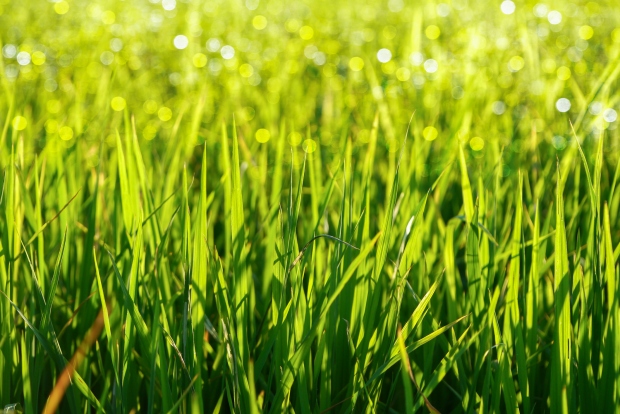
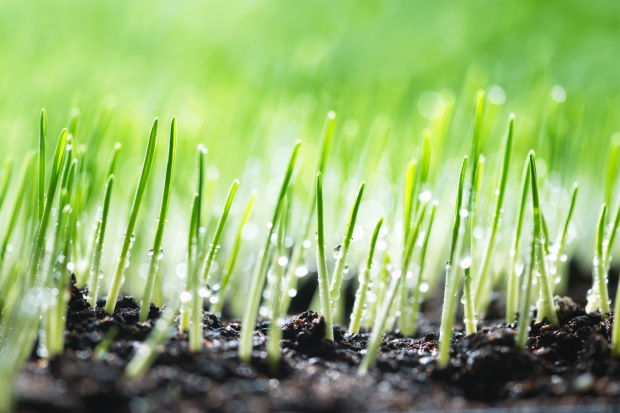
The surest sign that your lawn is ready for mowing is if it has produced a few inches of new healthy growth. New growth indicates that the soil and air temperatures are warm enough for your grass to begin growing and that your grass has officially exited its dormant phase. After you witness your grass grow about two to three inches, you should be ready to begin mowing and continue doing so until the season’s end.
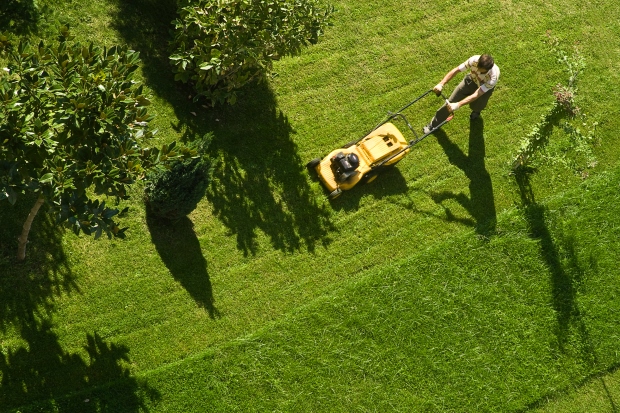
During the late spring, summer, and early fall months, you probably spend plenty of time mowing your lawn. But many people make the mistake of mowing their lawns on a rigid schedule rather than understanding the signs that their lawns are or are not ready for mowing. This chapter will solve that problem by giving you the steps you should take when deciding if it is the right time to mow your lawn.
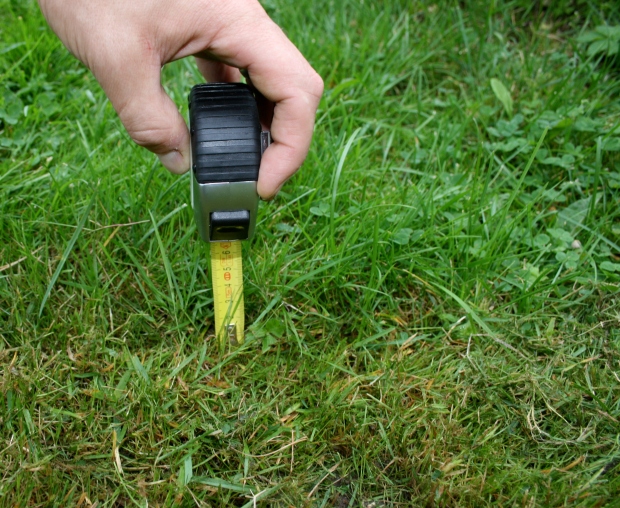
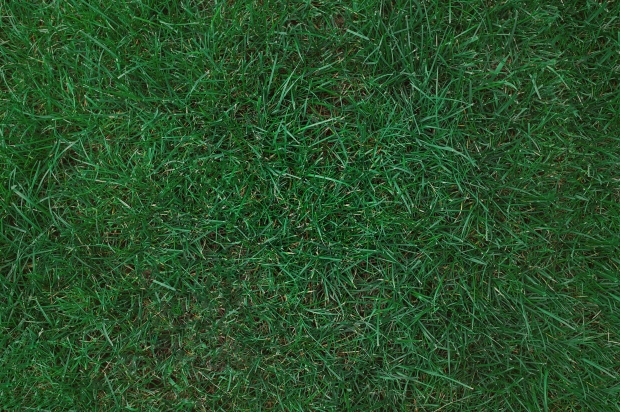
Before you can decide if it is a good time to cut your grass shorter, you need to have a clear idea of how long you want your lawn to be. The exact length of your grass is largely a matter of personal preference, but most of the time, you’ll want your lawn to be between two and three inches tall. Having this height in mind throughout the year will begin to give you a better idea of when you should mow.
When you know how tall you want your lawn to be, you should wait until it grows past that height. Once your lawn is about half an inch to one and a half inches above your desired height, you can begin mowing. Letting your grass get taller than you want it to be lets you set your mower to the exact height you wish your lawn to be each time you mow.

The weather and general climatic conditions will play a major role in deciding when to mow your lawn. Typically, during drought periods and times of extremely high or low temperatures, your grass will grow more slowly than normal. It will also have a harder time recovering from your mowing. As such, reduce your mowing any time the weather slows your grass’s growth.
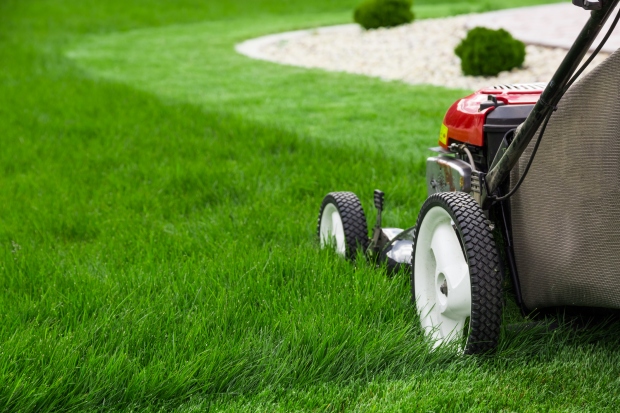
Just as there is a time to start mowing at the beginning of the season, there is also a correct time to stop mowing at the end. You’ll want to stop mowing your grass when it begins to re-enter its dormant phase.
Often, the dormant phase of your lawn grass corresponds to a certain temperature range. This range can change based on the type of grass you grow, but when the weather stays around 40 to 50 degrees Fahrenheit, there’s a good chance your lawn is exiting its growth phase.
During fall and early winter, you should notice that your grass’s growth has slowed or stopped. When this happens, it’s safe to assume that you can store your mower and wait until spring arrives to begin mowing again.
Contrary to what many people expect, there is more than one type of grass that can create a lovely lawn. Different types of lawn grass vary in appearance, growth habits, and preferred growing conditions. As you’ll soon see, the success of your lawn can come down to which type of grass you choose to grow.

Cool-season grasses are ideal for anyone who lives where the winters are cold, as these grasses can withstand significant seasonal temperature changes. You should plant cool-season grass if you live in the Northeast, Midwest, Northwest, or generally anywhere north of the southernmost United States.
Kentucky Bluegrass, Poa pratensis
Kentucky bluegrass has an exceptional ability to survive harsh winter temperatures, and it also has a consistent dark green color and long thin blades that make for a fine texture. However, Kentucky bluegrass may also require a relatively high amount of maintenance and does not do well if it does not get enough light. Still, this grass is an excellent cool-season option for your lawn.
Perennial Regrass, Lolium perenne
Growing perennial ryegrass will often give you a lush lawn faster than growing any other popular cool-season grass variety. This grass is so expedient because its seeds germinate incredibly quickly. Once this grass develops into a mature lawn, it tends to need less water than other grasses as well.
Tall Fescue, Festuca arundinacea
The advantages of tall fescue are that this grass is resilient to drought and disease and can survive in warmer regions than many other cool-season grass choices. Tall fescue lawn grass grows in bunches and is a decent option for somewhat shaded lawn areas.
Warm-season grasses grow where the weather remains warm all year. These grasses are the best choice for residents of the hotter parts of the United States, including Texas, Louisiana, and Florida.
Bermuda Grass, Cynodon dactylon
Bermuda grass grows well in the hottest parts of the United States and has a dependable resistance to some of the harshest environmental elements in those regions. This grass tolerates considerable drought and can handle significant foot traffic. If you grow this grass in soil with excellent drainage, you should have no trouble maintaining a healthy lawn.
Centipede Grass, Eremochloa ophiuroides
For those who want grass that requires minimal maintenance, centipede grass may be the best warm-season option. Centipede grass does not need mowing as often as other grasses and needs less fertilization too. This grass can also tolerate cooler temperatures than other warm-season grasses and thrives best where the soil is somewhat sandy.
St. Augustine, Stenotaphrum secundatum
St. Augustine grass is a warm-season grass with large blades and a coarse overall appearance. Among all common warm-season grasses, this one is the least likely to survive cool temperatures, making it suitable only for the hottest areas of the U.S. On the other hand, St. Augustine grass will grow in acidic and alkaline soils and be easy to care for once it is established.
To many homeowners, there are few more welcome sights than a lush lawn surrounding their homes. But if you want to enjoy the beauty of a healthy lawn, you need to start by learning the best growing conditions for grass, which the sections below will reveal.
Some types of lawn grass will survive in partial shade, but most will grow best when they are in full sunlight. Before planting your new lawn, make sure that the area you are planting receives about six hours of sunlight each day. Full sunlight conditions will make for the healthiest and most consistent growth across your lawn.

The soil in which your grass grows is as impactful as any other factor when creating a new lawn. Typically, the best type of soil for lawn growth is loam. Loam contains the ideal mix of sand, clay, and silt, which allows it to drain water effectively while holding enough moisture for your lawn’s roots to absorb.
While choosing a loamy soil for a lawn is an excellent starting point, there are a few more specific soil requirements that you should think about before planting your grass seed. You may need to conduct a quick soil test to ensure that your soil has all the characteristics that make for healthy lawn growth.
All soil has some level of acidity, which we measure using the pH scale. A pH level of 7 indicates neutral soil, while lower numbers indicate acidity and higher numbers show alkaline conditions. Each plant you grow will have a different preference for soil acidity, and grass is no exception.

Many lawn grasses prefer slightly acidic soil conditions. Often, a pH measurement that falls between 6 and 7 will be best for your grass.
Nutrient content is another crucial aspect of healthy lawn growth. The nutrients in your soil will fuel your lawn as it grows throughout the season.
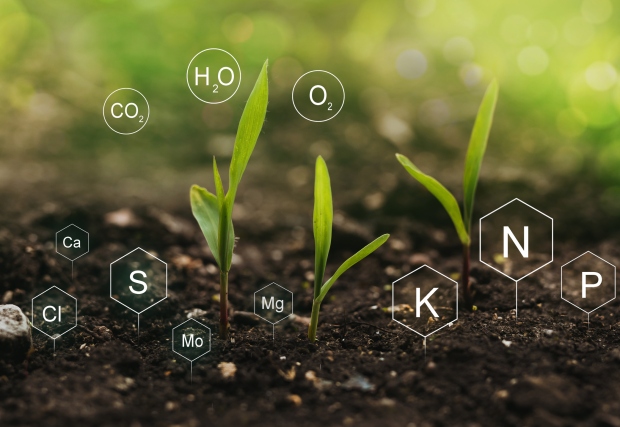
The essential nutrients for lawns, and most other plants, are nitrogen, phosphorus, and potassium. However, certain micronutrients like magnesium, iron, and sulfur will benefit your grass, too.
It’s wise to ensure your soil has plenty of these nutrients before planting your grass. If your soil proves to be lacking, you can always amend it to boost the total nutrient content.
The last condition we’ll mention for healthy lawn growth is temperature. Usually, your grass won’t start growing until the soil temperature has risen and remained above 60℉/16℃ . If the soil is colder, your grass will likely remain dormant. Once your growing area has gotten warm enough, you can expect healthy grass to start growing, if all the other conditions mentioned above are in place.
To keep your plants healthy and maximize yields, you need to fertilize your garden through the growing season. The best way to keep your garden on track is to put together a plan early.
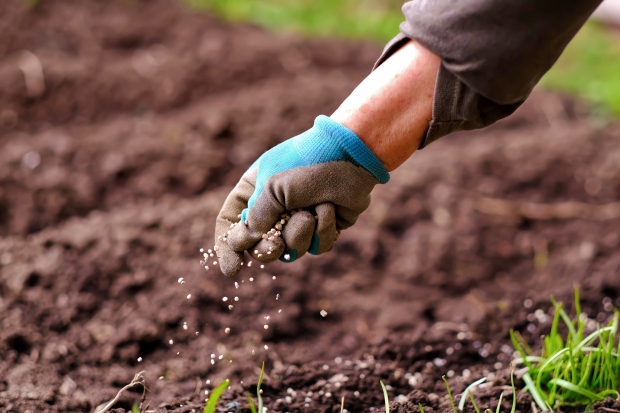
Over time, as plants pull nutrients from the soil for growth and water leaches them from the ground, you need to reintroduce these elements back into the soil. Plant growth will be negatively impacted if you don’t, and your harvest may be smaller.

The best way to fertilize is to create an overall schedule for your garden, with some customizations for particular circumstances, and then supplement nitrogen as plants need an extra dose.
Create a General Schedule
Most gardeners add fertilizer to the soil when preparing the planting bed. This early dose feeds seedlings for the first little bit, but they will need fertilizer again once the plants flower or hit a rapid growth spurt.
Once you start fertilizing, plan to feed the entire garden with a balanced fertilizer every three to four weeks through the growing season. Always follow the label directions, and when in doubt, it’s best to give plants less fertilizer than too much.
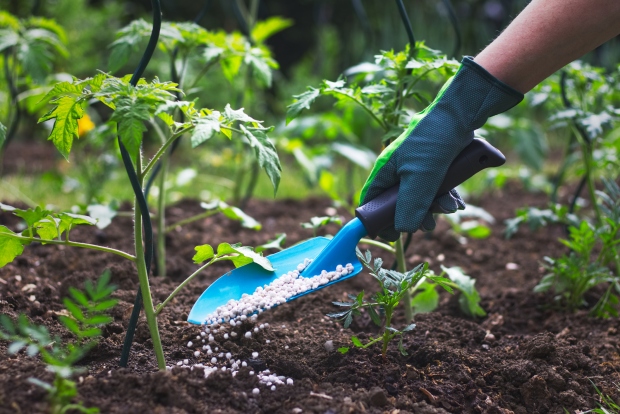
Plants like tomatoes and cauliflower are heavy feeders, so they need more fertilizer for growth. It may be beneficial to feed them every three weeks and the rest of the garden every four.

Create a Customized Plan
Certain vegetables have additional fertilizer requirements that require you to fine-tune your fertilization plan slightly. It’s best to research your plant types to determine if they have special needs.
Add Supplemental Nitrogen as Necessary
During the growing season, some veggies need a nitrogen boost via side-dressing, which is where you incorporate fertilizer into the soil about six inches away from the plant. Standard guidelines for nitrogen supplementation include:
Watering your vegetables properly is very important to their growth and almost as essential as getting the proper sunlight. Water is needed for photosynthesis, but how much water your plants get and how often they get it is critical.
Most garden vegetables need approximately an inch of water each week during the growing season through rainfall or irrigation. This amount is average, though, and you may need to give them a little more water if the weather is unnaturally warm, if you live in an arid climate, or if your garden bed is high in sand.
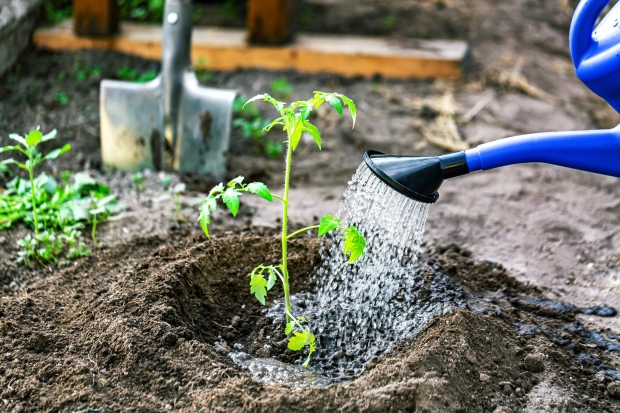
An inch of water each week is the standard recommendation since many gardeners rely solely on rainfall to water their plants. For them, it’s easy to measure an inch of water in a rain gauge. In areas where rainfall is low and you’re watering plants by hand, aim to give each plant about two-thirds of a gallon of water weekly.

The goal is to wet the top six inches of soil each time you water.
You may have heard (or read) that it’s best to water your plants deeply, infrequently, which can be confusing. You want to give your plants a good dose of water a couple of times a week versus giving them a little bit every day.
For most gardeners, you can expect to water your vegetables two or three times a week when the soil’s top one or two inches are dry. You don’t want to give them an inch of water every time, though—you want to break up that inch of water over a week.
Watering thoroughly yet infrequently helps develop strong, drought-tolerant plants. When you don’t water every day but water a large amount, the root system grows deeper, looking for water. In turn, it improves the plant’s drought tolerance.
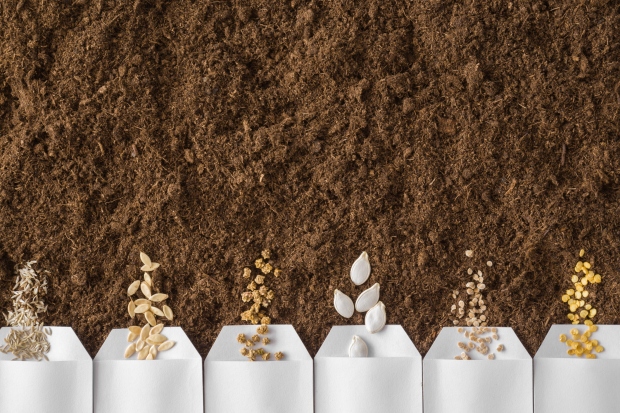
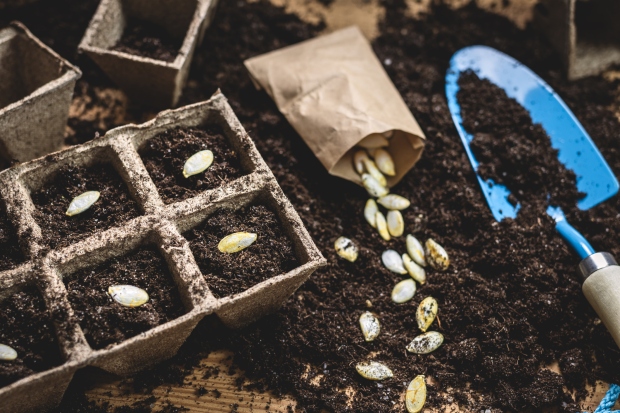
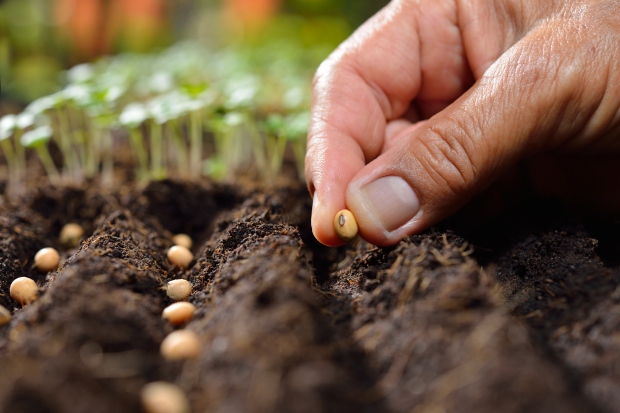
If you choose to grow your vegetables from seed, it’s essential to understand where to start them, when to plant them, and how to sow seeds to have the best plants for your garden.
Whether you can direct sow seeds into the planting bed or if you need to start them indoors depends on how long it takes the plants to grow to maturity and how long your growing season is.
Seeds that you can direct-sow fall into two timing categories based on their cold tolerance.
Seeds That You Can Plant Early in the Season
Some plants prefer cooler soil and air temperatures and may even survive a light frost. These cool-season plants can be sown directly outside before you can plant the rest and include leafy greens, peas, carrots, beets, Brussels sprouts, broccoli, cauliflower, parsnips, and turnips.
Seeds That Need to be Planted After the Last Frost
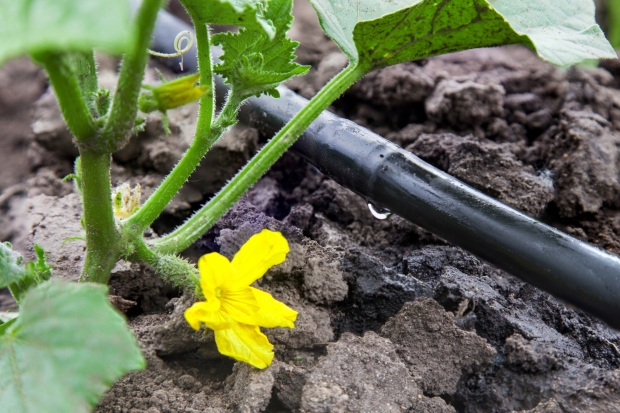
Warm-season crops need summer heat and aren’t frost tolerant. You can’t plant them until the last threat of frost has passed. They include peppers, tomatoes, cucumbers, pumpkins, squash, and sweet corn.
When it comes to sowing seeds directly into the garden, there are three things you need to consider:
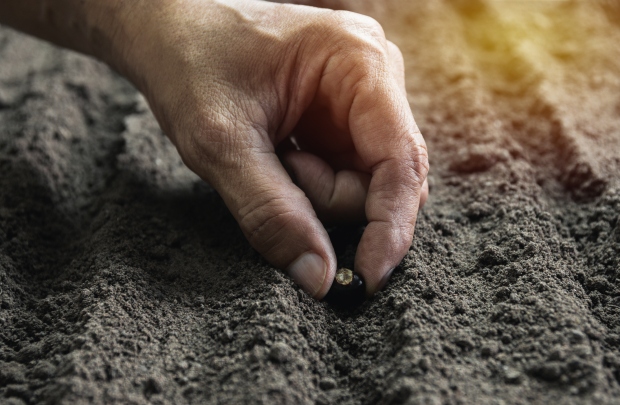
After you prep the garden bed, place seeds at the correct spacing and depth listed on the seed packet. Gently cover them with soil and tamp it down lightly, if needed.
The key to determining when to start seeds indoors is making sure plants have enough time to mature before the fall frost. Figure when they need to be harvested, and count backward from there, using their days to maturity, to determine when to plant.
Depending on the vegetable, this is typically four to eight weeks before the last spring frost.
Think about how much available space you have and the plants you want to grow, and sketch out a layout. When planning, consider the following:
To determine when to plant, you must compare the plants’ days to maturity versus your growing season length.
The goal is to get plants to maturity before it gets too cold in the fall, so you have harvestable produce.
If a plant’s days to maturity are greater than the growing season, you can:
Whether a plant is a cool-season or warm-season crop also affects the planting schedule.
When selecting plants to grow, you need varieties suitable for your climate or growing zone. U.S. growing zones are the standard by which gardeners determine what plants are likely to thrive in their climate. The growing zone map divides the U.S. into 10°F zones based on average low winter temperatures.
Companion planting is where plants are grouped to improve their growth, such as beans adding nitrogen to the soil for neighboring plants. They are also used for pest control, where one of the companion plants naturally repels insects for the others.
Choosing to go with seeds or starts depends on a few factors and personal preference.

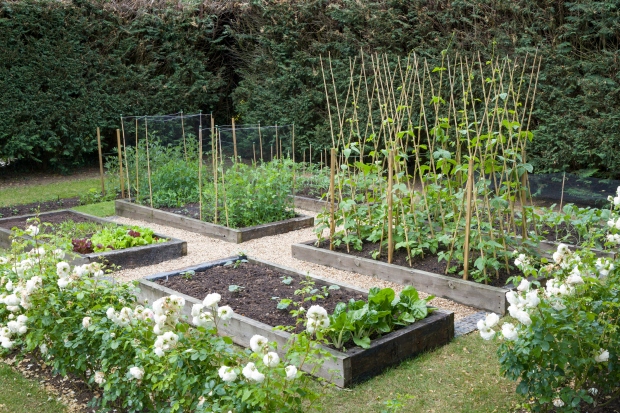
Plants can grow in less than ideal conditions, but having planting beds in a good spot with great soil is essential for robust plant growth and bountiful harvests.
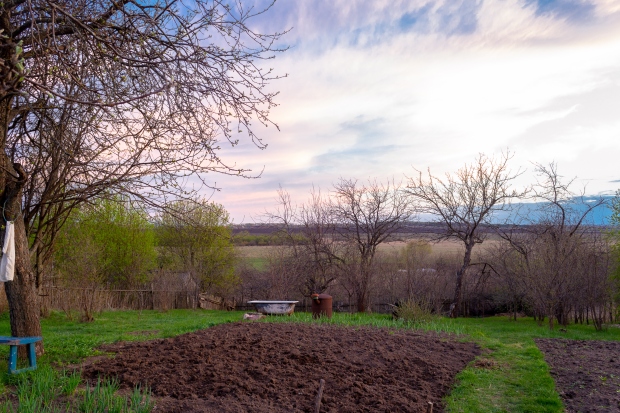
The first step in prepping planting beds is picking a good location in your yard. When looking around your property for a spot, there are some questions to keep in mind.
Look for a spot that doesn’t have a significant slope. That way, yu won’t need to worry about soil erosion or low areas that tend to stay wet with level ground.
Your planting beds need to get six to eight hours of full sun every day. It’s also important to check the spot at random times of the day to make sure it doesn’t get unexpected shade.
After you’ve decided on a possible location, it’s time to look at the soil texture, pH, and nutrient content.
Soil texture is determined by the amount of sand, silt, and clay (in percentages) that make up your topsoil.
Ideally, you want a blend of all three, or what is known as a loam type of soil. This soil type gives you good drainage while holding onto a respectable amount of soil moisture and nutrients.
Soil pH measures how acidic or basic (i.e., alkaline) the soil is, just like the acidity we are familiar with regarding liquids like vinegar or lemon juice. Knowing your soil’s pH is important because it directly influences the nutrients in the soil. If the pH value is too acidic or basic, it can make nutrients unavailable to the plants or create toxicities.
Ideally, you want the soil to be neutral or slightly acidic — most plants like a pH value between 6.0 and 7.0 because it has the best nutrient availability.
There are just over a dozen nutrients required for all plant growth: nitrogen, phosphorus, potassium, calcium, magnesium, sulfur, boron, chlorine, copper, iron, manganese, molybdenum, and zinc. Each of these nutrients has specific roles, and if any of them are deficient, it affects plant growth.
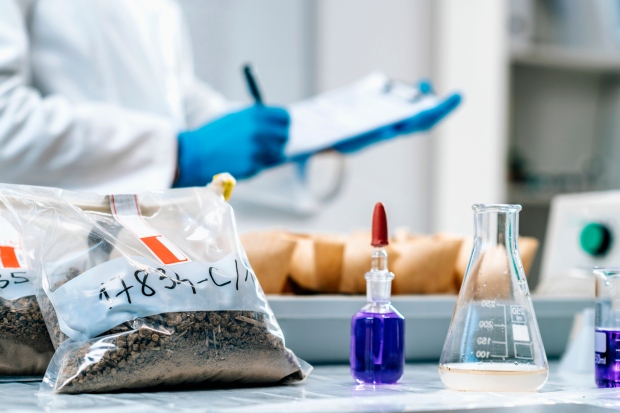
Over time, these nutrients can become depleted from the soil, and fertilizers are used to get them sufficient again. But it’s essential to know the nutrient content of your soil to help you determine how much fertilizer — and what kinds — to apply.
First, you need to collect a soil sample from the planting bed. Collect small shovelfuls from a dozen spots, digging down six to 10 inches and then putting them in a bucket. Mix the soil and pull out any rocks and debris.
After collecting a sample, spread it out on a newspaper to dry overnight. The soil pH is easy to check yourself, but a commercial soil testing laboratory best analyzes the texture and nutrient content.
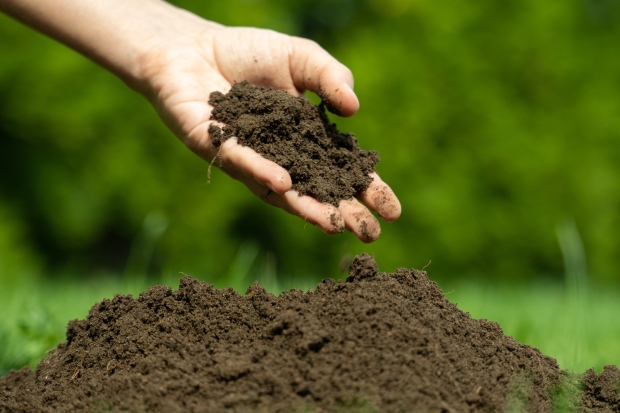
Once you have looked at the soil, it’s time to start preparing the beds for planting.
The first step is to add amendments to improve the soil texture, water holding capacity, soil pH, and nutrient capacity.

Dig down to about a foot deep to loosen the soil adequately and incorporate the amendments, working the ground well by hand or with a rototiller. Loose, crumbly soil lets water move quickly through the soil profile and allows roots to grow down and outward without interference.
Alasan mengapa tanaman yang sama bisa terlihat berbeda
Buah, bunga, dan daun dari satu spesies tanaman dapat bervariasi dalam ukuran, warna, dan bentuk apakah dipengaruhi oleh seleksi buatan atau lingkungan alam. Variasi yang disengaja dari satu spesies menghasilkan apa yang disebut kultivar.
Puring kebun (Codiaeum variegatum) adalah tanaman hias yang populer. Daunnya bisa filiform, lanset, bulat telur, spatulate, sagittate, atau bulat. Pewarnaan dapat mencakup merah, kuning, hijau, atau ungu di berbagai pola, seperti berbintik, bergaris, atau bertambal (digambarkan di bawah).
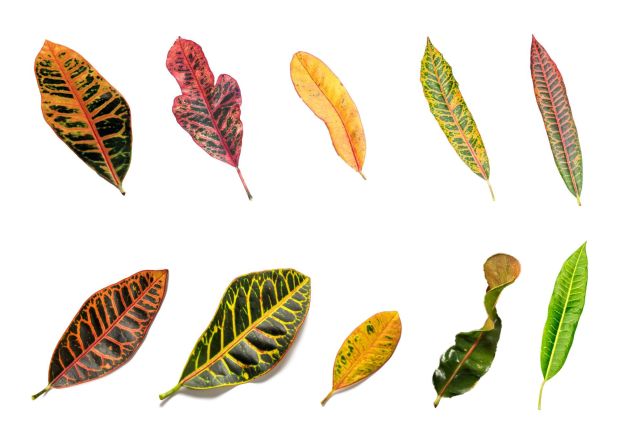
Kultivar puring kebun.
Mawar adalah contoh sempurna dari variasi hebat yang dapat terjadi di seluruh kultivar. Bunga mawar bisa tunggal atau berlapis-lapis, dan berwarna merah, ungu, oranye, atau merah muda. Tunas juga bisa tumbuh sendiri-sendiri atau berkelompok.
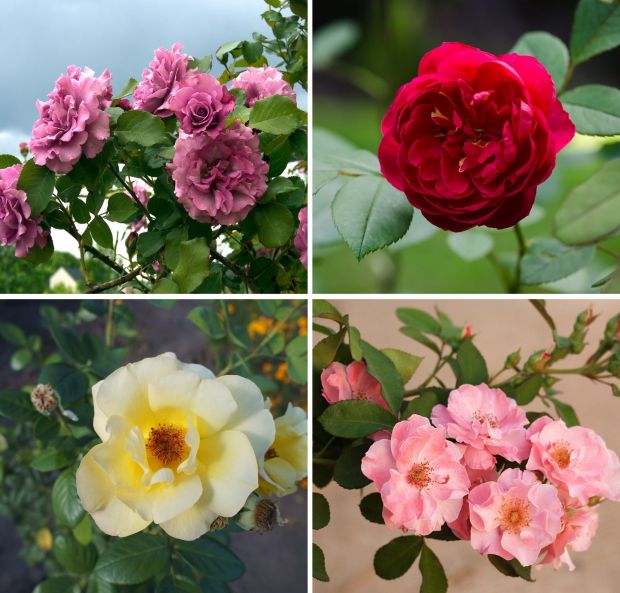
Kultivar mawar.
Labu musim dingin (Cucurbita maxima), umumnya terlihat di Amerika, diakui sebagai salah satu spesies tanaman peliharaan yang paling beragam. Ini memiliki banyak kultivar yang menghasilkan buah yang sangat berbeda dalam ukuran, bentuk, dan warna.
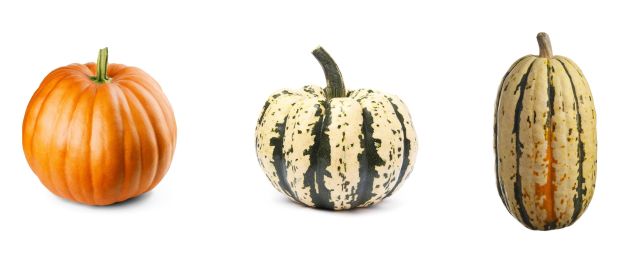
Kultivar labu musim dingin.
Bentuk dan ukuran daun dari tanaman yang sama dapat sangat berbeda sehingga sering disalahartikan sebagai daun dari dua spesies yang berbeda. Hal ini dapat disebabkan oleh perbedaan antara daun muda dan dewasa atau daun bawah dan atas, serta daun yang kekurangan nutrisi dan cukup dibuahi. Misalnya, daun muda dan bawah dari Paper mulberry (Broussonetia papyrifera) selalu memiliki 3-5 lobus. Ini menyampaikan pesan yang jelas kepada kupu-kupu atau serangga lain: “Saya sedang dimakan, jangan bertelur di atas saya!” Daun dewasa, atau atas, tidak melengkung karena mereka mengembangkan lapisan pelindung yang keras dan tidak membutuhkan kamuflase seperti itu.
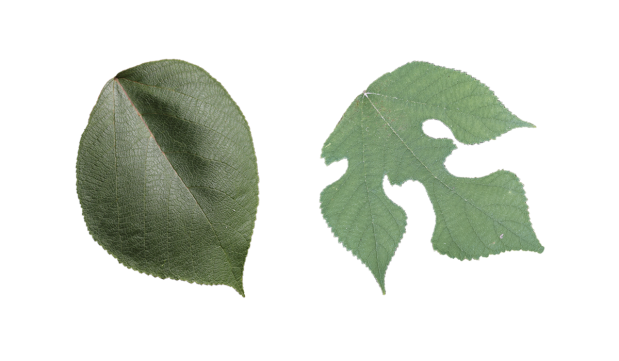
Daun atas dewasa dan daun bawah muda.
Bentuk pertumbuhan suatu tanaman juga dapat bergeser, tergantung pada lingkungannya. Tanaman mata panah (Syngonium podophyllum) dapat digunakan sebagai penutup tanah yang perawatannya rendah. Namun, ketika tanaman mencapai pohon atau dinding, itu menjadi pokok anggur.
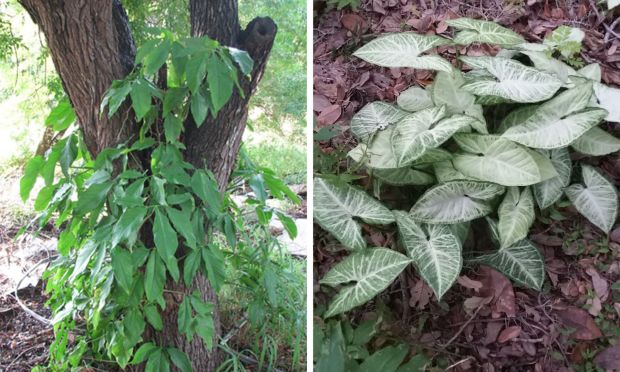
Tanaman Arrowhead dalam bentuk sulur dan penutup tanah.
Rasio daun, bunga, dan buah berubah ketika tanaman ditanam dalam wadah, seperti proses Bonsai.

Rhododendron sebagai bonsai dan dalam kondisi normal.