Dangers in Winter Gardens
Strategies to Safeguard Trees and Shrubs from Winter Damage
Winter’s serene snowfalls and glistening ice, while enchanting, can cast a hidden shadow over gardens, threatening the very backbone of your landscape: trees and shrubs. The weight of snow and layers of ice can cause significant damage, snapping branches and distorting natural forms. This comprehensive guide is designed to arm gardeners with the knowledge and techniques necessary to protect their green sanctuaries from these wintry adversaries. From understanding the risks to implementing effective protective measures, we’ll navigate through the challenges of winter, ensuring your garden’s resilience against the harsh elements of the season.
Understanding the Risk
The winter landscape, with its snow-capped trees and ice-glazed shrubs, can be a scene of tranquil beauty. However, for gardeners, this beauty comes with a hidden risk. Understanding the potential damage that snow and ice can inflict on plants is crucial in preparing and protecting your garden during the colder months.

The Weight of Snow and Ice
Heavy Snow: Snow, particularly when wet, can accumulate quickly and weigh down branches. This is most problematic when a rapid, heavy snowfall occurs, as plants have little time to adapt.
Ice Accumulation: Freezing rain and sleet can coat branches in ice, significantly increasing their weight. Unlike snow, ice can be more challenging to remove and poses a higher risk of causing breakage.
Vulnerable Plant Types
Young Trees: These often lack the structural strength to bear the weight of heavy snow and ice. Their developing branches are more prone to bending and snapping.
Evergreens: Plants like pine and spruce, with their wide-spreading branches, can collect a lot of snow. The weight can lead to branch deformation or breakage.
Deciduous Shrubs: Shrubs with intricate branching patterns or those that retain foliage, like hollies, can also suffer under the weight of snow and ice.
Recognizing Hazardous Conditions
Sudden Temperature Changes: Rapid temperature shifts can lead to quick freezing and thawing, increasing the risk of ice damage.
Heavy Snowfall Predictions: Being aware of weather forecasts for heavy snowfall allows you to prepare and possibly mitigate some of the damage.
Observing Plant Health: Regularly inspect your plants for signs of weakness or previous damage, as these areas are more likely to succumb to additional weight.
Preventive Measures
Proactively protecting your garden from the ravages of winter is key to ensuring the longevity and health of your plants. Understanding how to prevent damage from snow and ice can save you from costly and time-consuming repairs in the spring. This section outlines effective strategies to safeguard your trees and shrubs before winter’s full force hits.

Pruning for Strength
Timing and Technique: Prune during late fall or early winter. Focus on removing dead, diseased, or weak branches, which are more likely to break under the weight of snow and ice.
Structural Pruning: Encourage a strong, central leader in trees and open, sturdy branching in shrubs. This reduces the likelihood of snow accumulation and branch breakage.
Wrapping and Supporting Plants
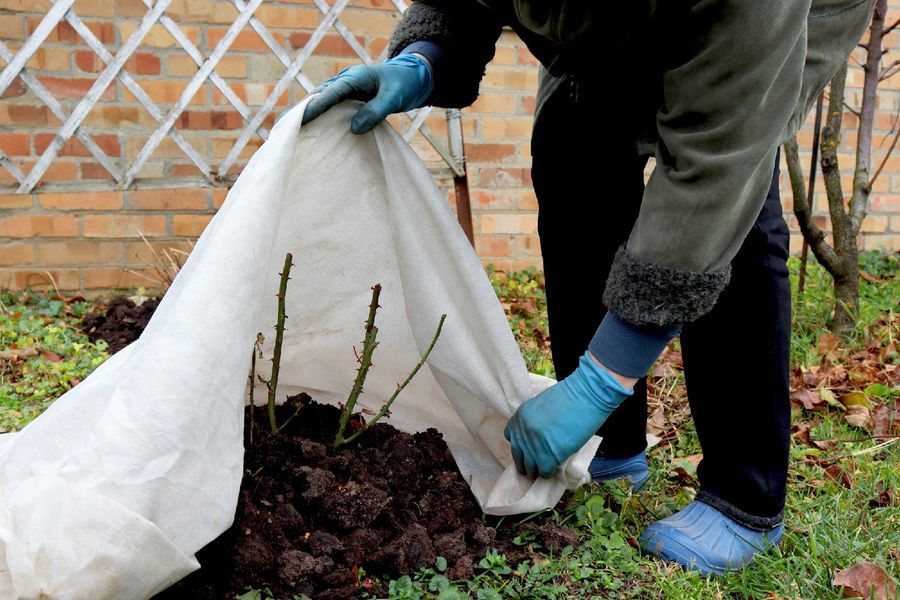
Burlap Wraps: Wrap sensitive shrubs and young trees with burlap to provide extra support and protection from heavy snow. This is particularly beneficial for evergreens and plants prone to deer browsing.
Staking and Tying: Use stakes and soft ties to brace and support vulnerable branches and young trees. Ensure ties are not too tight to allow for natural growth and movement.
Use of Anti-Desiccant Sprays
Application on Evergreens: Apply anti-desiccant sprays to evergreen foliage to reduce water loss through the leaves. This can help prevent branch breakage caused by dehydration and the added weight of snow.
Timing: Apply these sprays in late fall before the onset of freezing temperatures. Follow the manufacturer’s instructions for best results.
Soil and Root Protection
Mulching: Apply a layer of mulch around the base of trees and shrubs. This insulates the soil, maintains consistent moisture levels, and protects roots from freeze-thaw cycles.
Avoiding Salt Damage: Be mindful of where you apply de-icing salts, as they can harm plant roots. Use plant-friendly alternatives or create barriers to protect garden areas.
During a Snowfall
Snowfall, while often beautiful, can be a critical time for gardeners to take action in protecting their plants. The way you manage your garden during a snow event can significantly impact the extent of snow and ice damage. This section offers practical advice on how to care for your garden when snow begins to accumulate.

Gentle Removal of Snow
Soft Brushing Technique: Use a broom or your hands to gently brush off snow from the branches, starting from the lower branches and moving upwards. This technique prevents additional weight from being transferred to lower branches.
Frequency: It’s often better to remove snow multiple times during a light snowfall than to wait until all the snow has accumulated. This reduces the load on the plants.
Avoiding Ice Removal Mistakes
Patience with Ice: If branches are coated in ice, resist the urge to shake or break the ice off. This can cause the brittle branches to snap. Instead, wait for the ice to melt naturally.
Protective Measures: Cover sensitive plants with burlap or frost cloth before an ice storm to prevent ice accumulation directly on the plants.
Snow as Insulation
Natural Insulation: Interestingly, a blanket of snow can act as an insulator for the soil and plant roots. It keeps the temperature around the roots more stable, protecting them from extreme cold.
Balancing Benefits and Risks: While snow can be beneficial as an insulator, excessive amounts on branches can be harmful. It’s a balance between allowing some snow to remain for insulation while removing excess to prevent damage.
Post-Snowfall Assessment
Checking for Damage: After the snowfall has ceased and snow has been removed, inspect your plants for any signs of damage or stress.
Immediate Care for Damaged Plants: If you find broken branches, prune them cleanly to prevent further tearing and to facilitate healing.
Post-Storm Care
After a winter storm, it’s essential to assess and address any damage to your garden promptly. The steps you take following snow and ice accumulation can have a significant impact on the recovery and future health of your plants. This section provides guidance on post-storm care to help your garden bounce back from winter weather.

Assessing Damage
Inspection: Once it’s safe to do so, thoroughly inspect your trees and shrubs for any signs of damage, such as broken or bent branches.
Documenting: In cases of severe damage, especially for insurance purposes, take photographs of the affected areas.
Pruning Damaged Branches
Clean Cuts: Use sharp pruning tools to make clean cuts on damaged branches. This promotes faster healing and reduces the risk of disease.
Pruning Technique: Cut back to the nearest healthy, undamaged section. Avoid leaving stubs as they can be entry points for pests and diseases.
Professional Assistance: For large trees or significant damage, consider hiring a professional arborist to ensure proper pruning and care.
Long-Term Plant Health
Tree Wraps: If the bark has been damaged, tree wraps can protect the tree from further environmental stress and pests.
Monitoring Recovery: Over the following weeks and months, keep an eye on the recovery progress of your plants. Look for new growth as a sign of healing.
Soil and Root Care
Re-Mulching: After a storm, replenish mulch around the base of plants to protect roots and maintain soil temperature.
Watering: If the soil is dry, water the plants to aid in recovery, but be cautious of over-watering, especially in cold conditions.
Planning for Future Storms
Analysis: Consider what worked and what didn’t in your storm preparations. Use this information to improve your strategies for future winters.
Plant Selection: If certain plants consistently suffer winter damage, consider replacing them with more resilient varieties suited to your climate.
As our journey through safeguarding gardens from winter’s snowy embrace concludes, we are left with a blueprint for resilience and recovery. The aftermath of a storm offers a crucial window for action; prompt and careful responses can significantly mitigate damage and foster recovery. Embracing the lessons learned from each winter experience, we can refine our strategies, fortifying our gardens against future snow and ice events. This cycle of preparation, response, and adaptation not only preserves the health and beauty of our gardens but also deepens our connection and understanding of the natural world, even in its harshest moments.