Whether you’re new to the world of succulents or a veteran grower, mastering the art of creating and maintaining these planters will not only nourish your succulents but also your soul. Ready to delve into this exciting journey? Let’s cultivate some green thumbs together and create beautiful mini eco-systems right in our living rooms!
Mastering the Art of Layered Sand Succulent Planters in Glass
Greetings, fellow succulent enthusiasts! I’m thrilled to bring you this comprehensive guide on layered sand succulent planters in glass. These beauties are more than just a trending decoration; they’re a captivating blend of gardening and art that brightens any space, bringing a pinch of nature right to your tabletop.
Understanding Layered Sand Succulent Planters
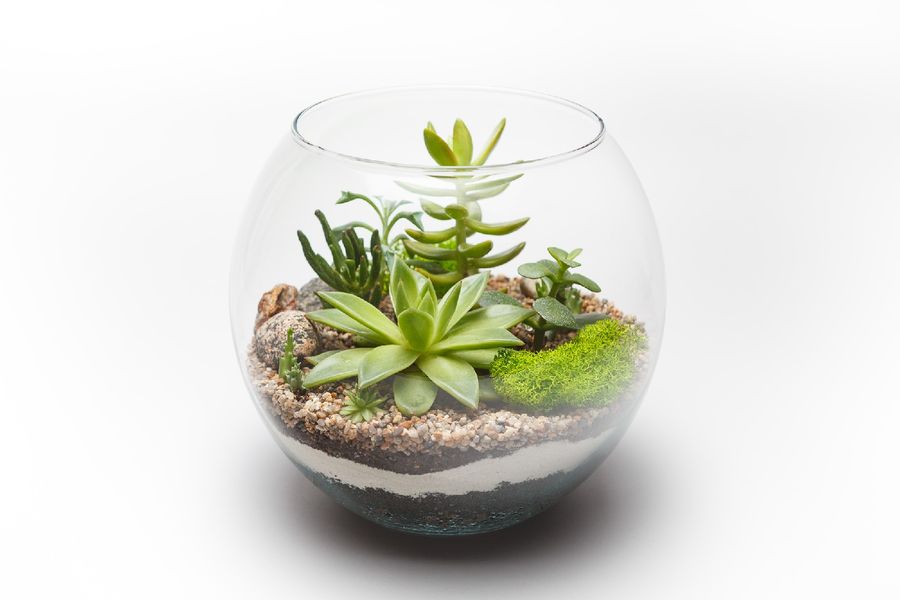
Welcome to the magical world of layered sand succulent planters! If you’re reading this, you’re likely captivated by these miniature desert landscapes, just like I was when I first laid eyes on one. Each planter is a microcosm of textures and colors, with every layer of material adding a unique touch to the design. But these planters are not just pretty faces; they’re a combination of careful design, selection, and nurturing.
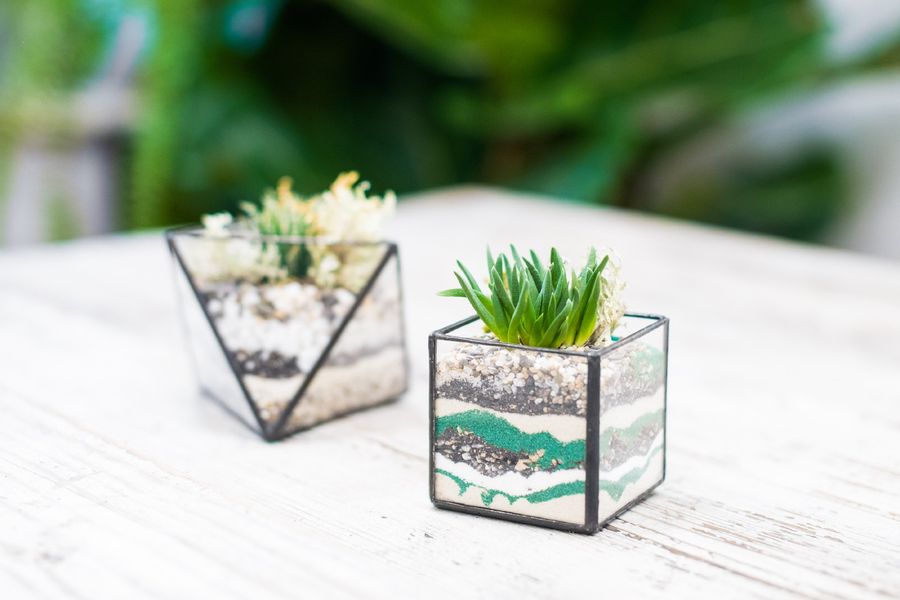
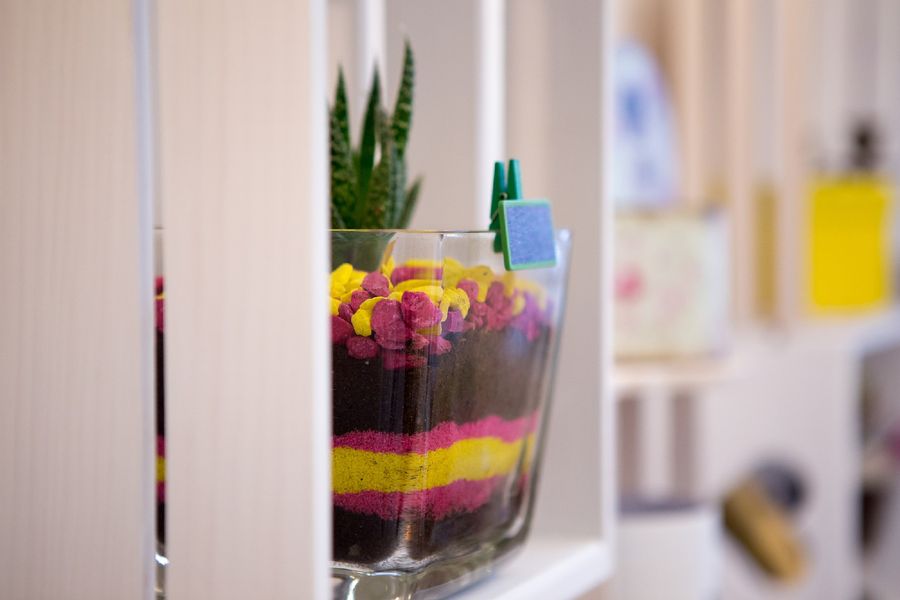
At their most basic, layered sand succulent planters are clear glass containers that hold various layers of materials such as pebbles, activated charcoal, sand, and soil. The succulents sit snugly within these layers, creating an artistic display that’s pleasing to the eye. But why do we layer these materials? Well, it’s not just for aesthetics, my friends!
Each layer in these planters serves a purpose: the pebbles or gravel at the bottom aid in drainage, preventing our succulents from sitting in soggy soil. The activated charcoal helps in keeping mold and bacteria at bay. Sand layers, while adding beauty, also assist in drainage. Finally, the succulent soil at the top is a nutrient-rich home where our plant friends thrive.
But the art of crafting these planters isn’t just about shoveling sand and soil into a jar. It’s about understanding the unique characteristics of succulents, how they interact with their environment, and how to care for them in a way that promotes health and growth. It’s about taking a creative approach to plant care, turning it into a form of self-expression.
So, let’s get our hands dirty, shall we? Together, we’ll unravel the secrets to creating your very own layered sand succulent planter that’s not just a visual delight, but also a thriving oasis for your succulents.
Container Types
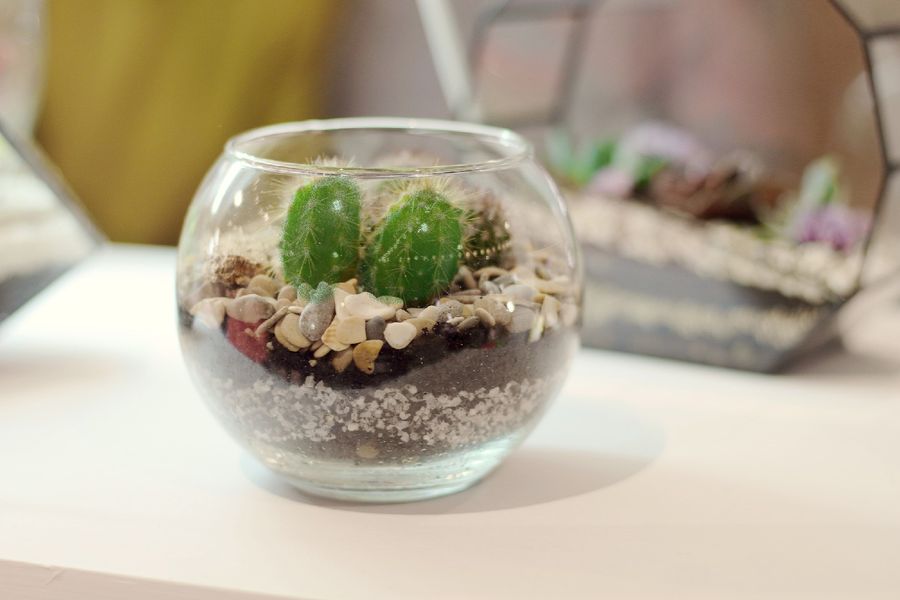
Before we embark on our layered journey, we must first choose our canvas – the glass container. The beauty of these planters lies in their versatility. From a large glass vase to a petite mason jar, almost any clear glass container can serve as your succulent’s new home. However, there are a few considerations to bear in mind to ensure your succulents thrive.
Size: When selecting a container, consider the size and number of succulents you’re planning to plant. Remember, their roots need space to grow. A container that’s too small can stunt your succulent’s growth and cause health issues down the line. Conversely, a container that’s too large might cause the soil to stay damp longer than desirable, potentially leading to root rot.
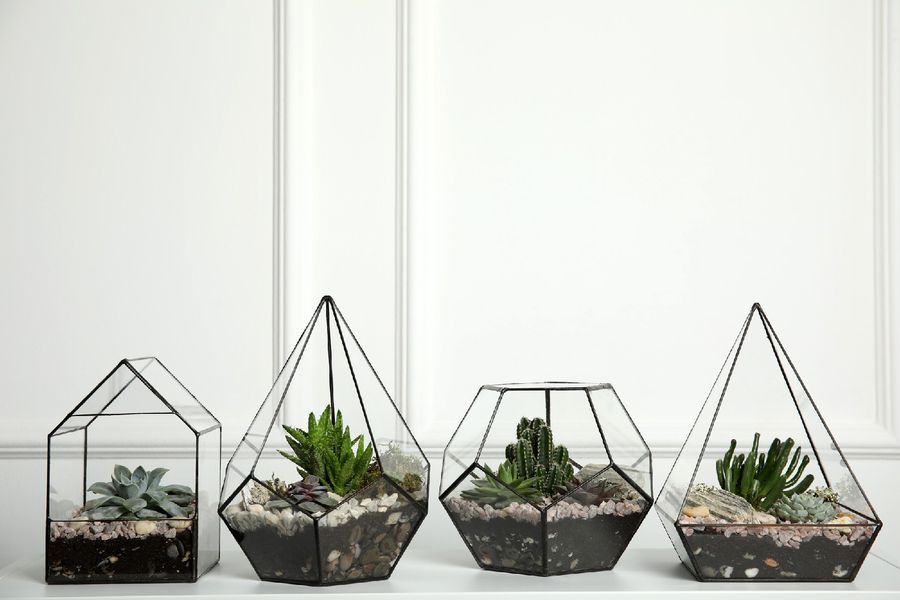
Shape: The shape of your container can greatly affect your design. A tall, slender container can highlight the beautiful strata of your sand layers, while a wide, low container might allow you to create a miniature succulent landscape. However, keep in mind that containers with narrow openings can make planting and caring for your succulents more challenging.
Drainage: Ideal succulent containers have drainage holes, but in the case of glass containers, this isn’t usually possible. Therefore, it’s even more critical to ensure your layers and care regimen provide the necessary drainage to keep your succulent happy.
Transparency: It’s all about the view! Clear containers allow you to show off your beautiful layers and watch your succulent roots grow. Tinted glass can add an interesting touch, but make sure it’s still transparent enough to let in ample light for your succulents.
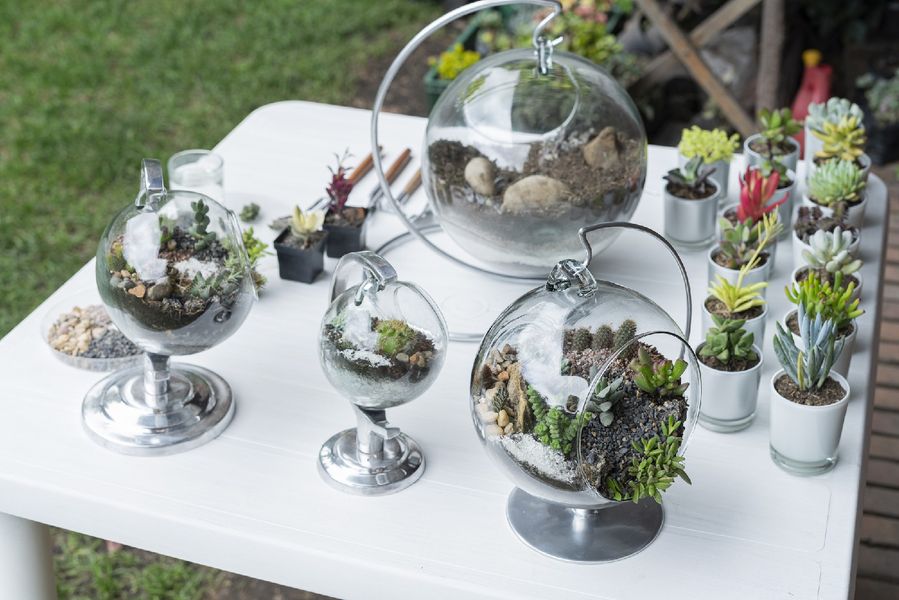
The choice of container, dear friends, sets the tone for your succulent adventure. It’s an extension of your personality, a reflection of your aesthetic sense, and a testament to your creativity. So, choose wisely, and remember that the best container for your succulent is one that brings you joy every time you look at it.
Layer Materials
Alright, green thumbs, let’s roll up our sleeves and delve into the layered world of our succulent planters. Each stratum in your planter not only contributes to the overall visual appeal but also plays a key role in the health of your succulents. Let’s explore each layer in detail:
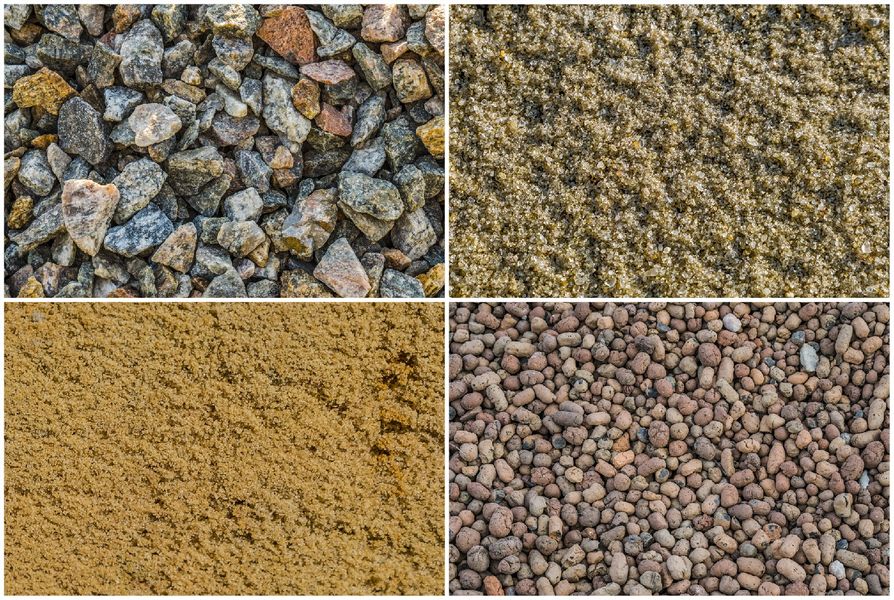
- Granite gravel (upper left); River sand (upper right)
- Ravine sand (lower left); Expanded clay gravel (lower right)
Pebbles or Gravel: The first layer of your planter should be small pebbles or gravel. Why, you ask? Well, since our glass containers lack drainage holes, this layer aids in preventing water from sitting directly at the succulent roots, thus avoiding root rot. Aim for a layer that’s about one to two inches thick.
Sand: Here’s where you can unleash your inner artist. Sand layers not only contribute to drainage but also offer a fantastic opportunity for creative expression. Play around with different colored sands to create a visually striking effect. Be mindful, though – too much sand can cause drainage issues.
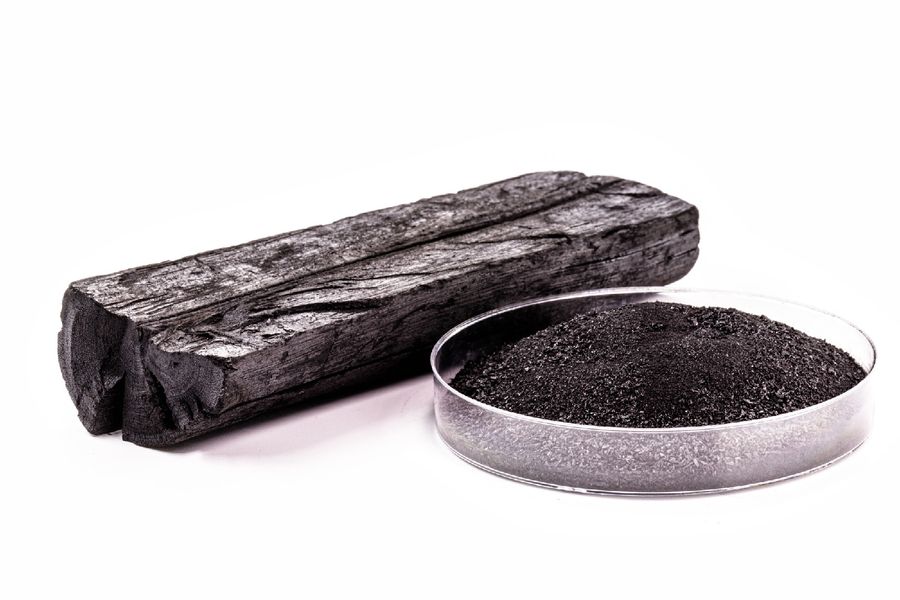
Activated Charcoal: Next up, activated charcoal. This magical substance works as a natural filter, warding off bacteria and preventing any funky smells. Think of it as your succulent’s personal bodyguard! A thin layer should suffice.
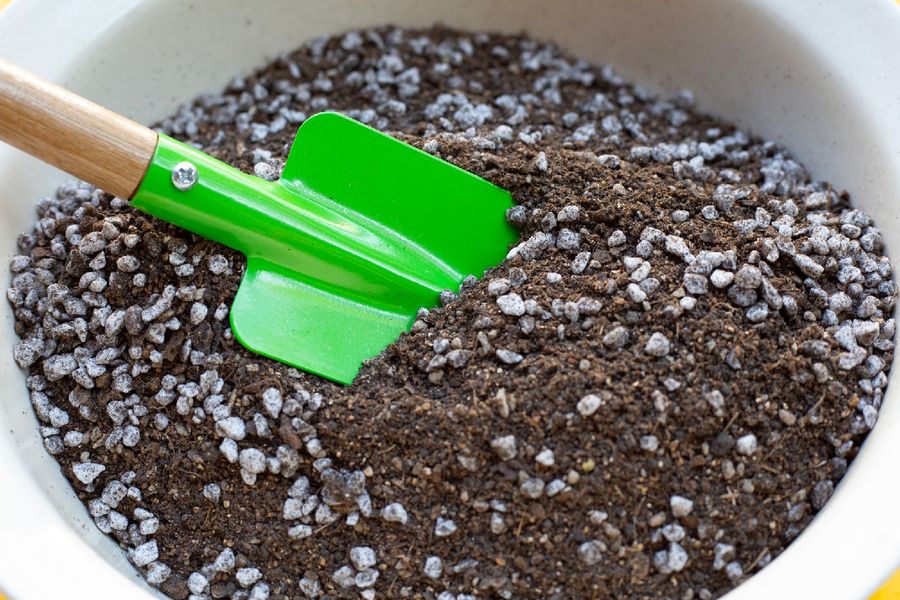
Succulent Soil: Last but certainly not least, we have our succulent soil. This is where your succulent roots will reside. It’s typically a well-draining mix of potting soil, coarse sand, and perlite or pumice. It’s crucial to use a specially formulated succulent soil rather than regular potting soil as it ensures proper drainage.
Remember, friends, the thickness of your layers will depend on the size of your container. However, ensure that your succulent soil layer provides ample space for your succulent roots to spread out comfortably.
The beauty of these planters lies in their flexibility. You can play around with the number of layers, their order, and even throw in a layer of moss or small decorative rocks for a personal touch. This is your mini desert, so have fun creating it!
Selecting Your Succulents
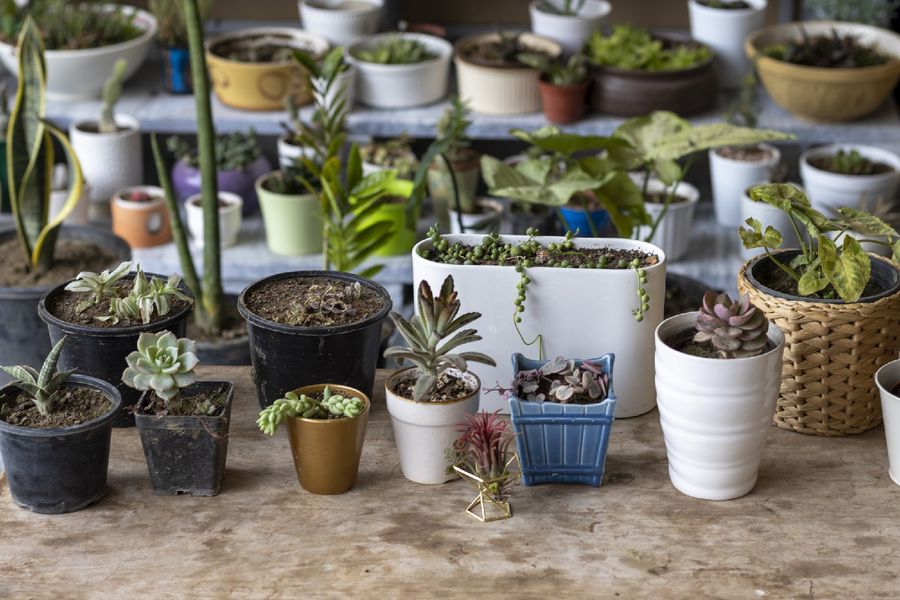
Now that our mini desert landscape is taking shape, it’s time to pick the stars of the show – our succulents. These hearty, adorable plants come in all shapes, sizes, and colors. The world of succulents is vast and varied, so it’s essential to choose ones that not only appeal to your aesthetic sense but also match your lifestyle and environment.
Size: Choose succulents that will comfortably fit in your container without overcrowding. Keep in mind that while some succulents stay small, others can outgrow a small container quickly.
Light Requirements: Most succulents love light, but not all can handle intense, direct sunlight. Consider the location of your planter and pick succulents accordingly. Haworthia and Gasteria, for example, are more shade-tolerant.
Watering Needs: Succulents, in general, don’t need much water, but some need less than others. If you’re someone who tends to overwater, opt for succulents like Sedum or Sempervivum, which are more forgiving.
Growth Habit: Succulents can be rosette-forming, trailing, or have an upright growth habit. A combination of these can create an interesting display.
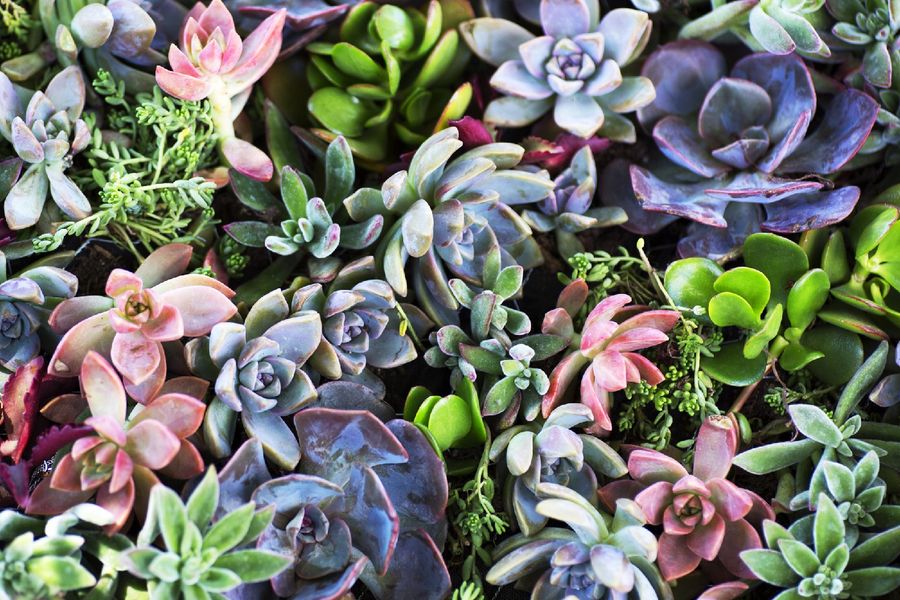
Color: Succulents come in a range of colors from the common greens to purples, blues, and even near blacks. Contrasting colors can make your planter pop!
When selecting your succulents, it’s essential to consider their compatibility. Choose succulents with similar light and water requirements to ensure they all thrive in your planter. Also, remember to select healthy plants. Look for succulents with firm, plump leaves, no visible damage or pests, and a well-established root system.
Once you’ve chosen your succulents, it’s time to get planting! And remember, the goal here is not just to create a beautiful planter, but to create a little ecosystem where your succulents can thrive and bring you joy. So choose with your heart, my friends, and let your succulents reflect your spirit.
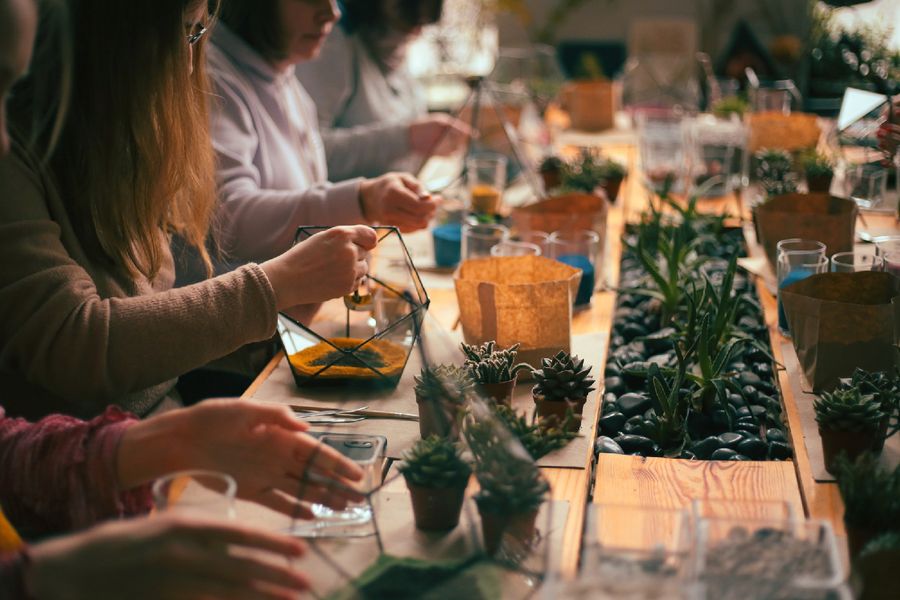
Design Techniques
Now that we have our canvas (our chosen glass container), our materials (pebbles, charcoal, sand, and soil), and our stars (the succulents), it’s time to dive into the delightful process of creation. Designing your layered sand succulent planter is where art meets science, so let’s make sure we cover both angles!
Layering: Start with your pebbles or gravel, followed by activated charcoal. Then comes the fun part! When adding your sand layer, consider using different colors and alternating between thick and thin layers for a unique effect. Just make sure you don’t overdo it to the point where it impacts drainage. Lastly, add your succulent soil, leaving room for your plants and their roots.
Planting: When arranging your succulents, take a moment to plan your design. Consider the size, shape, and color of your succulents. Generally, it’s aesthetically pleasing to place taller succulents at the back or center, depending on the view you want to emphasize, and smaller or trailing varieties towards the front or edges. Play around with your plants before you settle them into the soil.
Case Study/Example: Let’s say we’ve got a medium cylindrical container, white and blue sand, and three succulents – a tall Aloe ‘Blue Elf’, a mid-sized Echeveria ‘Perle Von Nurnberg’, and a small trailing String of Pearls. Start with your gravel layer, add the activated charcoal, and then begin with the white sand. Pour in a thick layer, then add a thin layer of blue sand. Repeat this until you’re ready for the soil. When planting, place your ‘Blue Elf’ at the center, your ‘Perle Von Nurnberg’ next to it, and trail the String of Pearls near the edge of the container for a waterfall effect.

Final Touches: Add small decorative elements like fairy garden accessories, shells, or additional pebbles around the succulents if you wish. These little touches can bring your planter to life and give it a personal touch.
Remember, patience is key when designing your planter. It’s not a process to rush through, but rather one to savor. So put on some soothing music, get in touch with your inner artist, and let’s bring your vision to life!
Tools and Accessories
The right tools and accessories can make the journey of plant care much smoother. In creating and maintaining your layered sand succulent planter, there are a few key items that can aid in your process.
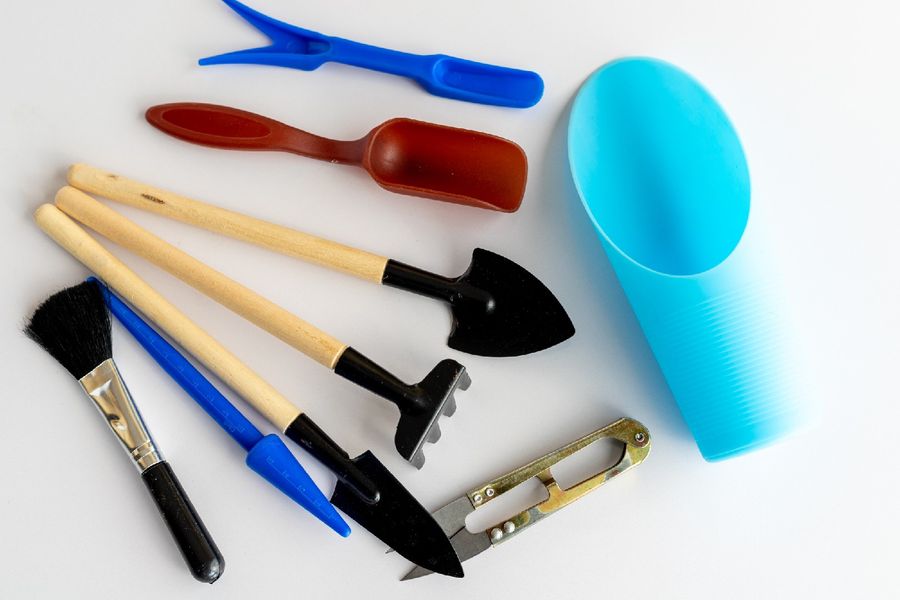
Succulent Tools: A set of succulent tools can be incredibly helpful in arranging your plants and adding the final touches to your planter. These often include a mini spade and rake for arranging soil, tweezers for handling small plants or removing debris, and a succulent tamper to help compact the soil around your plants.
Gardening Gloves: Some succulents have spines or sap that can irritate your skin. A good pair of gardening gloves can provide protection.
Fine Mesh Sieve: If you’re using sand or fine gravel, a sieve can help remove any dust that could cloud the sides of your container and obscure your beautiful layers.
Tweezers and Brush: These can help clean and maintain your succulents and their surrounding areas. A soft brush is excellent for gently removing dust off succulent leaves, and tweezers can assist in removing any debris.
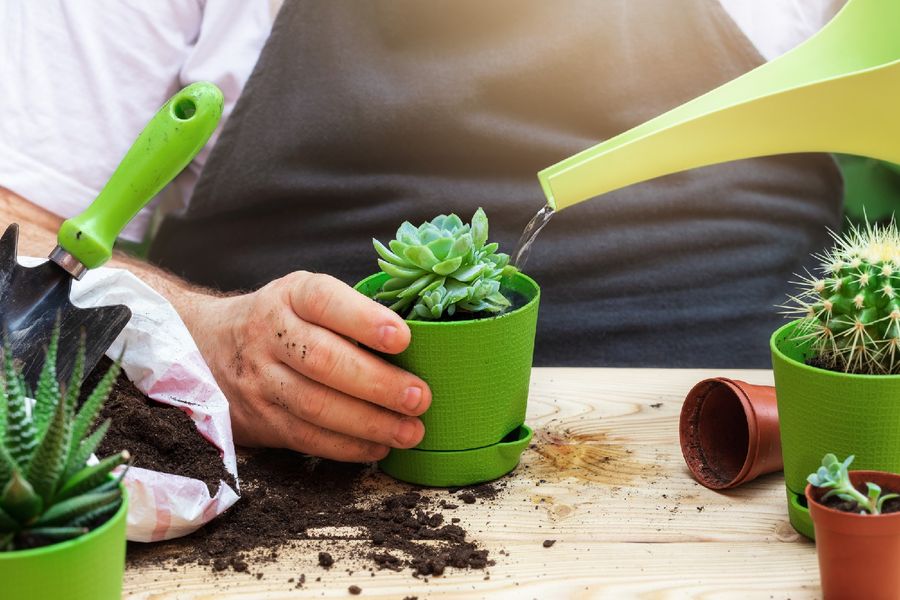
Watering Can with Long Spout: A watering can with a long, narrow spout allows you to water your plants without disturbing the soil or sand layers too much.
Spray Bottle: A spray bottle can be handy, especially when your succulents are young. It allows you to moisten the soil without overwatering.
Succulent Fertilizer: While not necessary for survival, succulents can benefit from an occasional feeding during their growing season with a succulent-specific fertilizer.
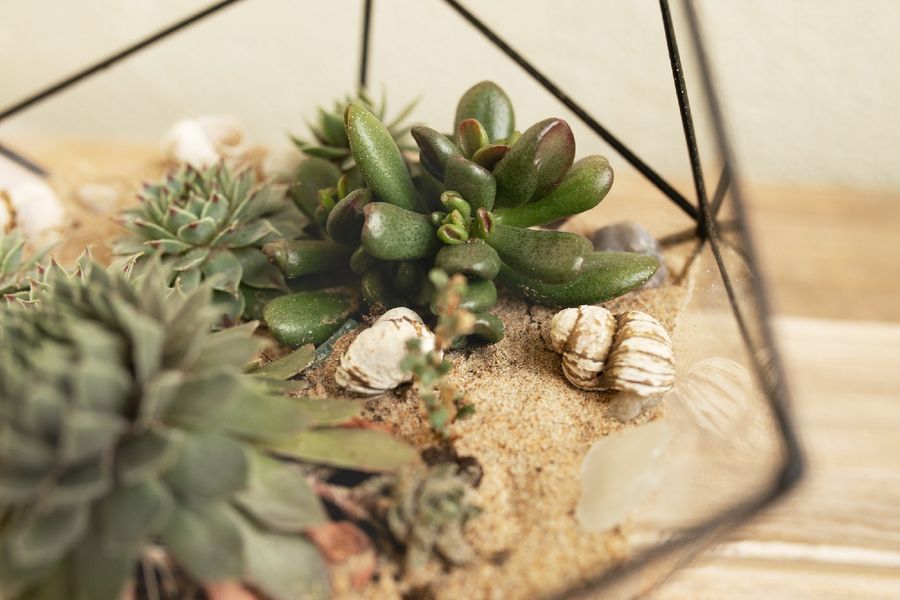
Decorative Elements: Small stones, shells, fairy garden accessories, or any other non-toxic, plant-safe decorative items can be used to add personal touches to your planter.
And there you have it, my green-thumb friends! Equipped with these tools, your journey to creating and maintaining a layered sand succulent planter will be all the more enjoyable and rewarding. Remember, this is your mini oasis, so feel free to add any other tools or accessories that make this process a joy for you.
Shopping Guide
So, you’re all set to dive into the magical world of layered sand succulent planters. But where to start? Shopping for materials and succulents can be overwhelming, especially for beginners. To make things easier, here’s a simple guide to help you find everything you need:

Containers: As we’ve discussed, you’ll want to find a clear glass container that fits your space and aesthetic preferences. Home decor stores, garden centers, and online platforms like Amazon or Etsy are great places to find a variety of options. Look for containers labeled as terrariums or vases. Thrift stores can also be treasure troves for unique glassware.
Layer Materials: Your local garden center should carry most, if not all, of the materials you need. Pebbles or small stones can often be found in the aquarium section of pet stores. Activated charcoal is commonly available in garden centers, pet stores (in the aquarium section), or online. Colored sand may be found in craft stores or online. Lastly, a high-quality succulent or cactus mix is a must, and can be found in any garden center or online.
Succulents: The fun part! Garden centers, home improvement stores, and even some grocery stores carry a variety of succulents. If you’re looking for something specific or rare, check out online retailers that specialize in succulents. Make sure to buy from reputable sellers to ensure healthy plants.
Tools & Accessories: A basic succulent tool set, spray bottle, long-spout watering can, and succulent fertilizer can be found online or in garden centers. Decorative elements can be found in craft stores, garden centers, online, or even from your own collection at home.

When shopping for your supplies, consider the overall look and feel you want to achieve with your planter. This will help guide your decisions. And remember, this process is meant to be fun and creative, so take your time and enjoy it! Let’s get shopping, my succulent-savvy friends.
And there you have it, my green-thumbed companions: your comprehensive guide to mastering the art of layered sand succulent planters. We’ve journeyed together through understanding the concept, selecting the right materials, designing your miniature desert, and ensuring it thrives with the right care. We’ve delved into troubleshooting issues, picking the right tools and accessories, and even shopping for the perfect supplies.
Remember, gardening is not just about the destination – it’s about the journey. As you set off on this succulent adventure, take the time to savor each step, from the thrill of selecting your first succulent to the quiet satisfaction of watching it grow. Your layered sand succulent planter is not just a decoration, but a testament to your nurturing and creativity.
Don’t be disheartened by any challenges you may encounter along the way; they are opportunities to grow, both for your succulents and for you as a gardener. The beauty of succulents lies in their resilience, and with your care and attention, they will continue to flourish.
FAQs
Q1: Can any succulent be used in a layered sand planter? A1: Yes, generally, any small succulent can be used in a layered sand planter. However, it’s important to consider the plant’s light and water requirements, and ensure all succulents in the same planter have similar needs.
Q2: My succulent seems to be dying. What am I doing wrong? A2: The most common issue with succulents is overwatering. Make sure the top layer of soil is completely dry before watering again. If overwatering isn’t the issue, your plant may be getting too much or too little light, or it could be infested with pests.
Q3: How often should I water my layered sand succulent planter? A3: There’s no one-size-fits-all answer, as it depends on factors like the type of succulents, your home environment, and the season. A good rule of thumb is to water thoroughly when the top layer of soil is completely dry.
Q4: How do I know if my succulent is getting the right amount of light? A4: Signs of too much light include scorched or bleached patches on leaves, while signs of too little light include stretching or sparse, leggy growth.
Q5: Can I use regular potting soil for my succulent planter? A5: It’s best to use a soil mix specifically designed for succulents and cacti, as they need well-draining soil. Regular potting soil retains too much moisture, which can lead to root rot.
Q6: Why is the sand in my planter turning cloudy or green? A6: This could be due to algae growth, which occurs when the sand is kept too wet. Consider watering less, or replacing the sand if the issue persists.
Q7: What do I do if my planter doesn’t have a drainage hole? A7: Layering materials like pebbles, activated charcoal, and sand at the bottom can help with drainage. However, you’ll need to be extra cautious not to overwater.
Q8: Can I make a layered sand succulent planter in a container without clear sides? A8: Yes, but the layered effect will not be visible. The care instructions and other aspects remain the same.
Q9: Can I put my succulent planter outside? A9: Yes, but be mindful of the conditions. Succulents can get sunburned in direct sunlight and may not survive freezing temperatures.
Q10: How often should I fertilize my succulents? A10: Succulents generally don’t require much fertilizing. However, for optimum growth, you can feed them with a diluted succulent fertilizer during their growing season, typically spring and summer.